
How to Fix Points That Went to the Wrong Customer
What Is This?
Each POS sale earns points for the customer linked to the bill. Link the wrong person and they get the points. Here's how to spot it and move the points.
Real-Life Example
Farah runs a carpet shop that uses AutoCount. She buys a RM400 rug as her own member, "Umi". Later, the points land on "Demo Member A", a test member from setup. That demo member was still attached to the bill at the counter. Farah takes the points back from Demo Member A and records them for Umi.
How to Set It Up
For AutoCount, Pixalink matches a cash sale by the member on the bill, then the debtor, then the bill's Phone 1. Invoices use the debtor, then Phone 1. POS terminal bills use the member only. So first check the bill for:
- A demo, test or walk-in member or debtor left selected
- A wrong or placeholder phone number, such as 0123456789
- The wrong member picked from the list
Editing the bill in AutoCount afterwards doesn't move points already given. Fix them in Pixalink:
-
Go to Loyalty Program → POS Transactions and find the sale by its Invoice Number. The Phone column usually shows who got the points.
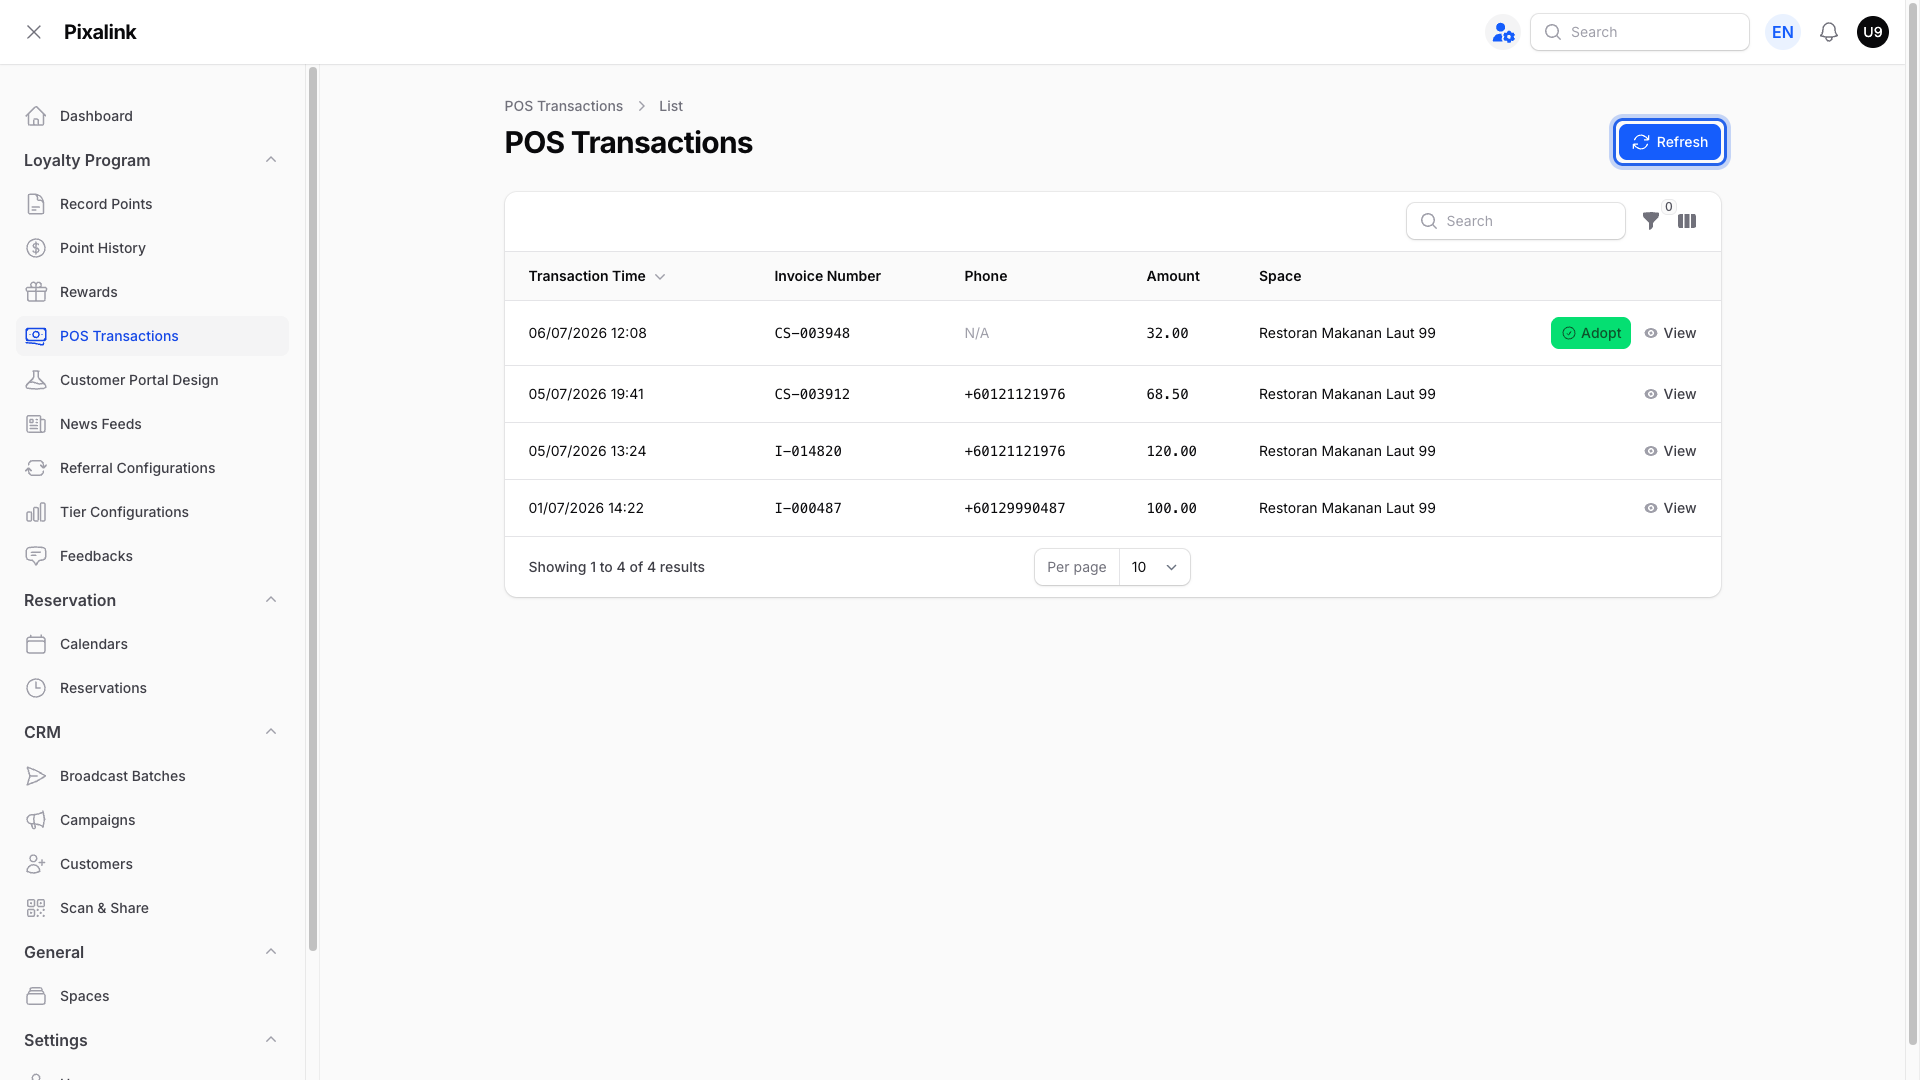
Search matches phone numbers, not invoice numbers. Note the Amount for step 6.
-
Go to CRM → Customers and click View on the customer who got the points by mistake.
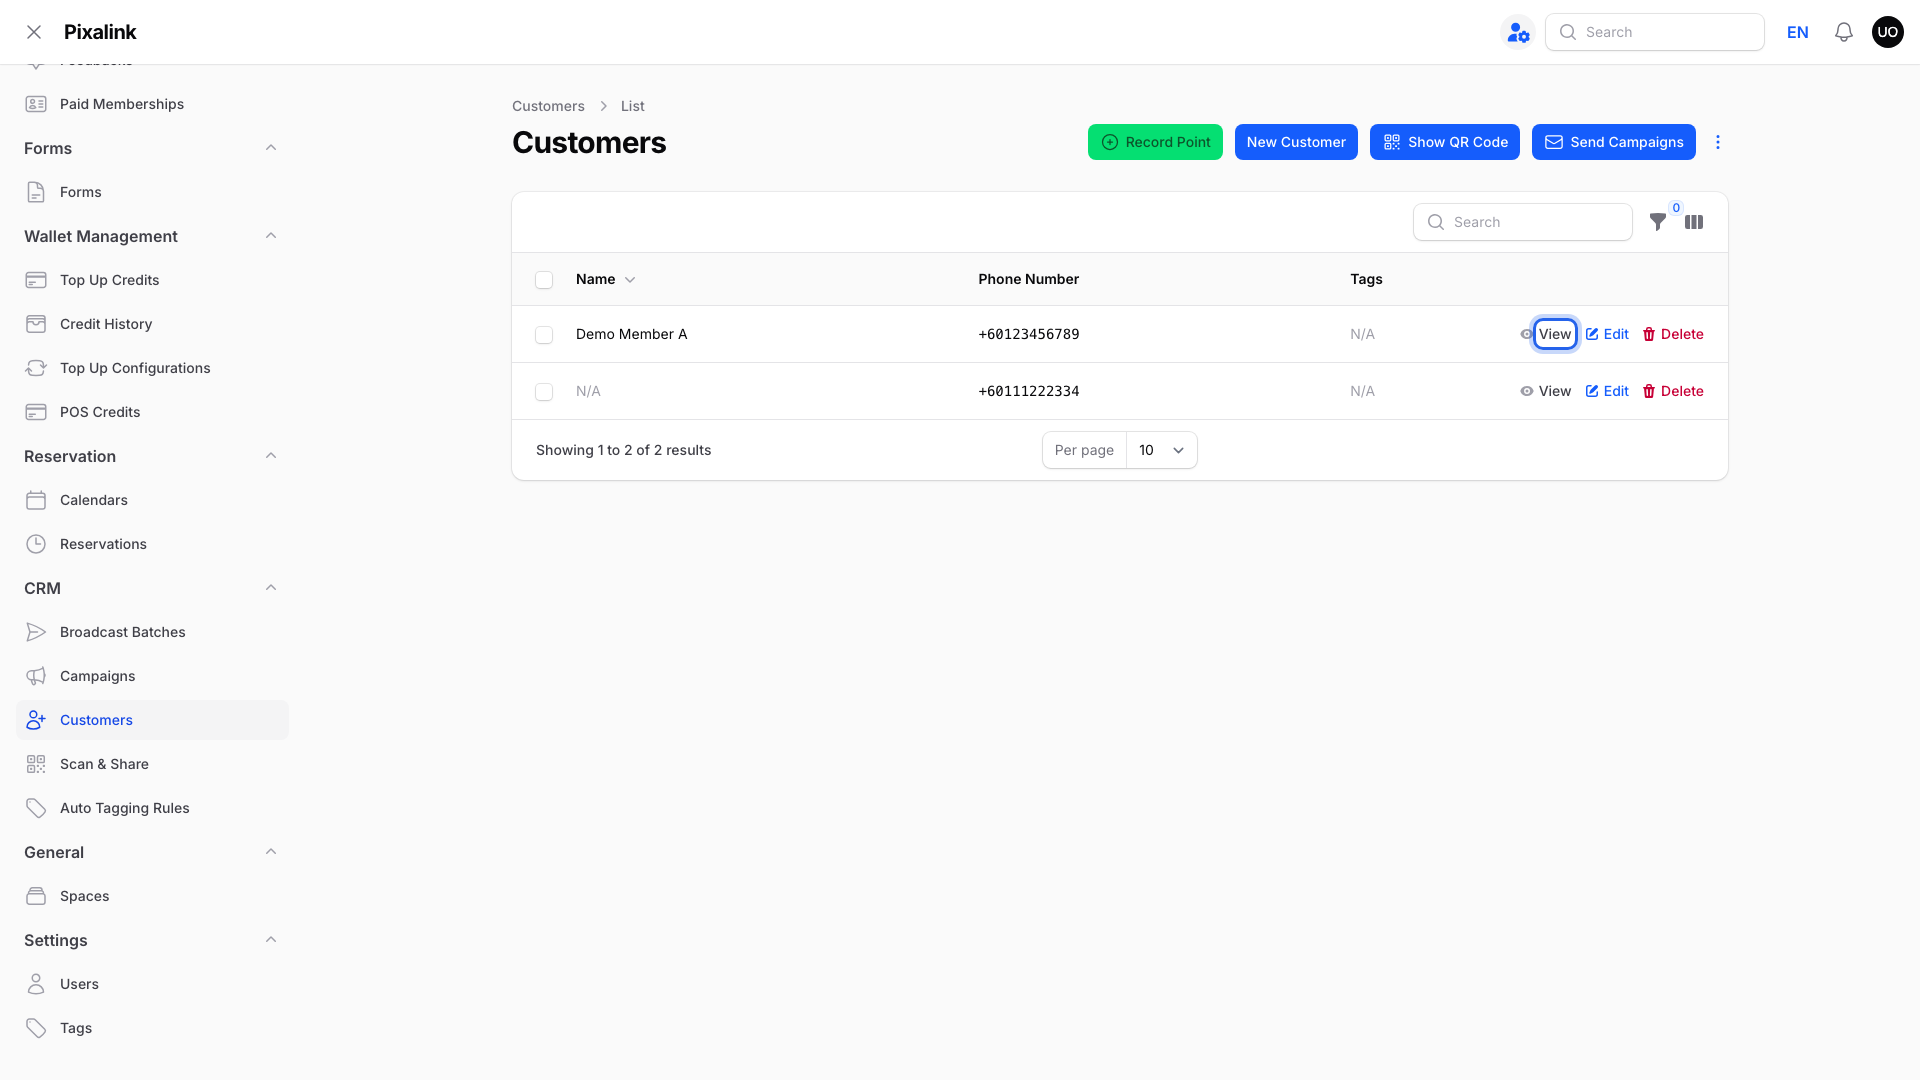
In their Transactions, search for the invoice number. It is in Remarks. Note that sale's points.
-
Click Redeem in the Transactions section.
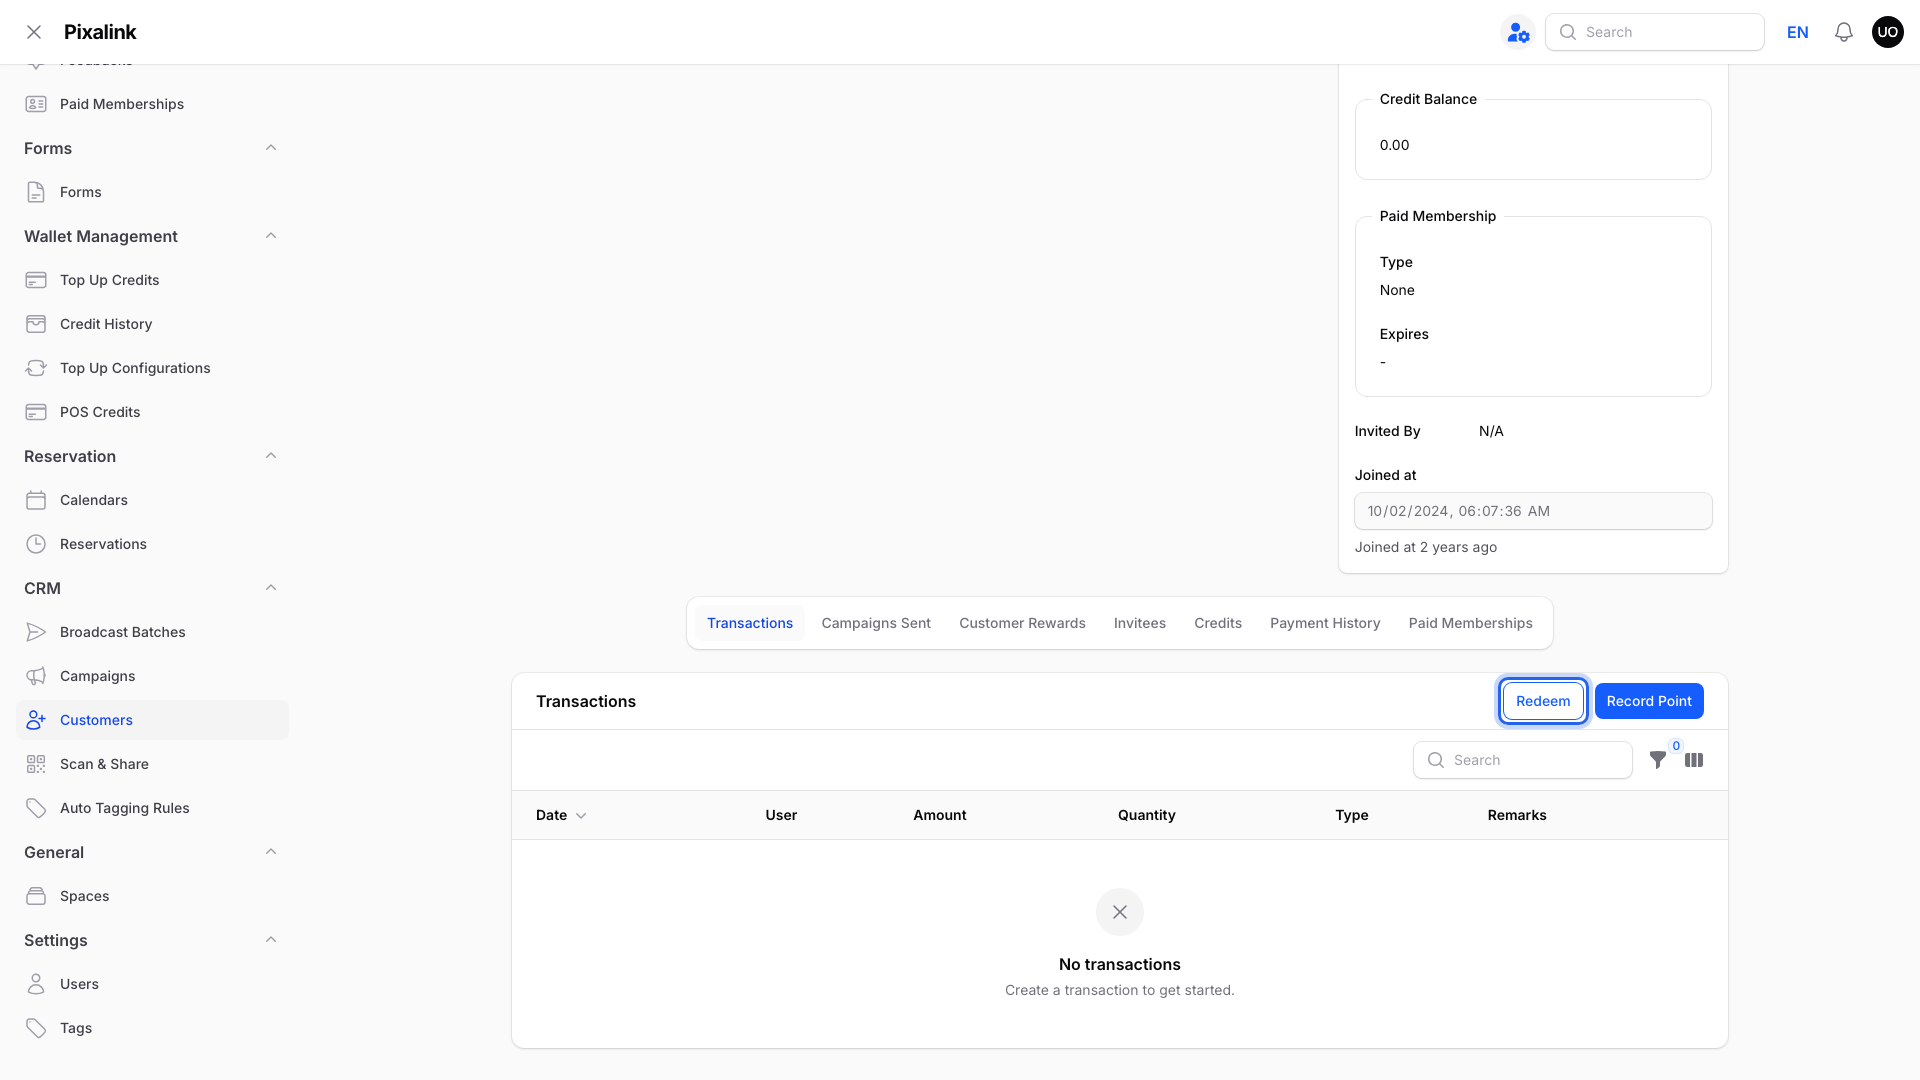
Redeem is the outlined button.
-
Choose Custom... in Reward Name, type the points in Custom Points Deduction, then click Submit.
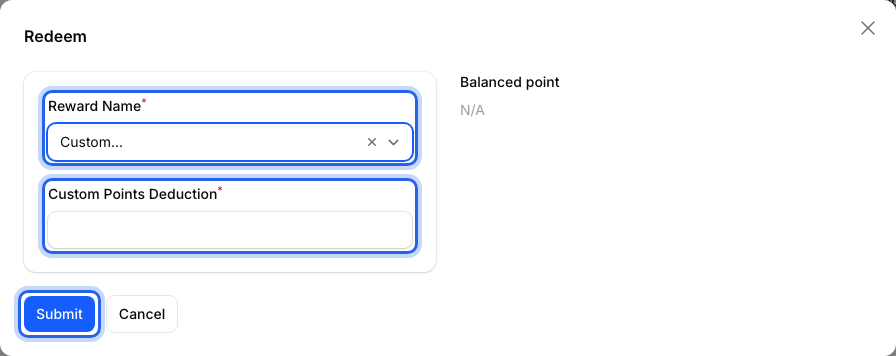
The points field appears once Custom... is picked.
-
Open the right customer's page and click Record Point in the Transactions section.
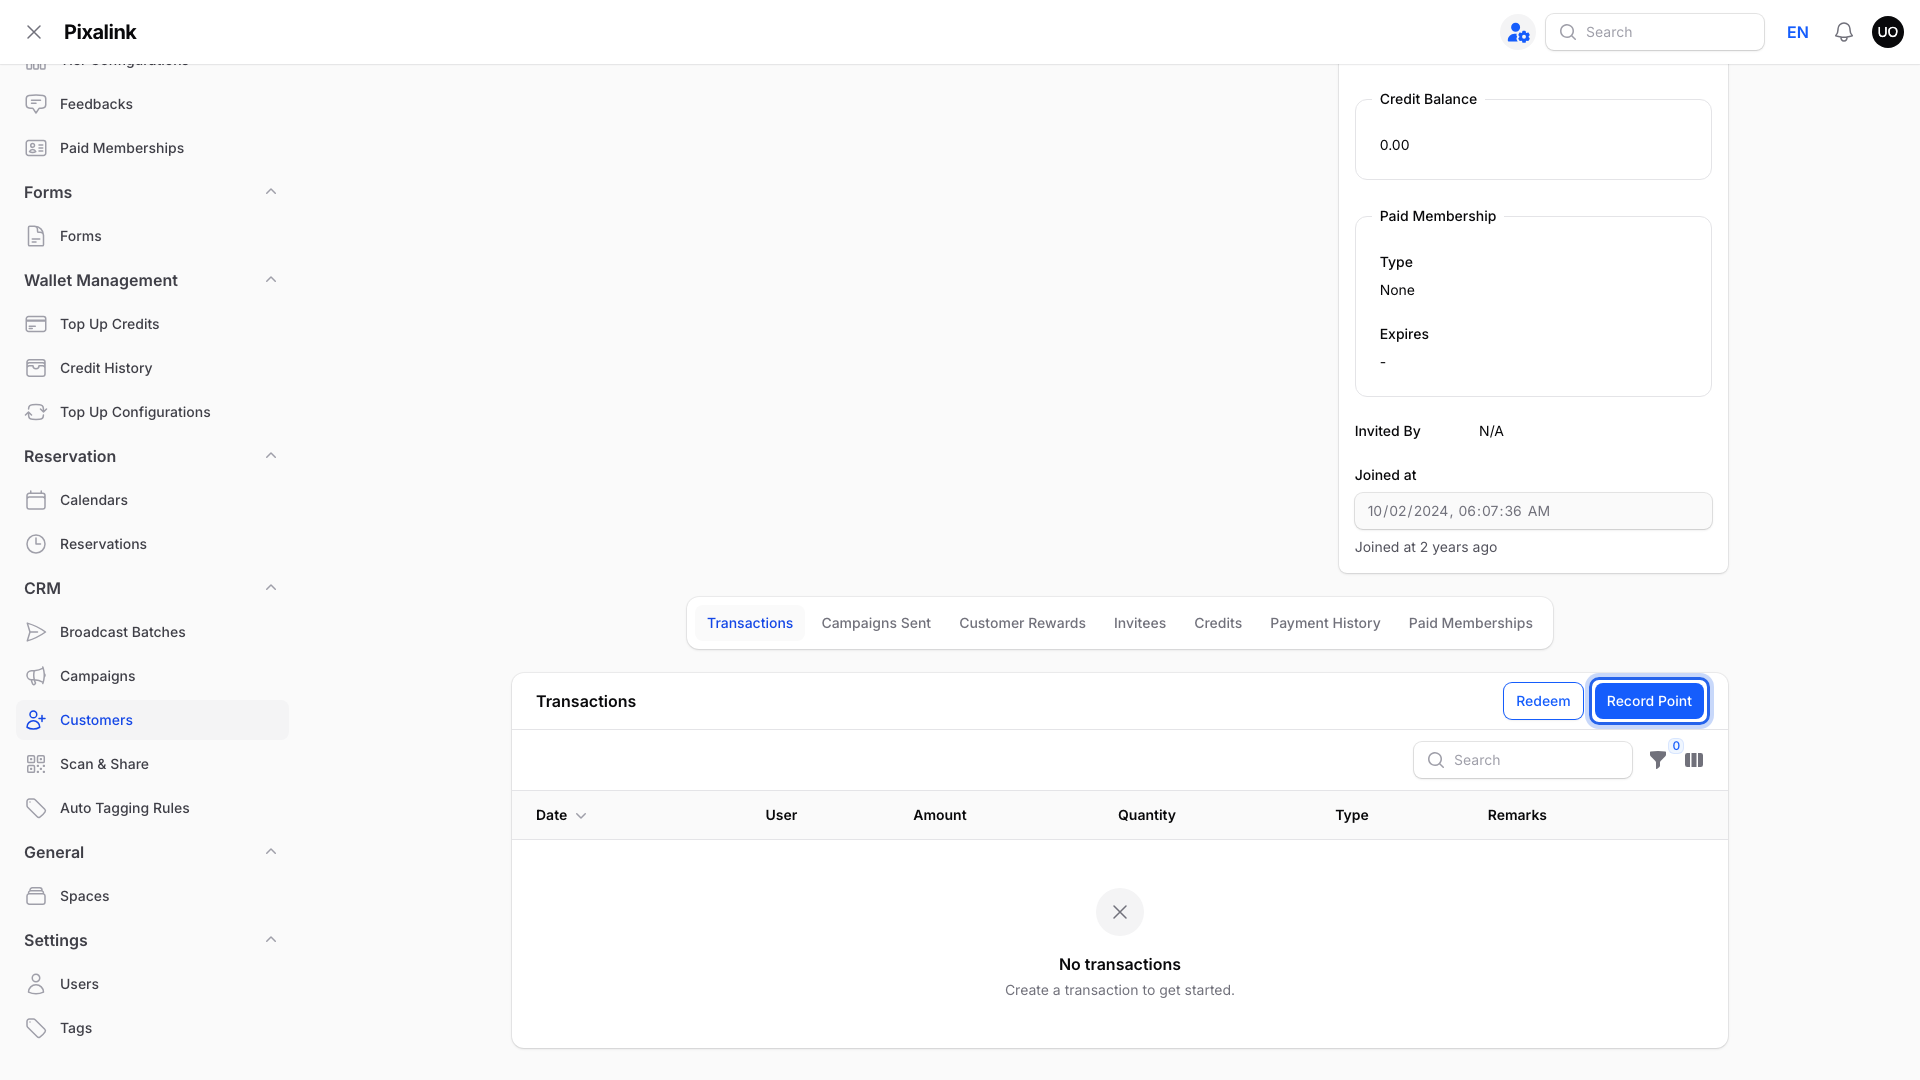
Record Point is the filled blue button.
-
Type the sale amount in Point Amount, add the invoice number in Remarks, then click Create.
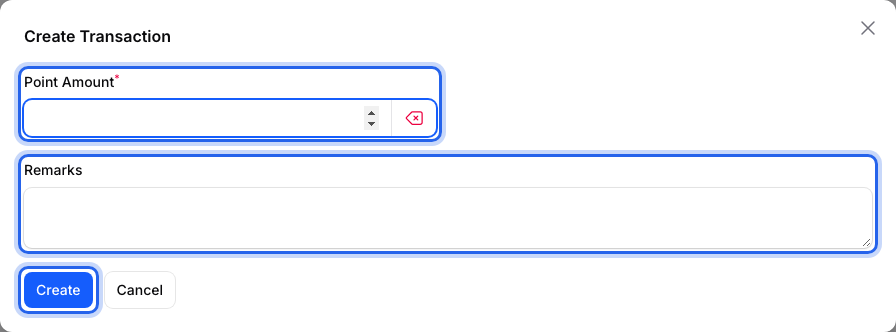
If asked, pick the sale's Space. Their tier multiplier still applies.
What Your Customers Will See
The right customer sees the new points. The other customer's balance drops.
Good to Know
- You can't take back more points than the customer has left.
- After moving the points, don't void, return or change that bill's amount in AutoCount. Pixalink would apply the change to the first customer.
- Adopt only shows on Pending sales.
Need Help?
Contact support with the invoice number and both phone numbers.