
How to Set Up Credit Top-Up Settings
How to Set Up Credit Top-Up Settings
What Is This?
The Top Up Configurations page lets you control how credit top-ups work for your business. You can set up bonus promotions, enable quick top-up buttons for your staff, let customers top up through a payment gateway, and more.
Real-Life Example
Wei Lin runs a bubble tea chain with three outlets. She wants to encourage customers to load up their credit wallets with larger amounts. She sets up a top-up promo: customers who top up RM100 or more get RM15 in bonus credits, and those who top up RM200 get RM35 bonus. Within a month, her average top-up amount jumps from RM30 to RM120 — customers love feeling like they're getting a deal, and Wei Lin benefits from the upfront cash flow.
Video Walkthrough

How to Set It Up
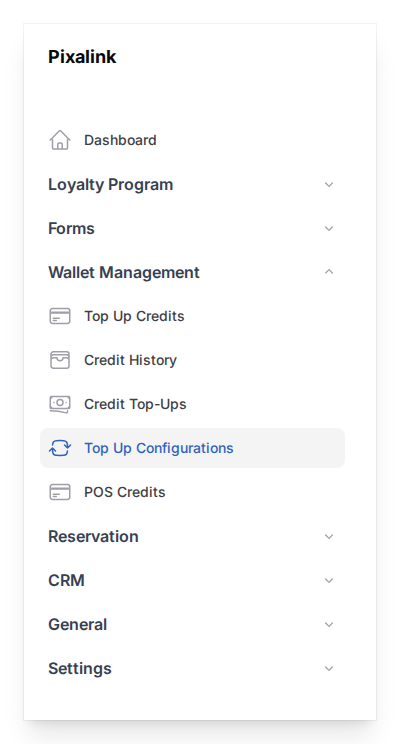
- Go to Admin Panel → Wallet Management → Top Up Configurations
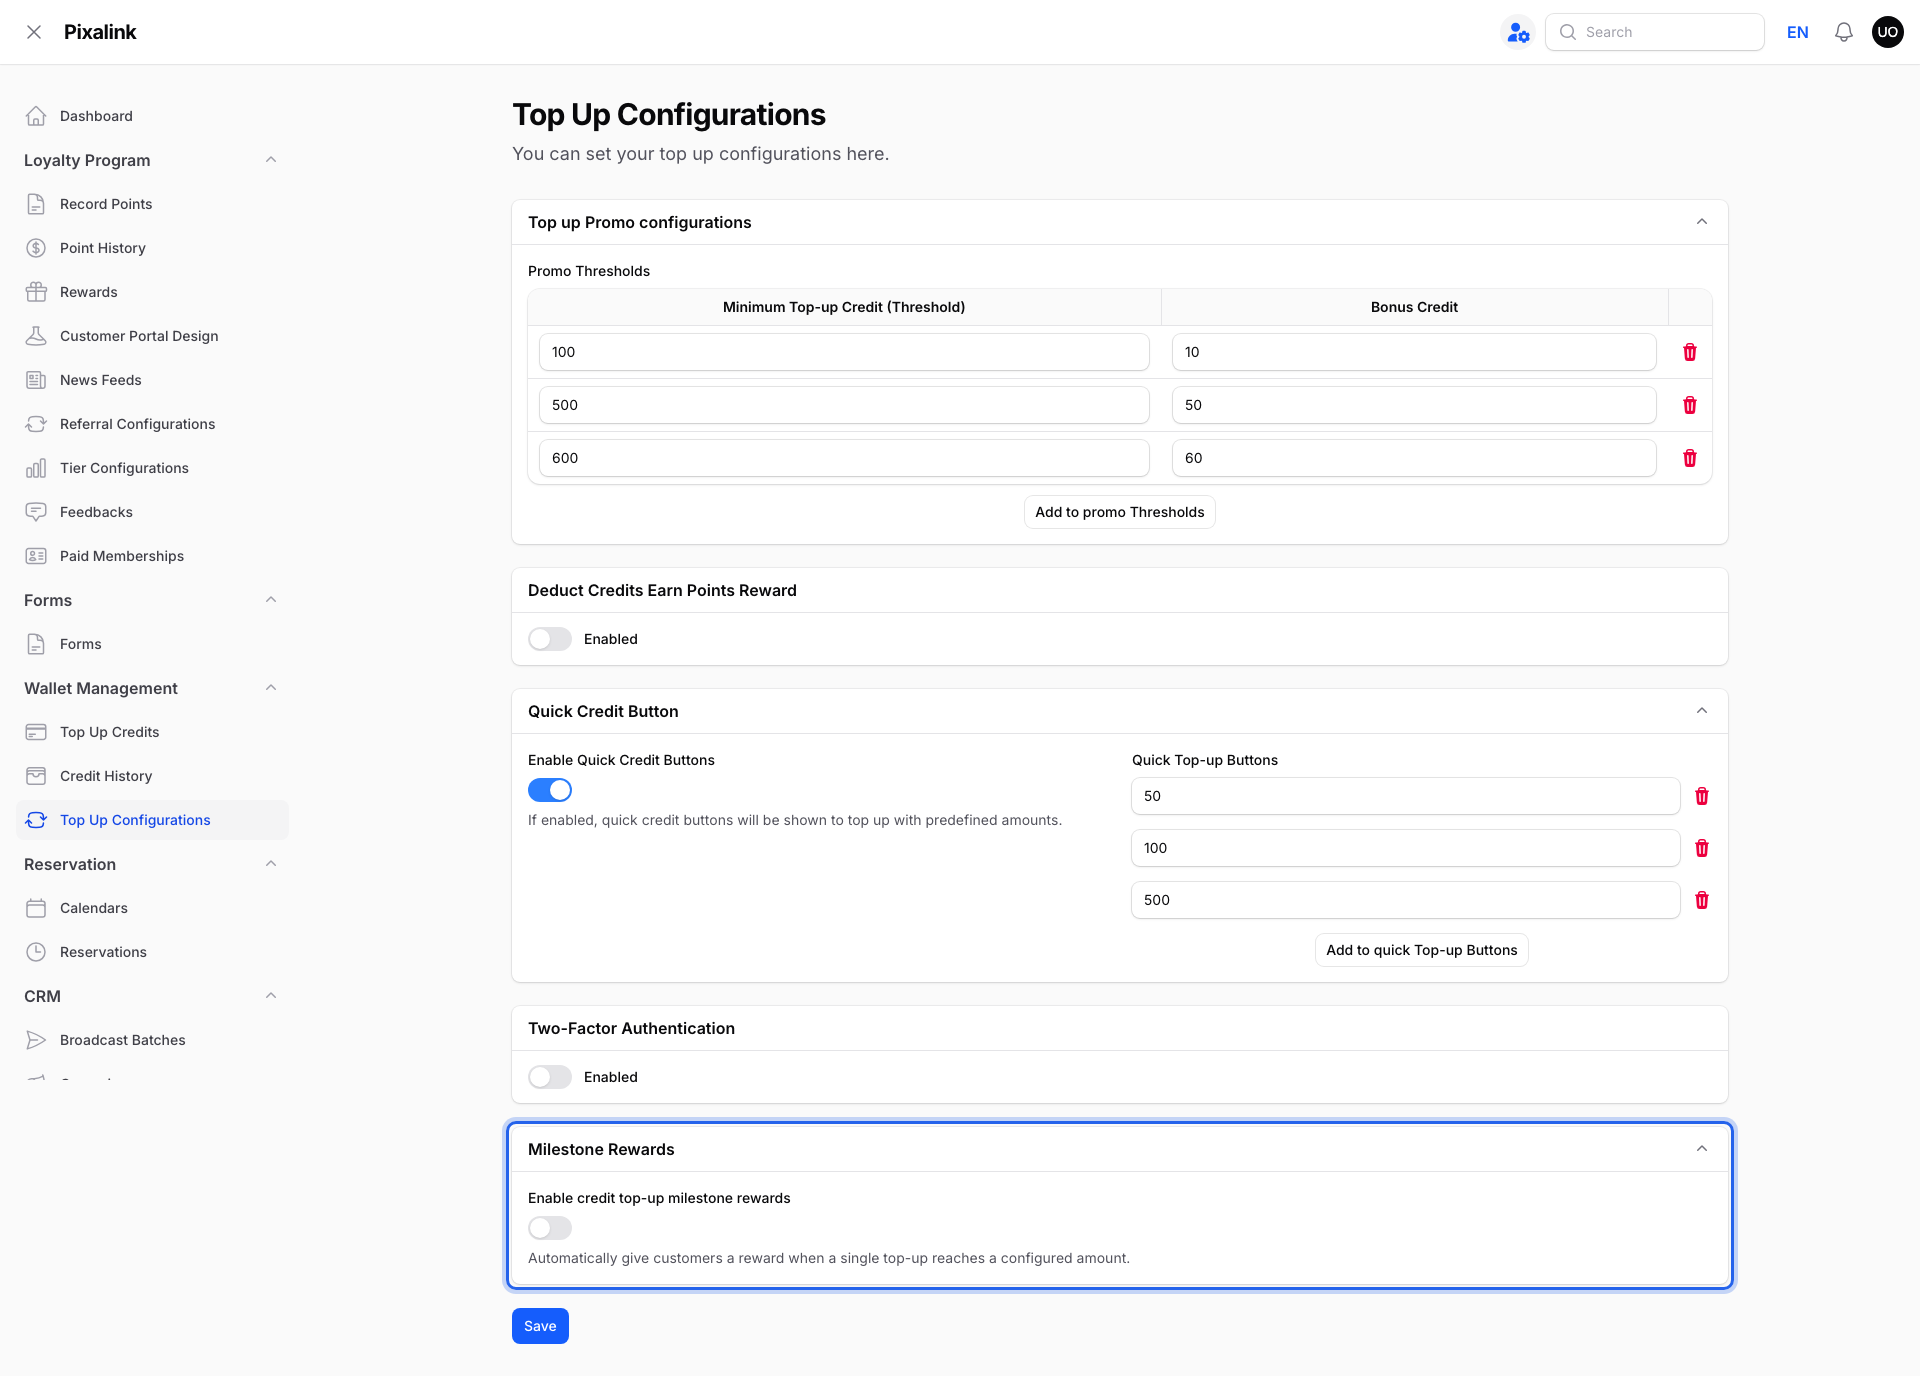
- You'll see the full settings page with several sections. Each section controls a different part of how credit top-ups work. Read on for each one.
Top-Up Promo
-
Open the Top up Promo configurations section.
-
Click Add to Promo Thresholds to create a new promo tier. Fill in:
- Minimum Top-up Credit (Threshold) — the minimum amount a customer must top up to qualify (e.g., 50.00)
- Bonus Credit — the bonus credits they'll receive (e.g., 5.00)
-
Add as many tiers as you'd like. For example:
- Top up RM50 → get RM5 bonus
- Top up RM100 → get RM15 bonus
- Top up RM200 → get RM35 bonus
The system automatically picks the best matching tier for each top-up. If a customer tops up RM150, they'll get the RM100-tier bonus (RM15).
Earn Points When Staff Deduct Credits
-
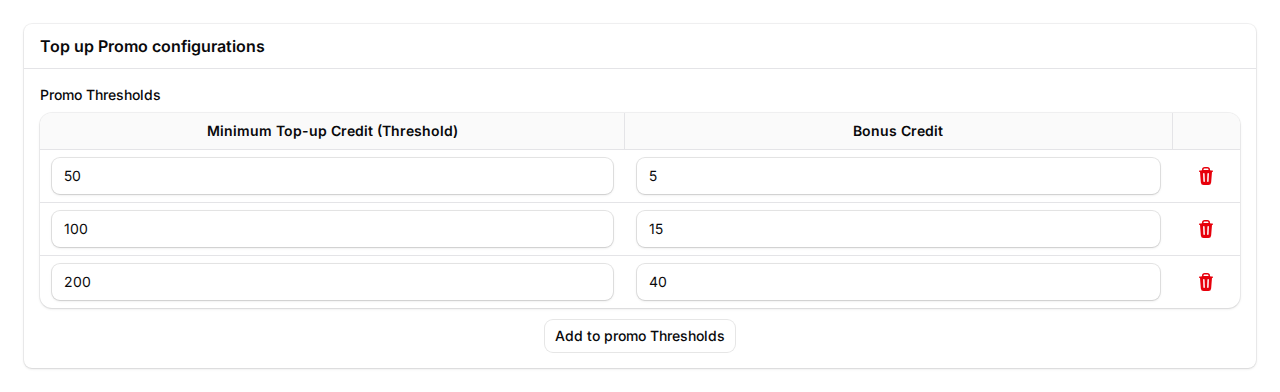
In the Deduct Credits Earn Points Reward section, toggle Enabled on if you want staff to be able to give loyalty points when they deduct credits. This adds an Earn Points toggle to the staff Deduct Credit form. It is off by default, and points are only given when staff switch it on for that deduction.
-
Set the Conversion Rate (%) — this controls what percentage of the credit payment counts towards earning points. A rate of 100 means the full credit amount earns points.
Quick Credit Buttons
-
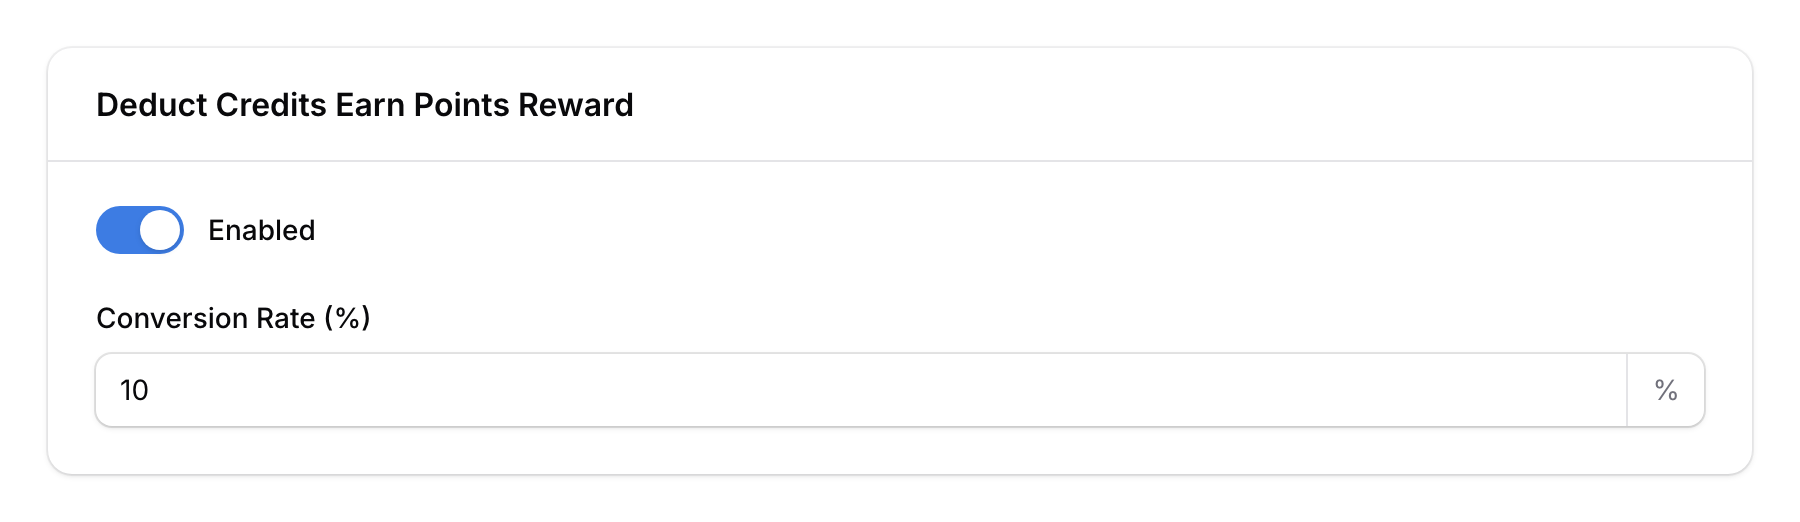
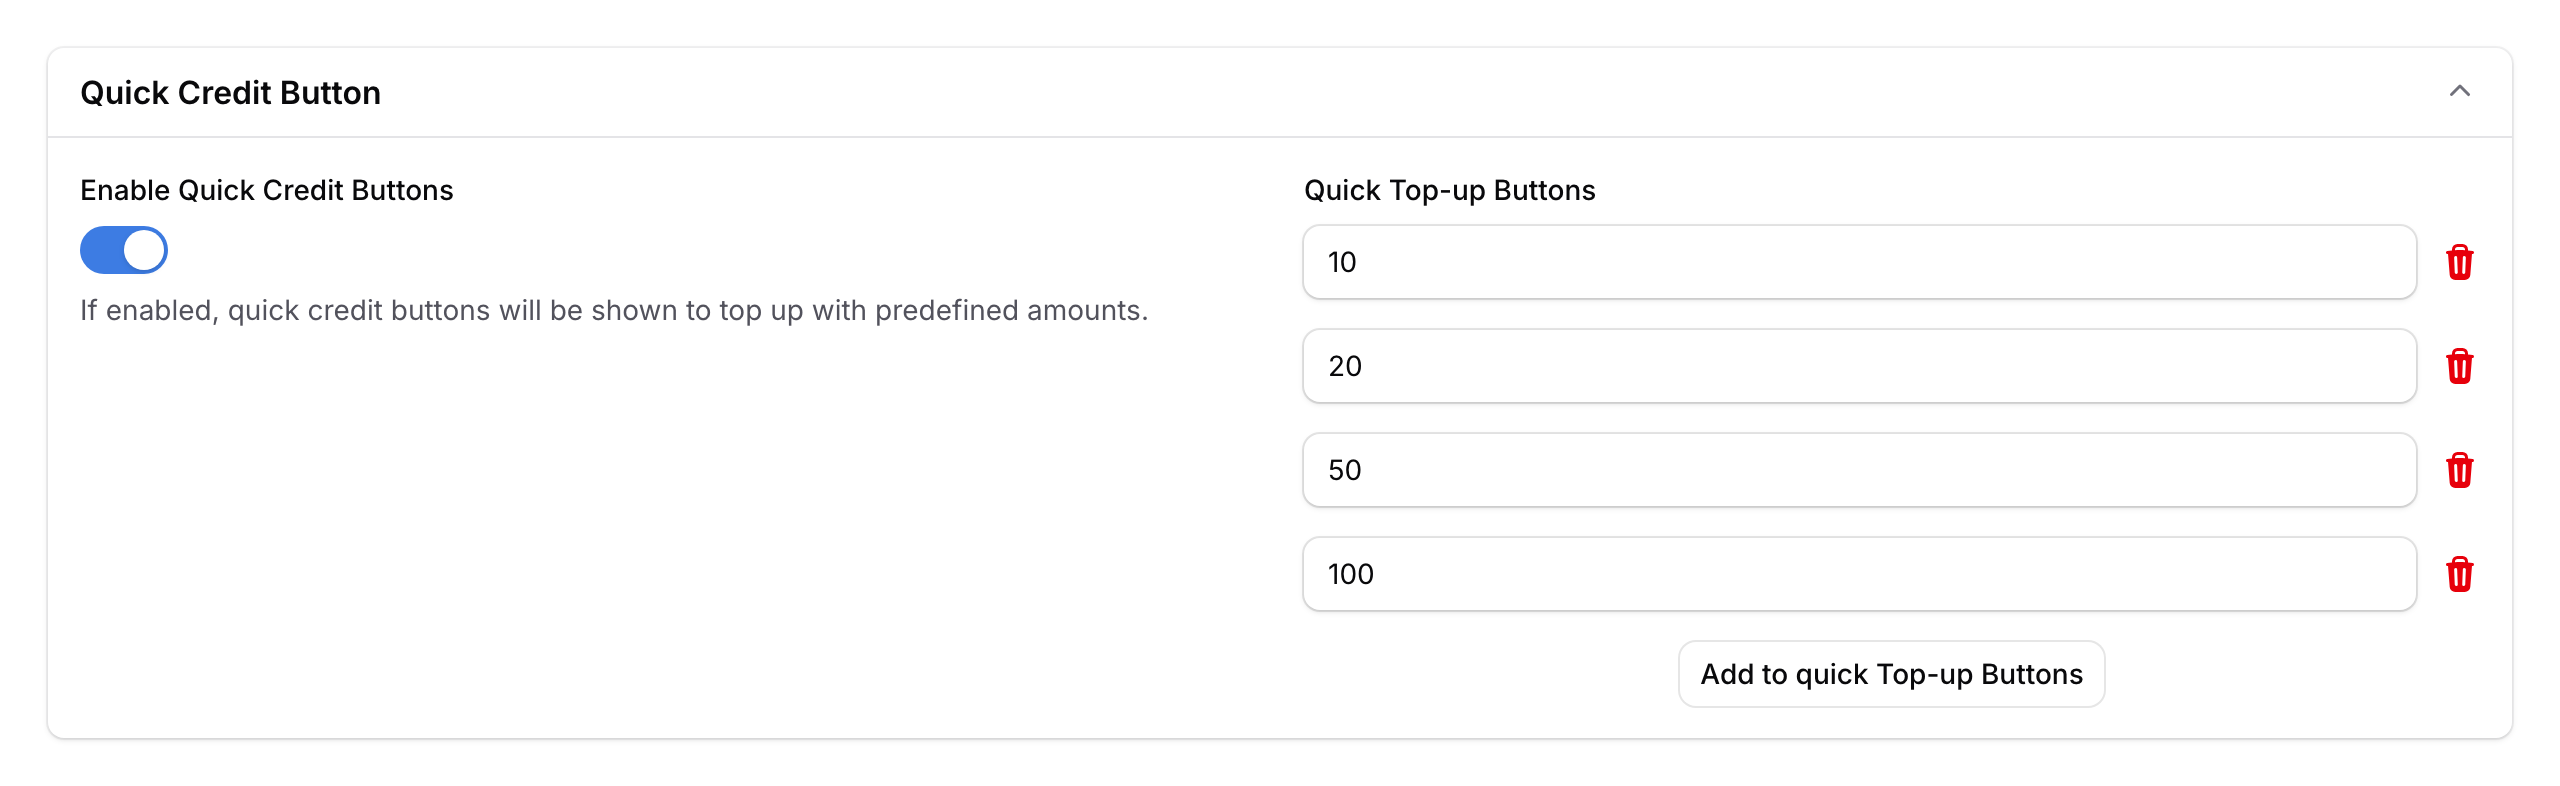
In the Quick Credit Button section, toggle Enable Quick Credit Buttons on.
-
Set your Quick Top-up Buttons — these are preset amounts that appear as shortcut buttons for your staff on the admin Top Up Credits screen. Each one adds its amount to the top-up. Customers don't see them. The defaults are 1, 5, 10, 50, and 100. You can change these to match your most common top-up amounts. You can have up to 5 buttons.
Payment Gateway Top-Up (Customer Self-Service)
This section only appears if you have a payment gateway connected.
Requires additional setup: The Payment Gateway integration needs to be connected to your account before you can use this feature. Reach out to our support team for help getting started.
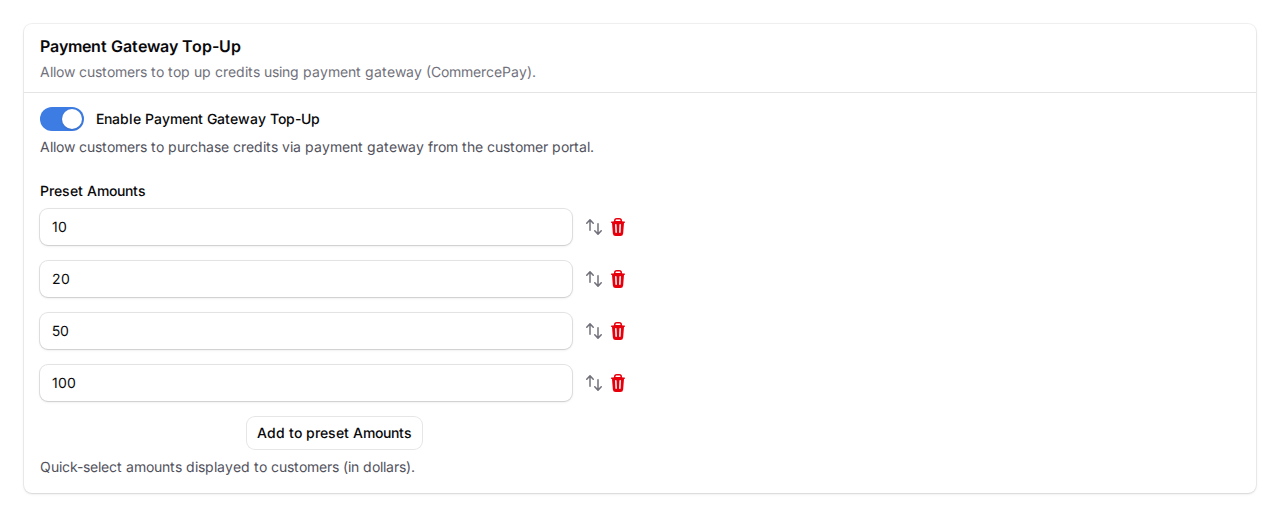
- In the Payment Gateway Top-Up section, toggle Enable Payment Gateway Top-Up on. This lets customers buy credits directly from the customer portal using online payment.

- Set up your Preset Amounts — these are the quick-select buttons customers see (e.g., RM10, RM20, RM50, RM100). You can add up to 6 preset amounts.
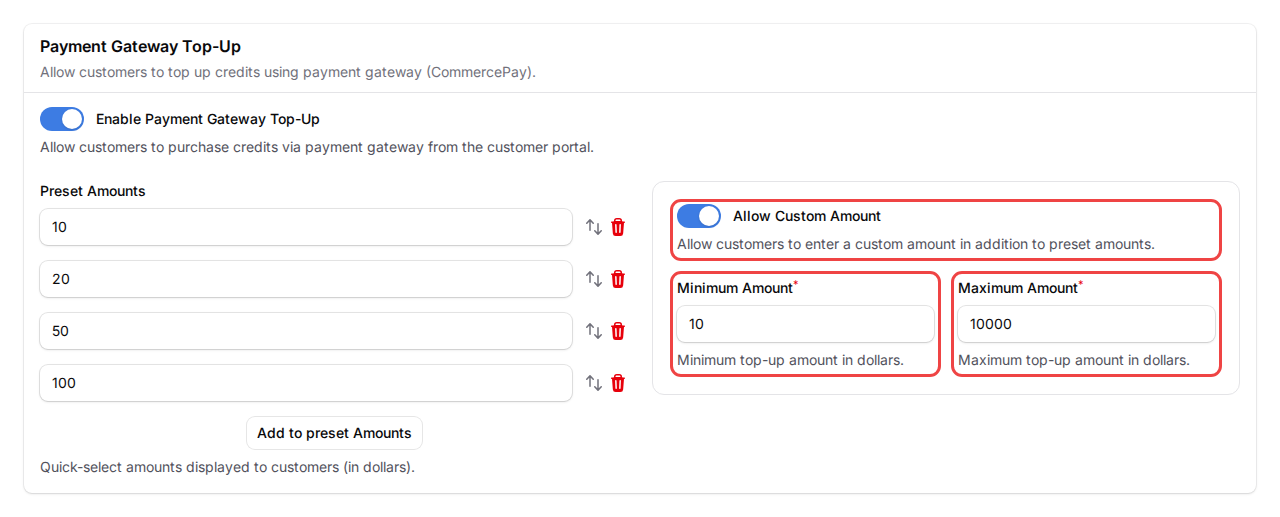
- If you want customers to enter their own amount, toggle Allow Custom Amount on, then set:
- Minimum Amount — the smallest amount they can top up (e.g., RM10). The payment gateway charges a fee on every top-up, so very small top-ups may not be worth it
- Maximum Amount — the largest amount they can top up (e.g., RM10,000)
Two-Factor Authentication
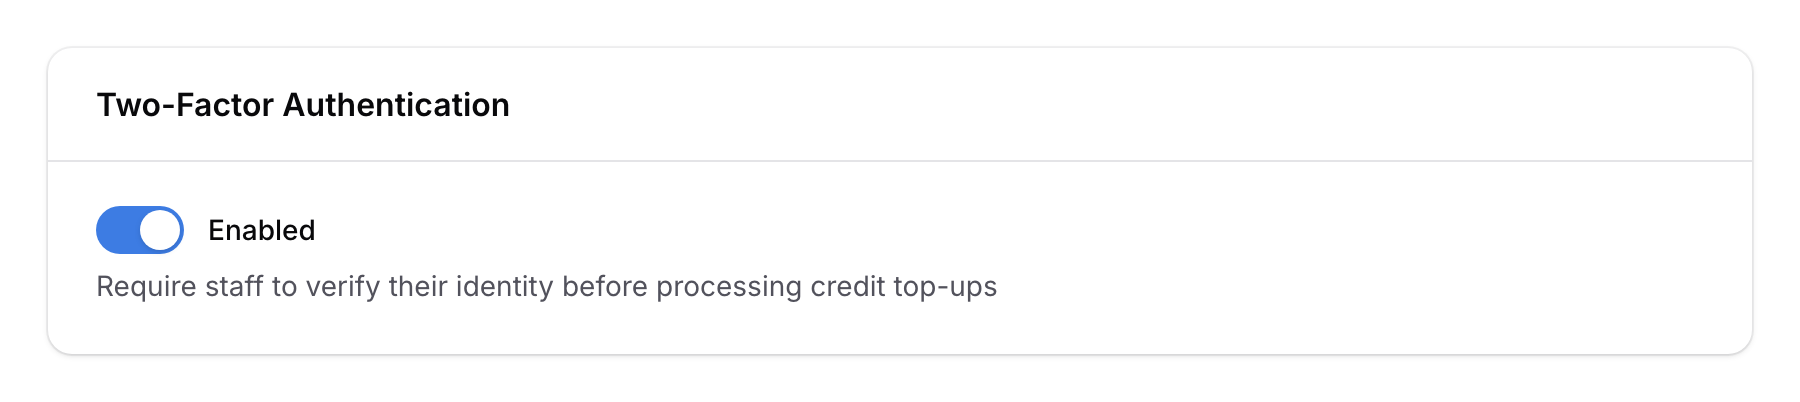
- In the Two-Factor Authentication section, toggle Enabled on if you want extra security when staff deduct credits. Staff then ask the customer for a code before using Deduct Credit. The customer gets the code by opening Pay Now in the customer portal. This does not apply to top-ups.
Milestone Rewards
-
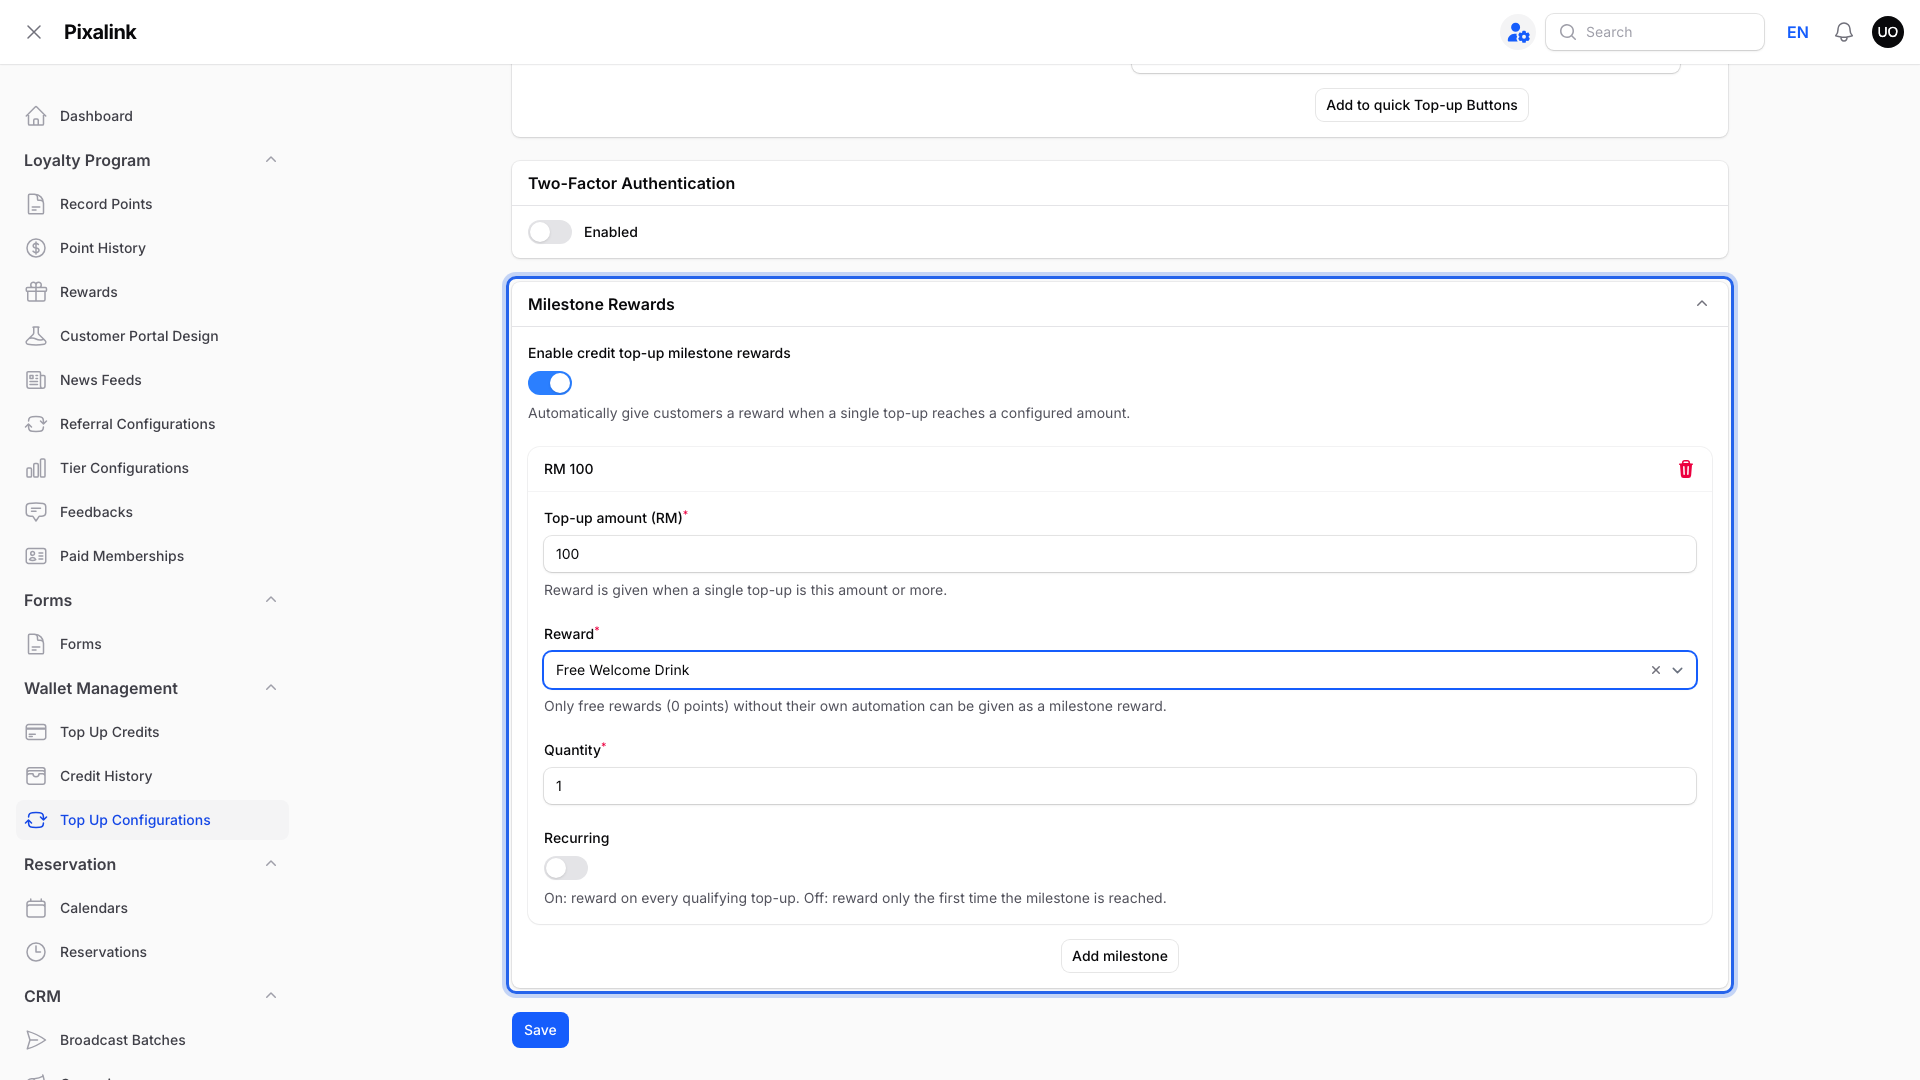
In the Milestone Rewards section, toggle Enable credit top-up milestone rewards on. This gives a customer a reward automatically when a single top-up reaches an amount you choose.
-
Click Add milestone and fill in:
- Top-up amount (RM) — the reward is given when a single top-up is this amount or more
- Reward — the reward to give. Only free rewards (0 points) that don't have their own automation can be picked
- Quantity — how many of the reward to give
- Recurring — turn on to reward every qualifying top-up, or leave off to reward only the first time
-
Click Save to apply all your changes.
What Your Customers Will See
When Payment Gateway Top-Up is enabled, customers visiting the customer portal will see a top-up screen with:
- Preset top-up buttons — quick-select buttons for the amounts you configured (e.g., RM10, RM20, RM50, RM100)
- Custom amount input — if you enabled Allow Custom Amount, customers can type in any amount within your configured minimum and maximum range
Customers simply pick an amount (or type their own), then complete the payment through the connected payment gateway.
Good to Know
- Top-up promo bonuses are applied automatically — your staff don't need to do anything extra. The system checks the promo tiers each time a top-up is processed.
- Each promo tier minimum must be unique. You can't have two tiers with the same minimum amount.
- The Payment Gateway Top-Up section only appears once a payment gateway is connected to your account. Our support team sets up the gateway for you.
- Quick credit buttons only affect the staff-facing top-up screen. Customers won't see these buttons.
- If a Bonus Credit value reaches your organisation's authorisation limit, a password confirmation field will appear inline in the form for security. You must enter your password before you can save.