
How to Assign a Paid Membership to a Customer Manually
How to Assign a Paid Membership to a Customer Manually
What Is This?
You can give a paid membership to a customer straight from their profile — no app payment needed. Use this when the customer paid you outside the app, or when you want to gift one.
Real-Life Example
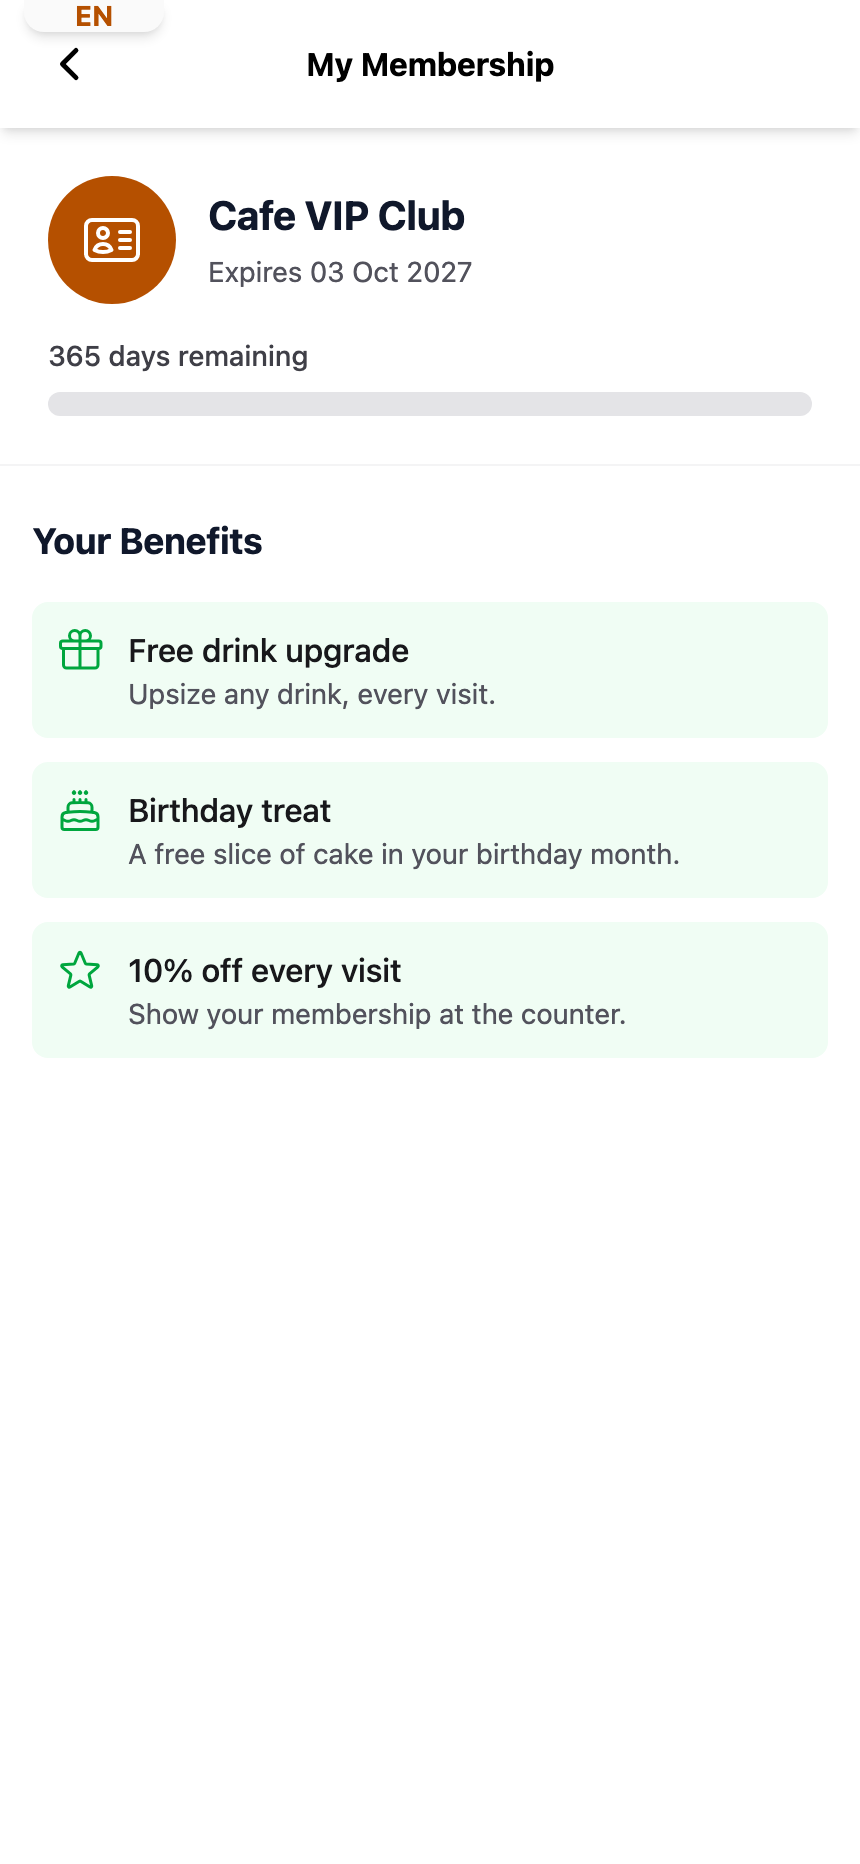
Aishah is a regular at Wei Lin's cafe in Bangsar. After a year of weekly Sunday brunches, Wei Lin wants to thank her with a complimentary Cafe VIP Club yearly membership (worth RM288). Instead of asking Aishah to pay through the app, Wei Lin opens Aishah's customer profile, clicks Assign Membership, picks Yearly, sets payment to Free (Complimentary), and adds a note. Aishah opens her Membership page in the portal and sees Cafe VIP Club with all its benefits.
Video Walkthrough
How to Set It Up
First check paid memberships are turned on for your business and you have at least one active membership type with pricing.
-
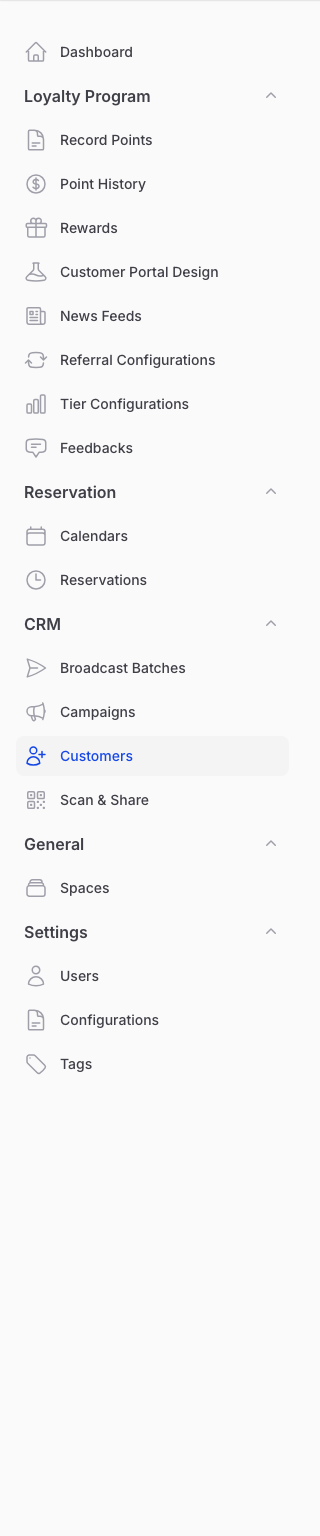
Go to Admin Panel → CRM → Customers and click View on the customer.
-
Scroll down to the tabs at the bottom of the profile, open the Paid Memberships tab and click Assign Membership at the top right of the table. The button only appears when the customer has no active membership.

-
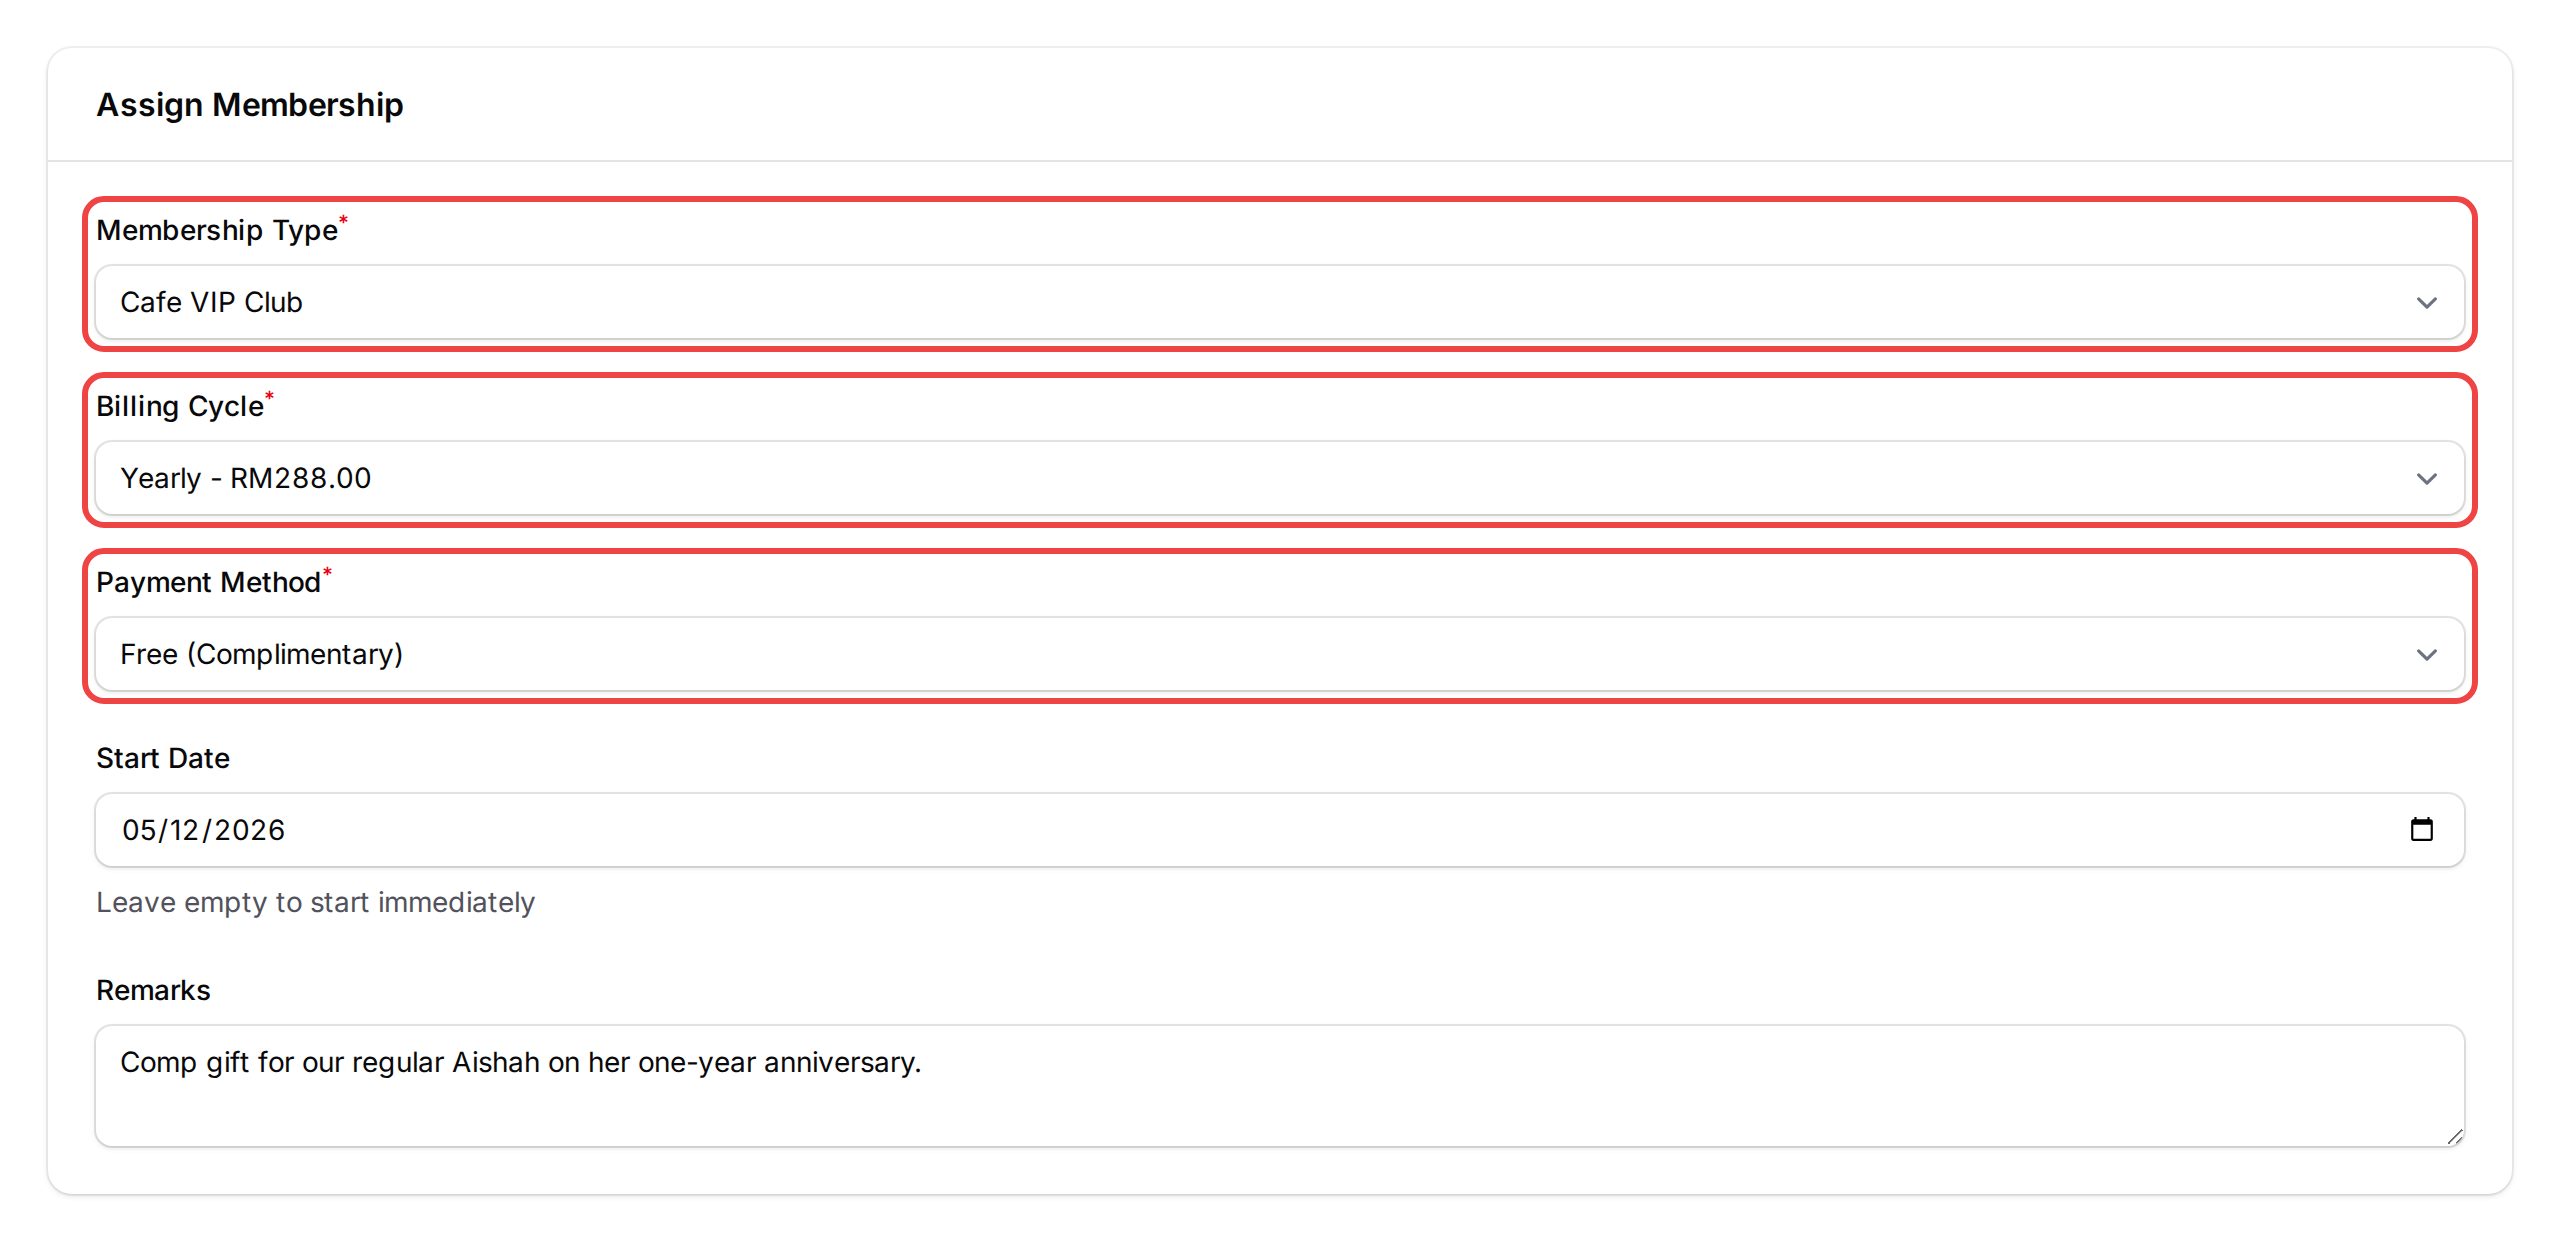
Pick a Membership Type first — only Active types with pricing show up. Once selected, Billing Cycle (Monthly or Yearly) and Payment Method appear, with the price shown next to each option.
- Free (Complimentary) — gift the membership.
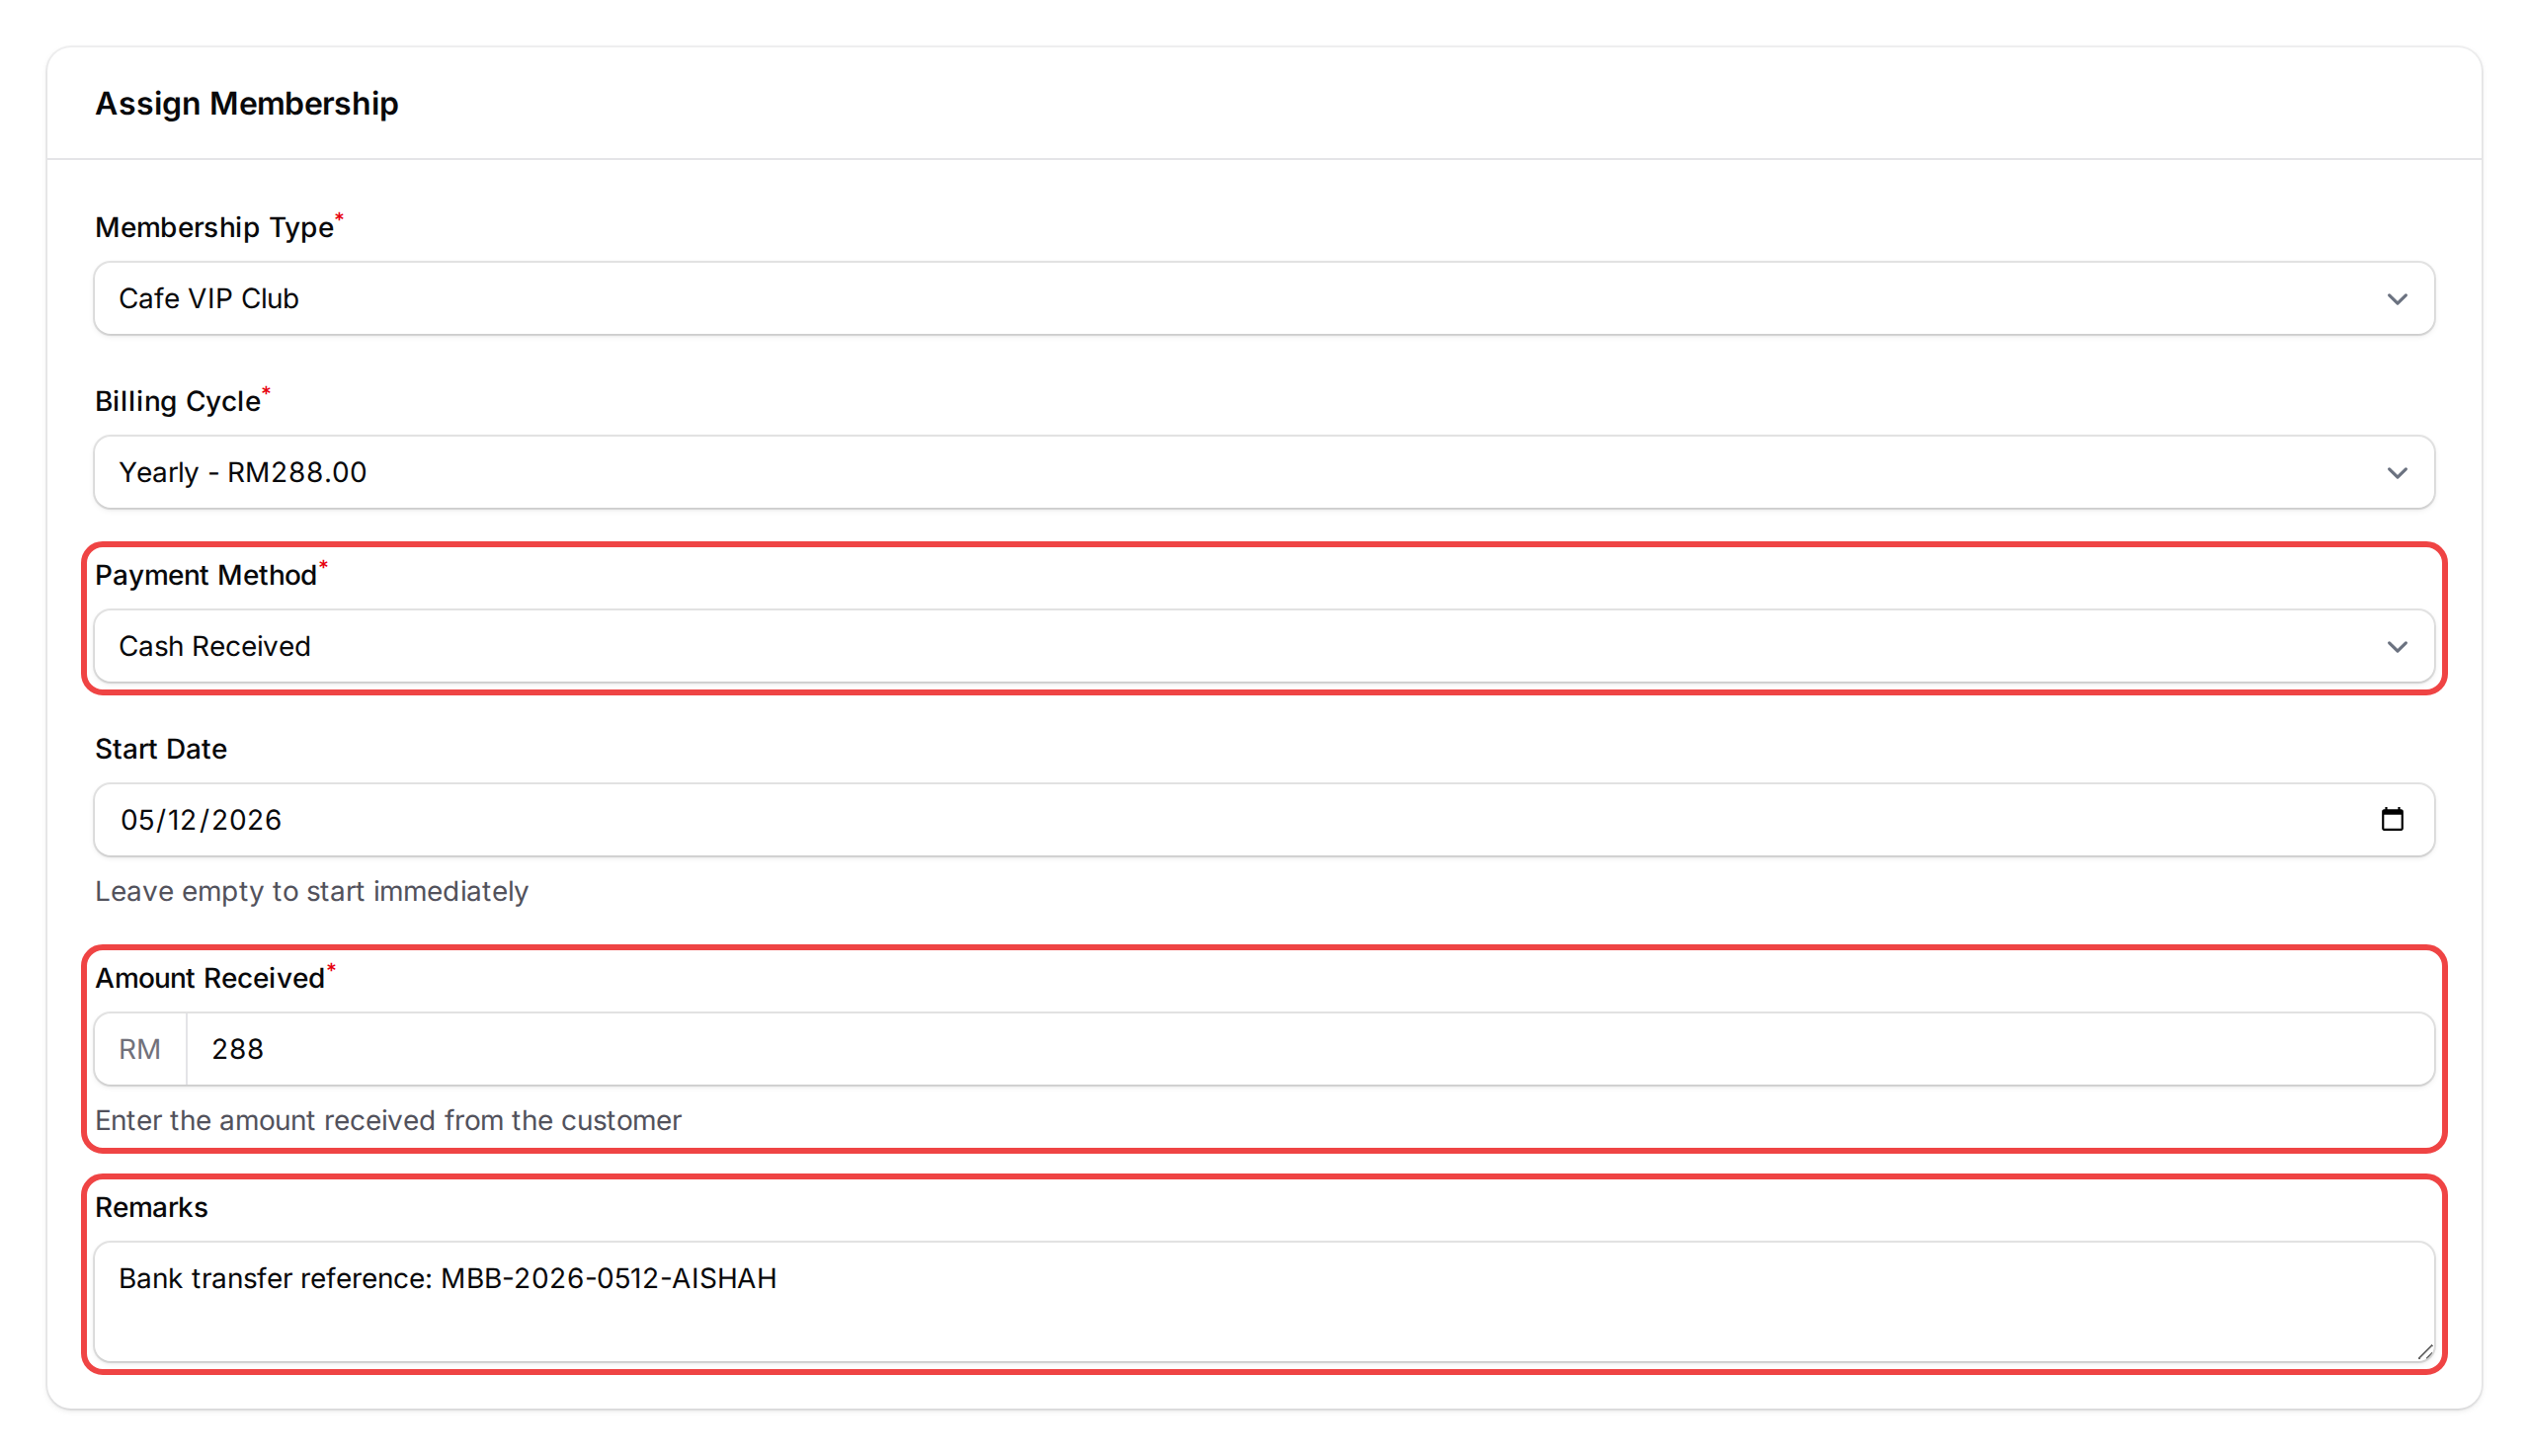
- Cash Received — record a payment you took outside the app.
- Online Payment (Generate Link) — create a link to send to the customer. Shown only if your account has online payment enabled.
-
Fill the rest based on your choice. Start Date defaults to today — change it for a future-dated membership.
- Free or Cash — add a short note in Remarks. For Cash, also enter Amount Received in RM.
- Online Payment — nothing more to fill.
-
Click Submit.
- Free or Cash — the membership appears as active in the table straight away.
- Online Payment — a payment link is generated. Send it to the customer; their membership activates when they pay.

What Your Customers Will See
The membership shows on the customer's Membership page in the portal, with its expiry date and a Your Benefits list taken from the membership type's Benefits tab. If you've added rewards on the type's Rewards tab, those vouchers land in My Rewards straight away.
If you've turned on the Membership Activated notification, the customer also gets a message by WhatsApp or email.
Good to Know
- A customer can have only one active paid membership at a time. The Assign Membership button stays hidden until the current one expires.
- To add days to the current membership without a payment, use Extend on its row instead.
- To switch a customer mid-cycle, use Deactivate on their current membership first — any remaining days are not carried over. The Assign button then reappears.
- Only Active, priced membership types appear in the dropdown.
- Cash assignments are stamped with your staff name in the payment record — useful for end-of-day reconciliation.
- If your account limits manual memberships to certain staff roles, other staff only see Online Payment (Generate Link).
Need Help?
Reach out to our support team — we're happy to help.
What's Next?
- Paid Memberships — overview of the feature
- How to View and Edit a Customer Profile — find the right customer first
- How Customer Membership Statuses Work — what active, expired and replaced mean