How to View and Edit a Customer Profile
How to View and Edit a Customer Profile
What Is This?
Every customer who joins your loyalty program has a profile with their contact details, points balance, tier, tags, and activity history. You can view any customer's full profile and update their details whenever needed — keeping your records accurate and your communication on point.
Real-Life Example
Siti runs a boutique cafe in Petaling Jaya. One of her regulars, Ahmad, recently changed his phone number and asked to update it. Siti opened Ahmad's profile in the admin panel, clicked Edit, updated his phone number, and saved the changes — all in under a minute. Now Ahmad continues receiving WhatsApp updates about new promotions and his birthday reward. Keeping profiles up to date means your customers never miss out on rewards they've earned.
How to View a Customer Profile
-
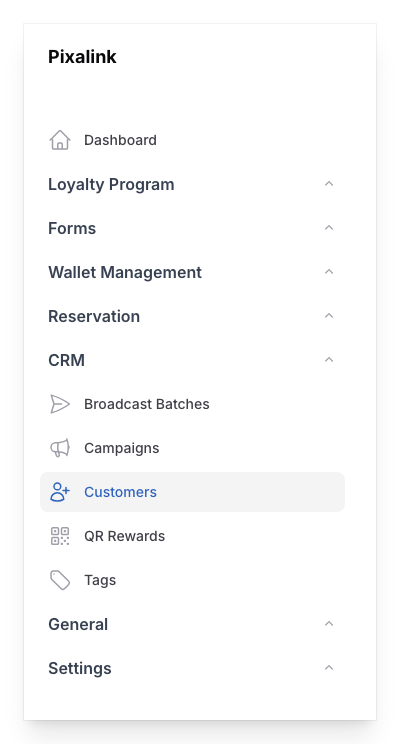
Go to Admin Panel → CRM → Customers
-
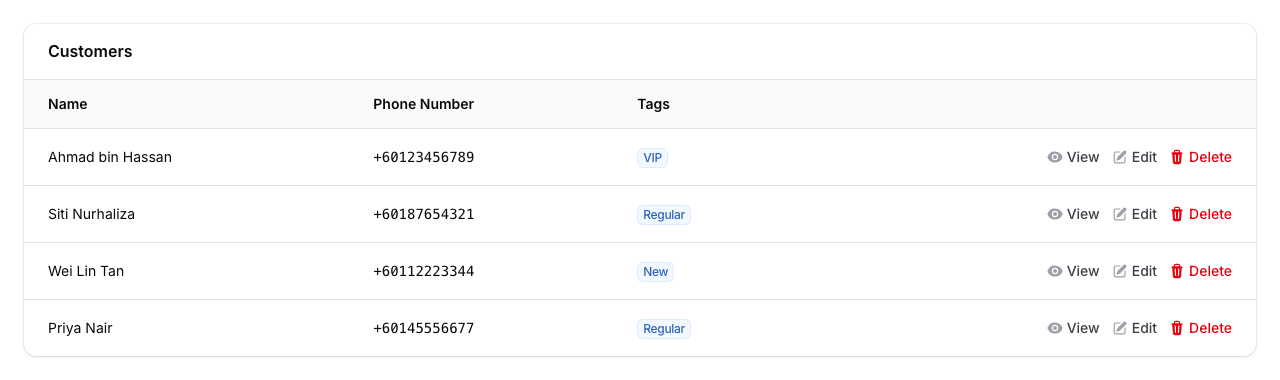
Find the customer in the list using the search bar at the top. You can search by name or phone number.
-
Click View next to the customer's name to open their full profile.
How to Edit a Customer Profile
-
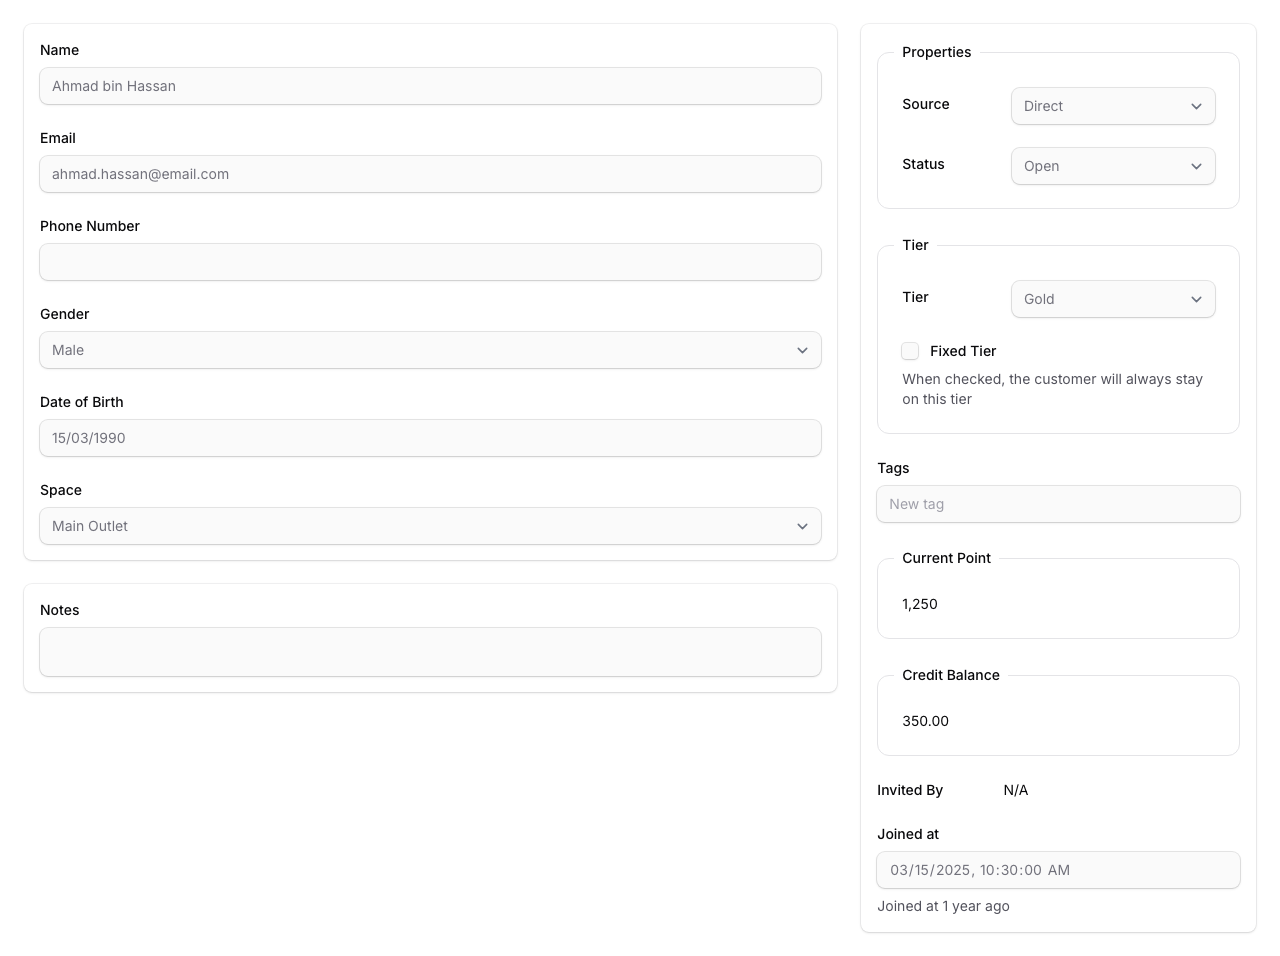
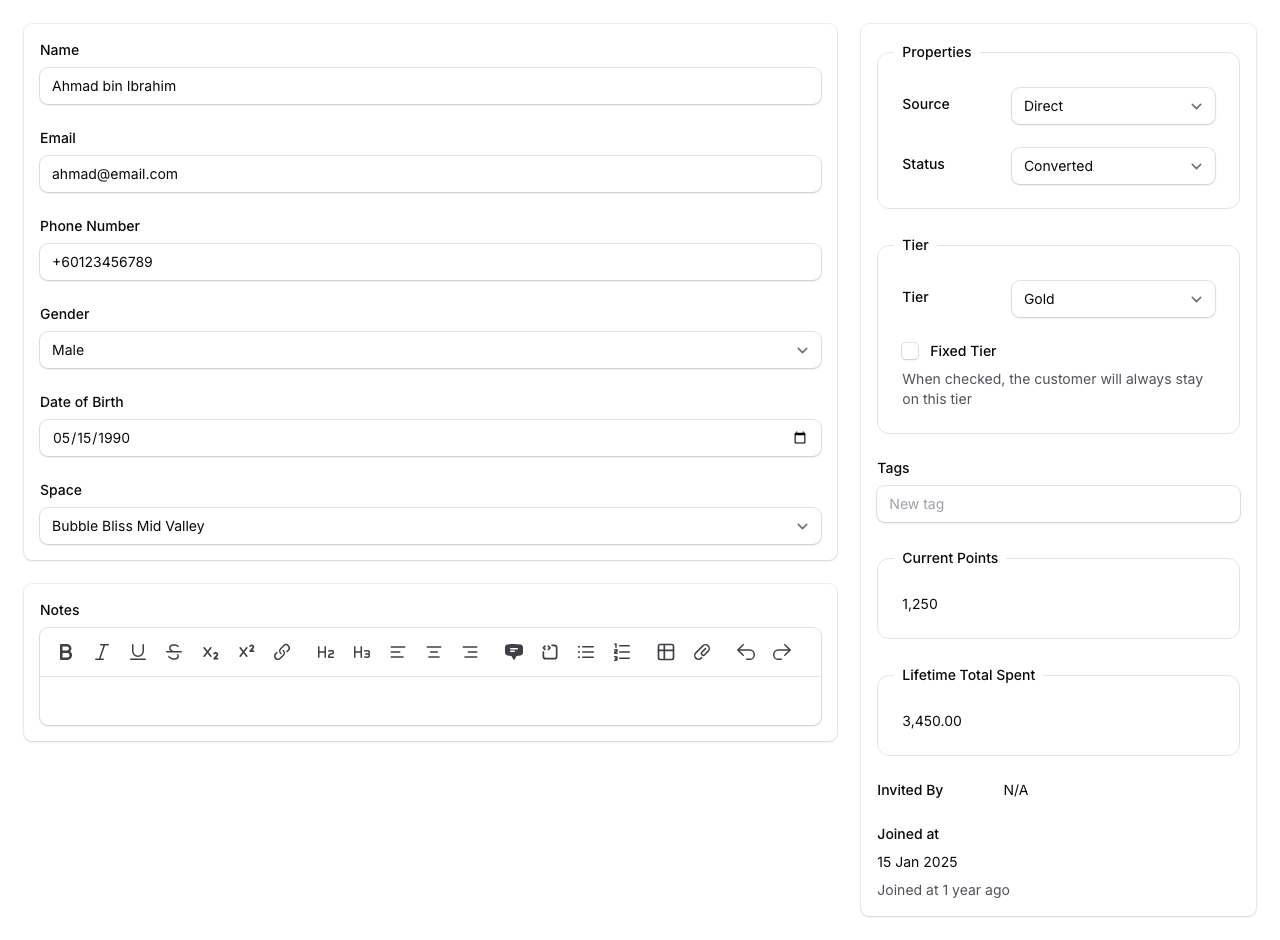
Click Edit in the top-right corner, then update the fields you need — for example, Name, Email, Phone Number, Gender, or Date of Birth. Click Save when you're done.
What You'll See on the Profile
The customer profile is split into two areas:
- Left side — personal details like name, email, phone number, gender, date of birth, space, and notes. You may also see additional custom fields if your organisation has set them up.
- Right side — properties (source and status), tier, tags, points balance, credit balance, who invited them, and the date they joined
Below the profile, you'll find tabs for:
- Transactions — full history of points earned and spent
- Broadcasts — messages sent to this customer
- Customer Rewards — rewards assigned or redeemed
- Invitees — people this customer referred
- Credits — credit wallet history
- Payments — payment records
- Paid Memberships — membership plans the customer has purchased (only visible if the Paid Membership feature is enabled)
Good to Know
- You can record points or redeem a reward directly from the profile page using the Record Point and Quick Redeem buttons at the top
- The Status field tracks where the customer is in your sales pipeline — options include Lead, Open, Replied, Opportunity, Quotation, Lost Quotation, Interested, Converted, Do Not Contact, and Blocked
- If you assign a tier manually and tick Fixed Tier, the customer stays on that tier even if their points change
- Tags help you group customers for targeted campaigns — you can add or remove them right from the profile
- The Joined at field shows exactly when this customer first signed up