
How to Set Up a Voucher Pool for an AutoCount Reward
How to Set Up a Voucher Pool for an AutoCount Reward
What Is This?
A voucher pool lets Pixalink create redeemable voucher codes for a reward and send them to your AutoCount counter on their own. You never run out of codes, and your customers can claim a voucher and use it right away.
Real-Life Example
Ahmad runs Kopi Corner, a busy cafe in Bangsar. He wanted to give regulars a free coffee they could redeem at his AutoCount counter. Before, he typed voucher codes into AutoCount by hand and often ran short on a busy morning. Now he switches on the voucher pool for his Free Coffee reward and gives it a short prefix. Pixalink makes a batch of codes and keeps topping it up as customers claim them. When Wei Lin claims her free coffee, the code is already waiting at the counter. Ahmad never touches AutoCount again for that reward.
How to Set It Up
You set this up on the reward itself. Make sure AutoCount is connected first.
Important
Voucher pools need the AutoCount Point of Sale module, because that is where voucher redemption lives. Check your AutoCount desktop for a Point of Sale → Maintenance → Voucher Maintenance menu. If it is missing, your AutoCount does not include POS and the codes will never reach your counter — speak to your AutoCount dealer about adding it.
-
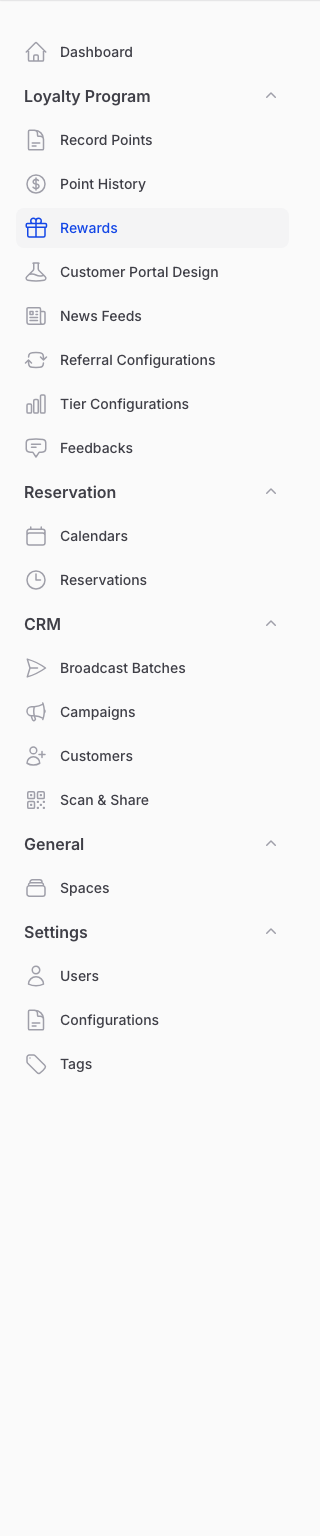
Go to Admin Panel → Loyalty Program → Rewards and open your reward.
-
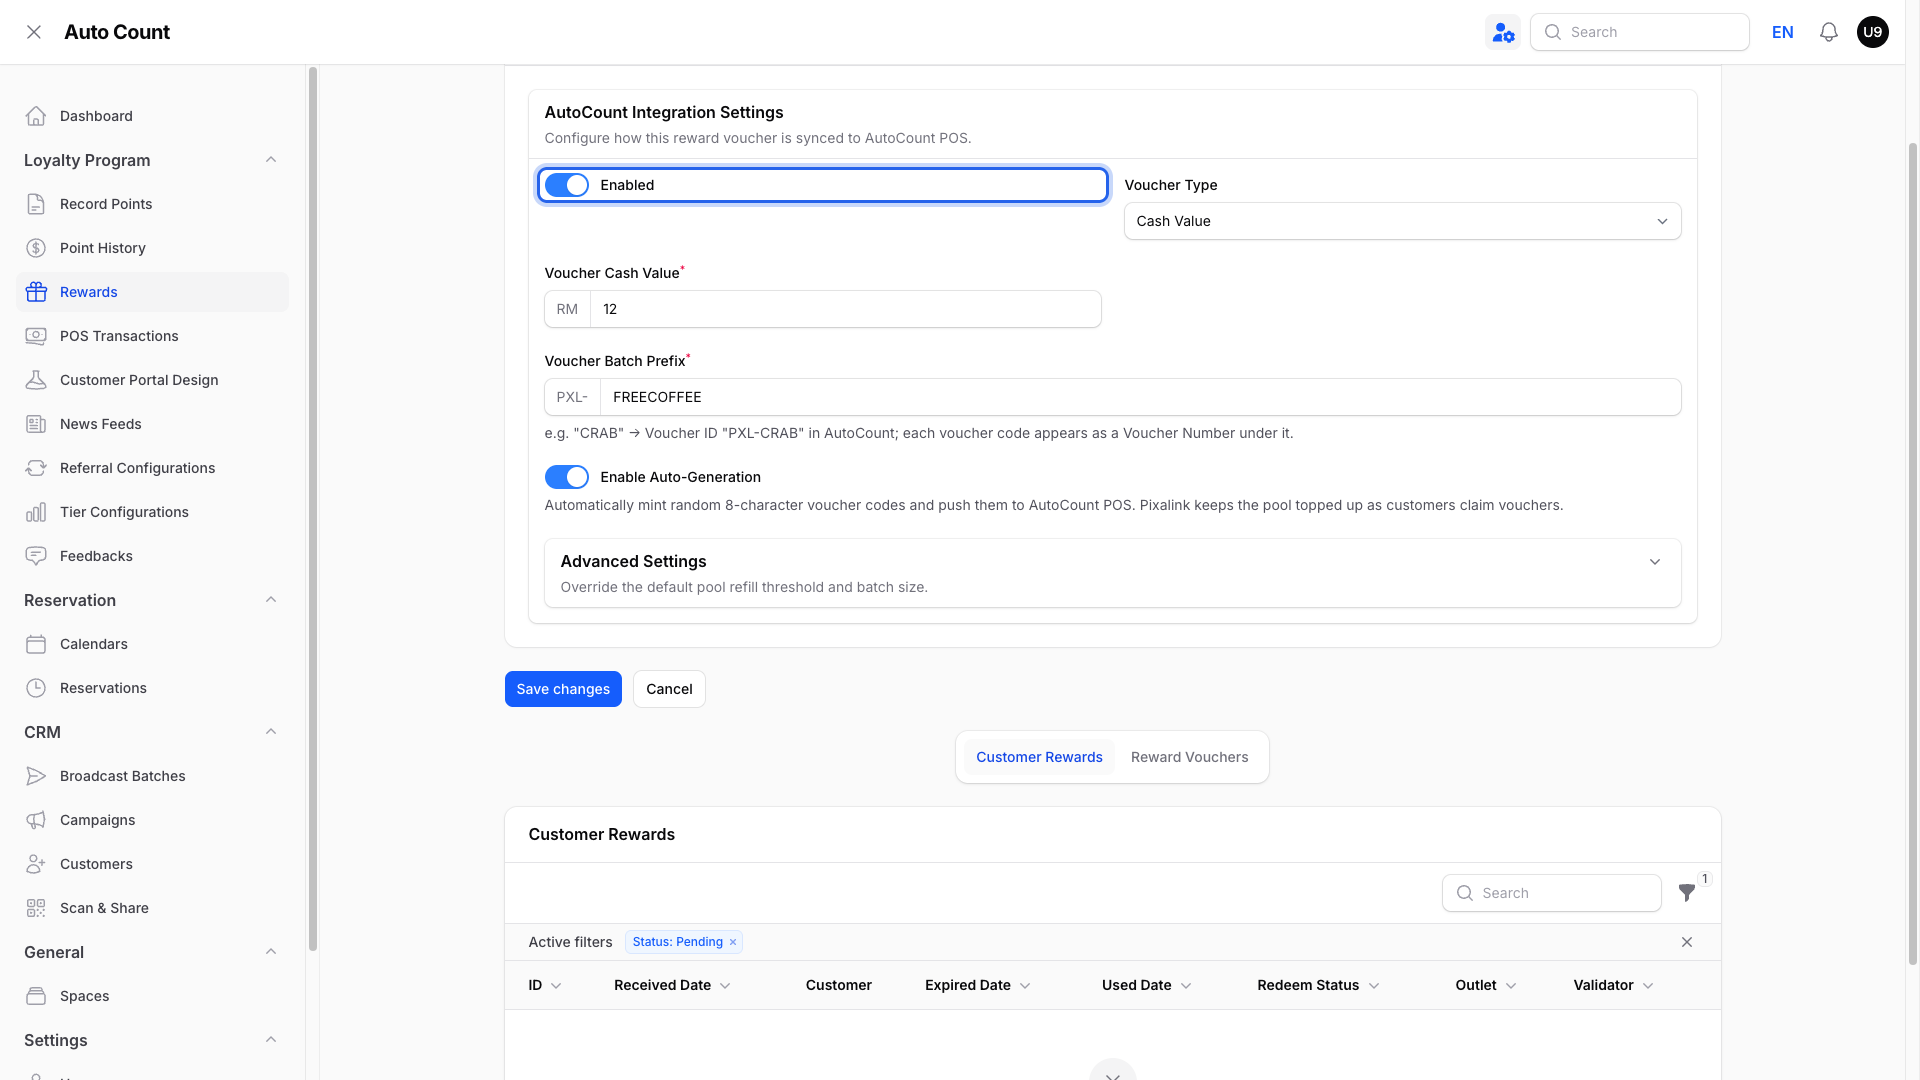
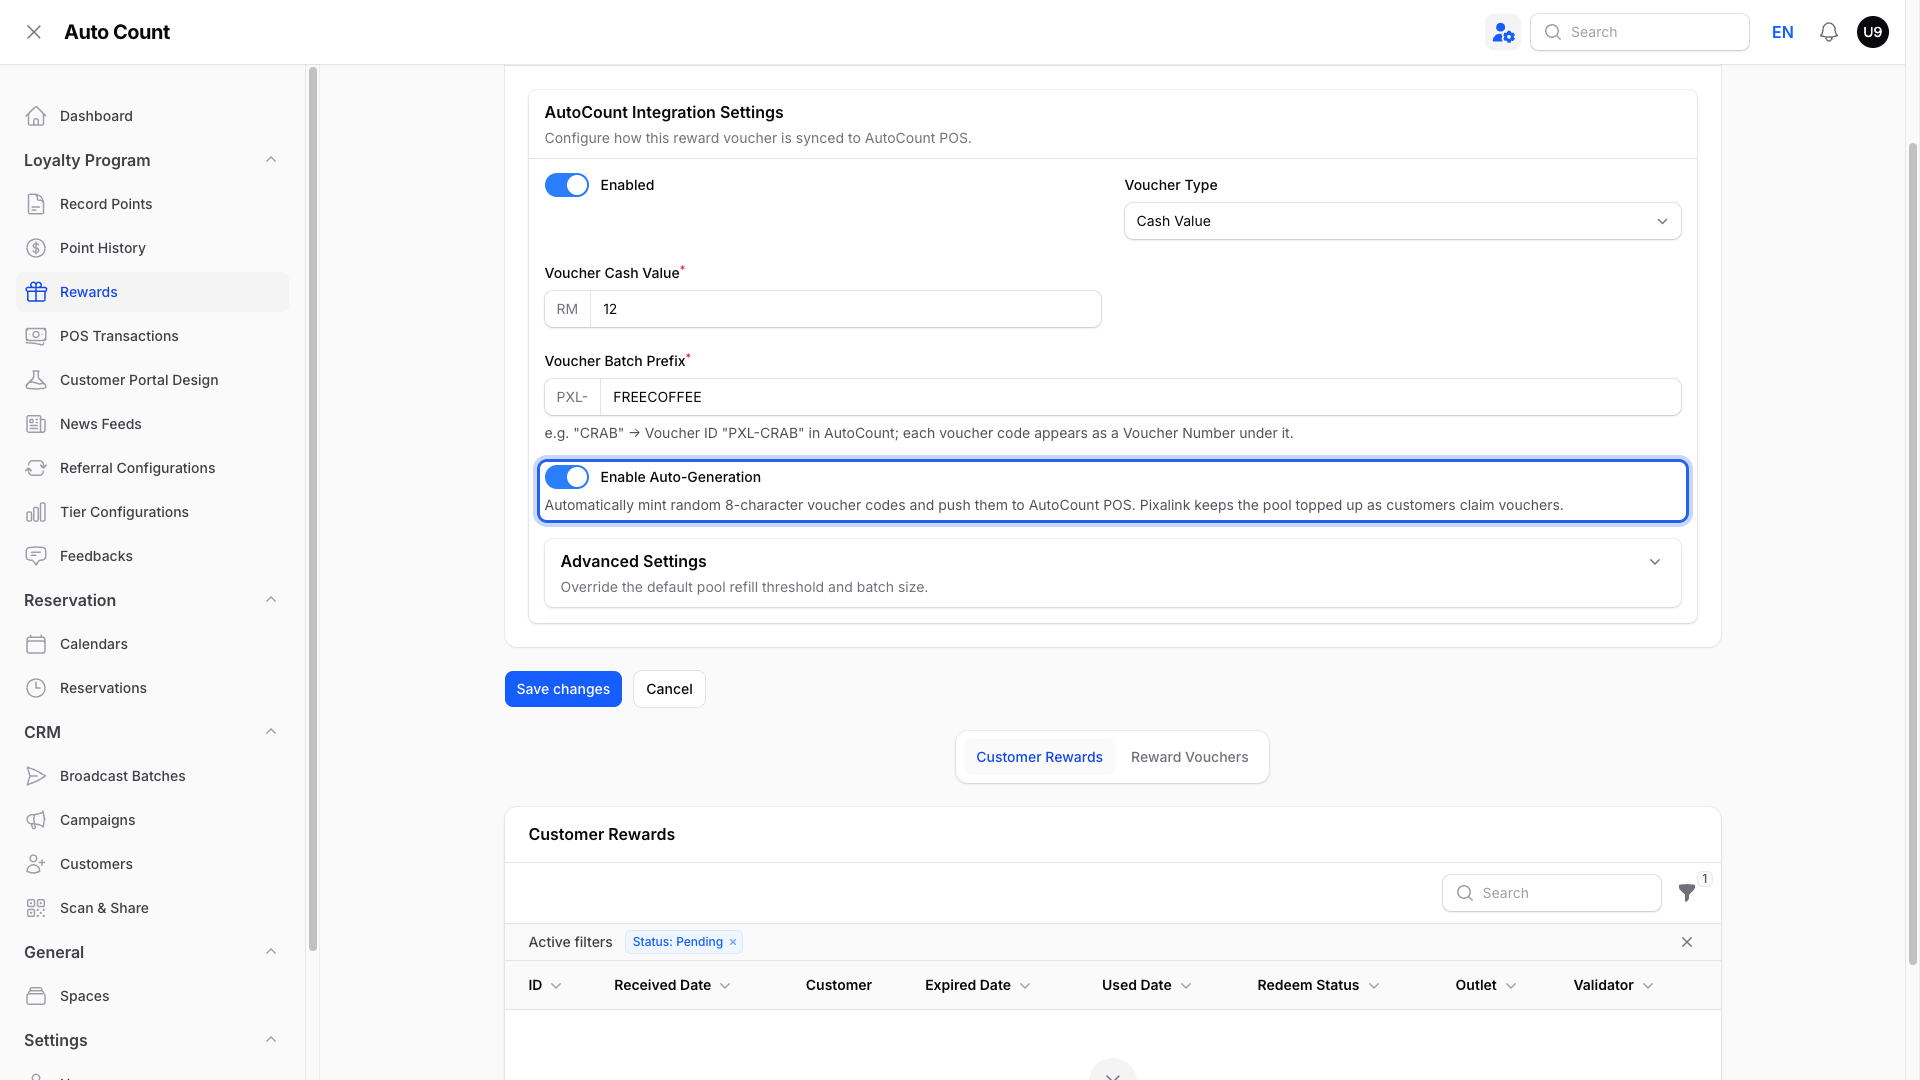
Open the Configurations tab and switch on Enabled under AutoCount Integration Settings.
-
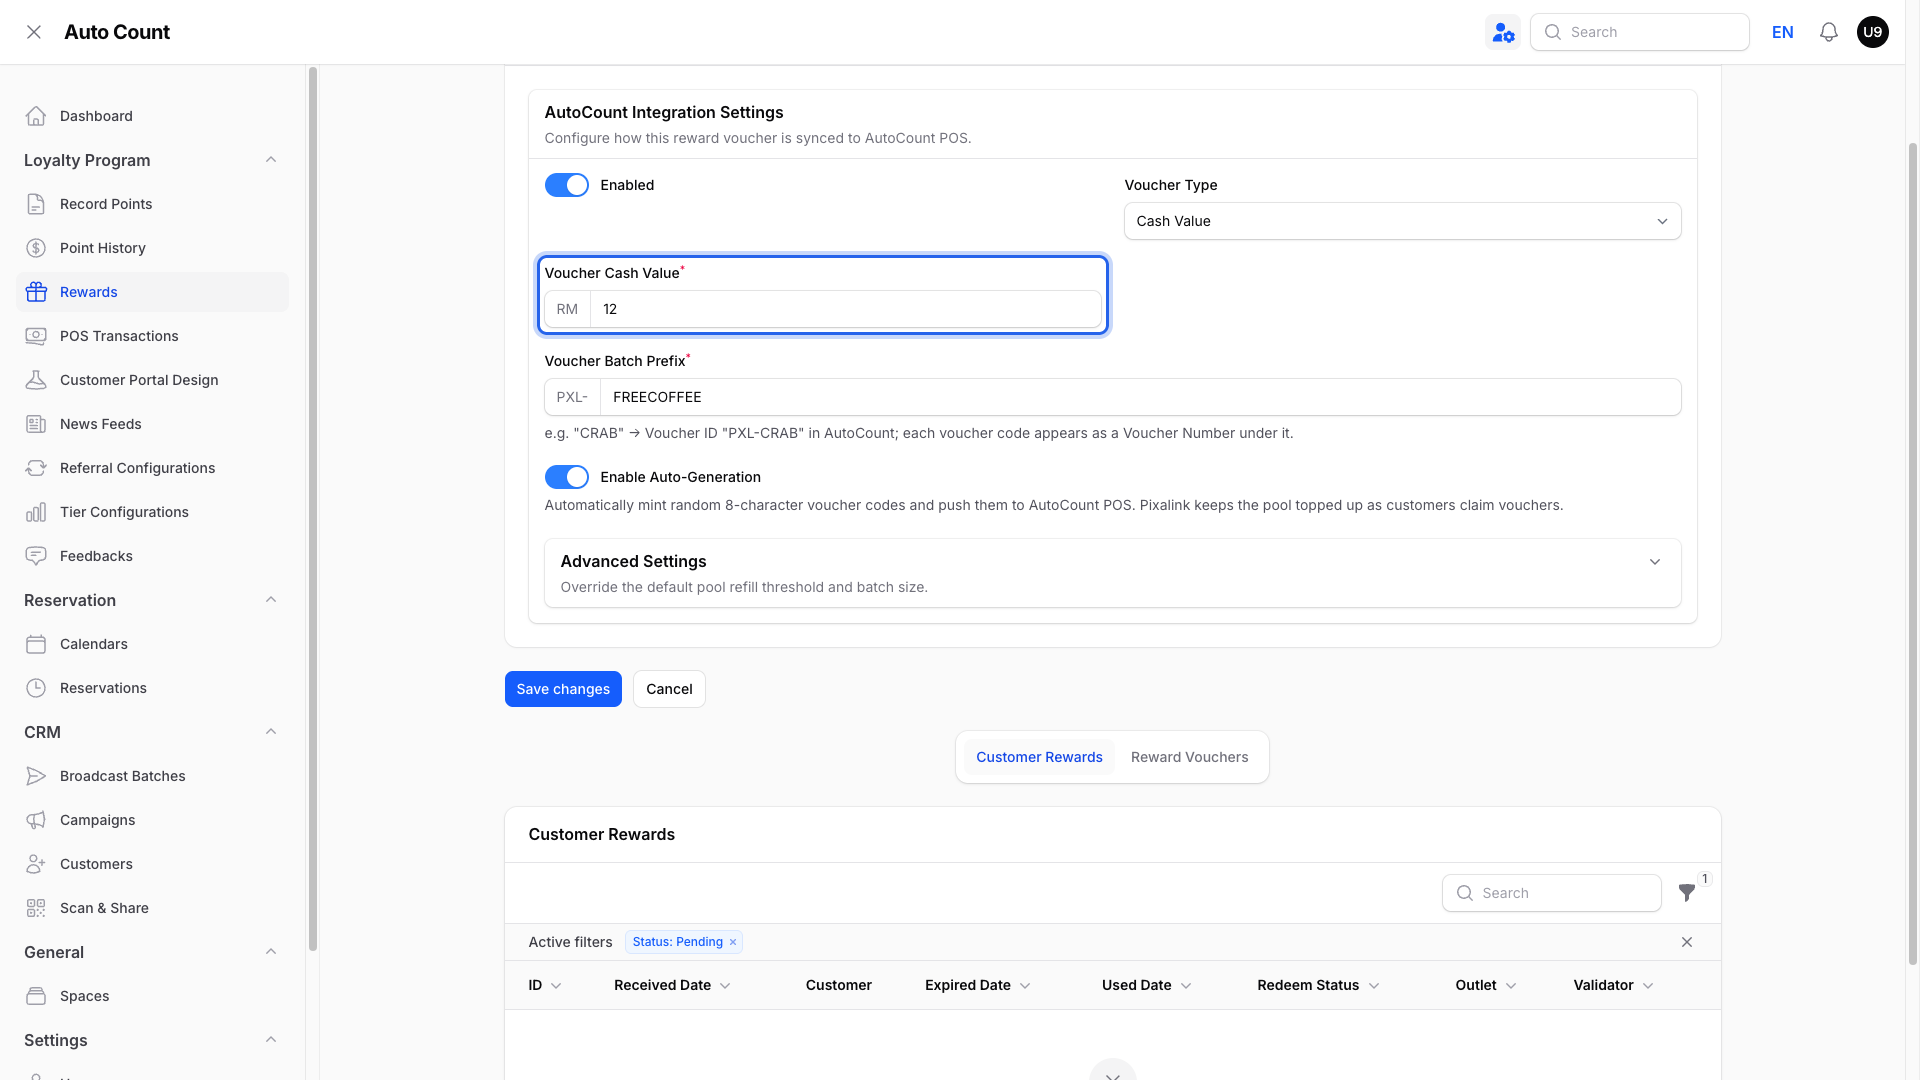
Set the Voucher Cash Value to what the voucher is worth at the counter.
-
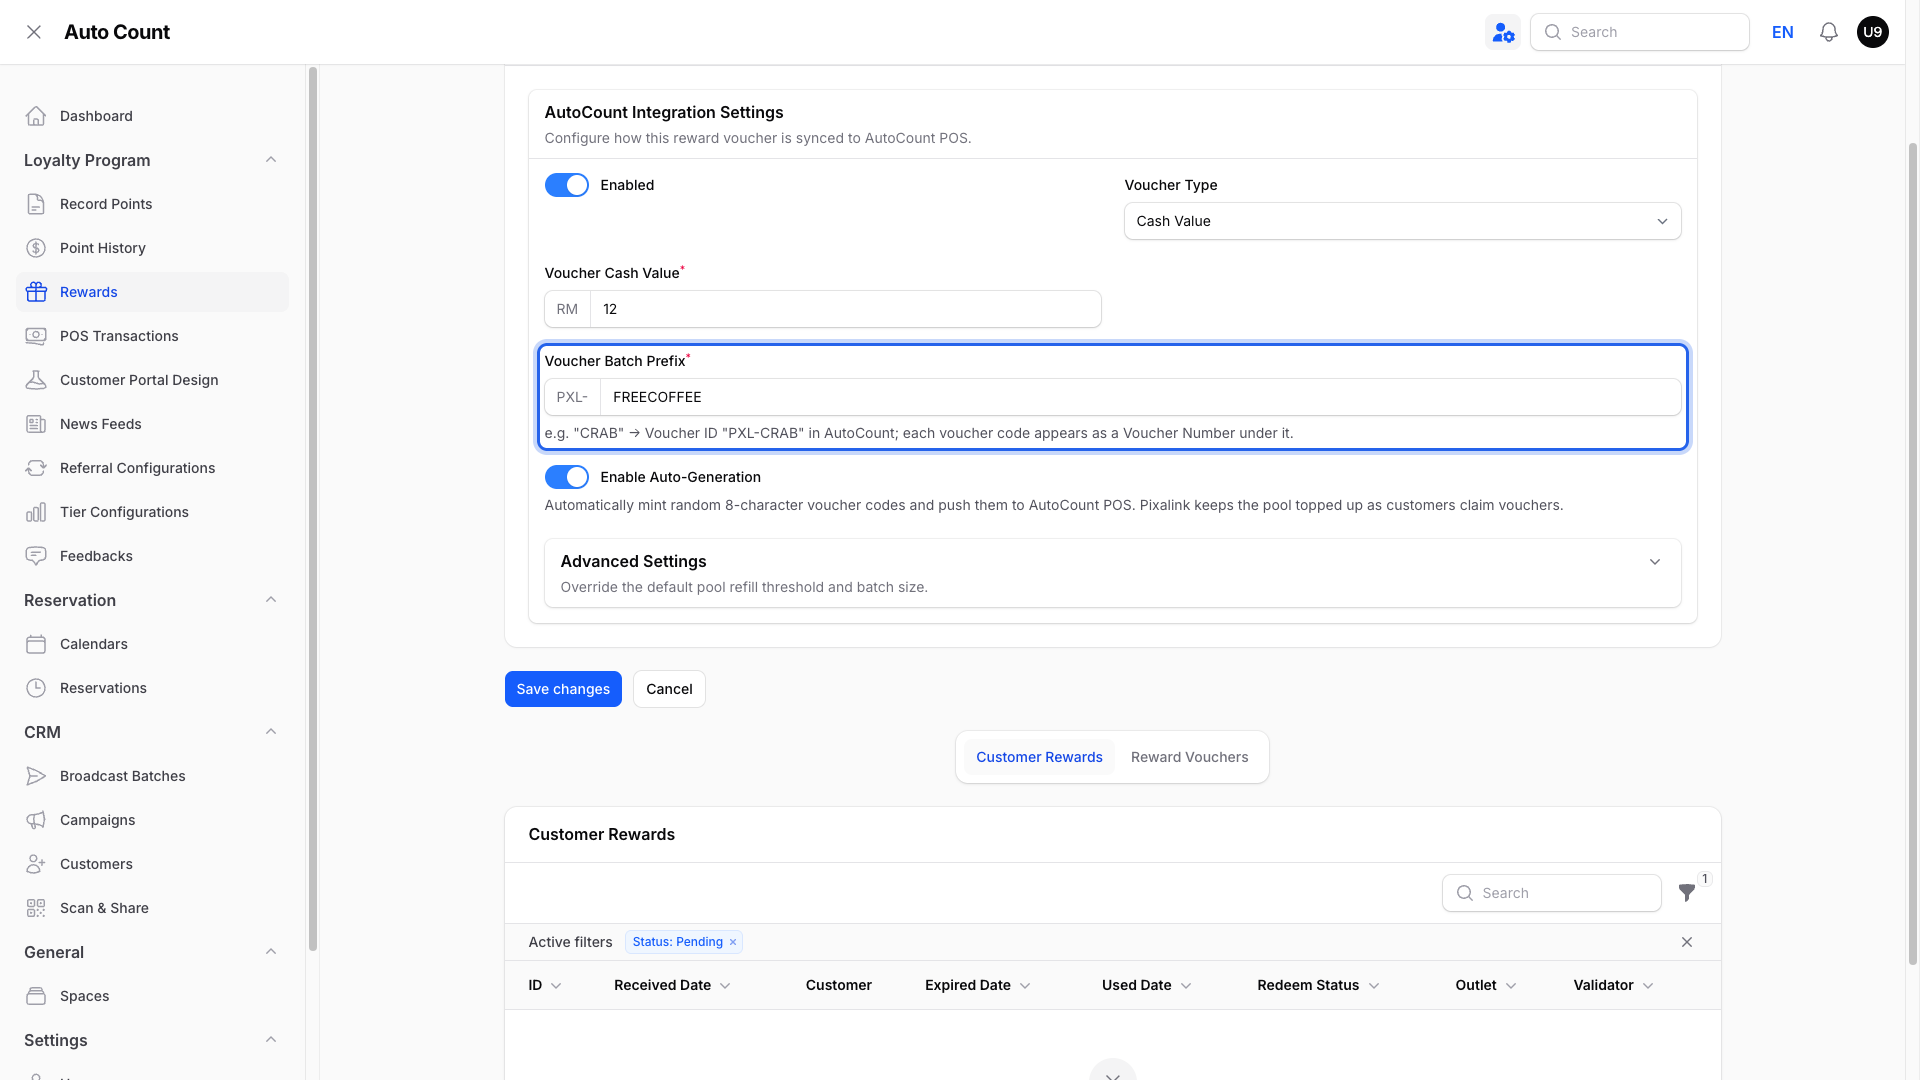
Enter a Voucher Batch Prefix. This is a short name for this reward's codes, like FREECOFFEE. Pixalink adds it after PXL- so AutoCount can tell your batches apart.
-
Leave Enable Auto-Generation switched on so Pixalink makes and tops up the codes for you.
-
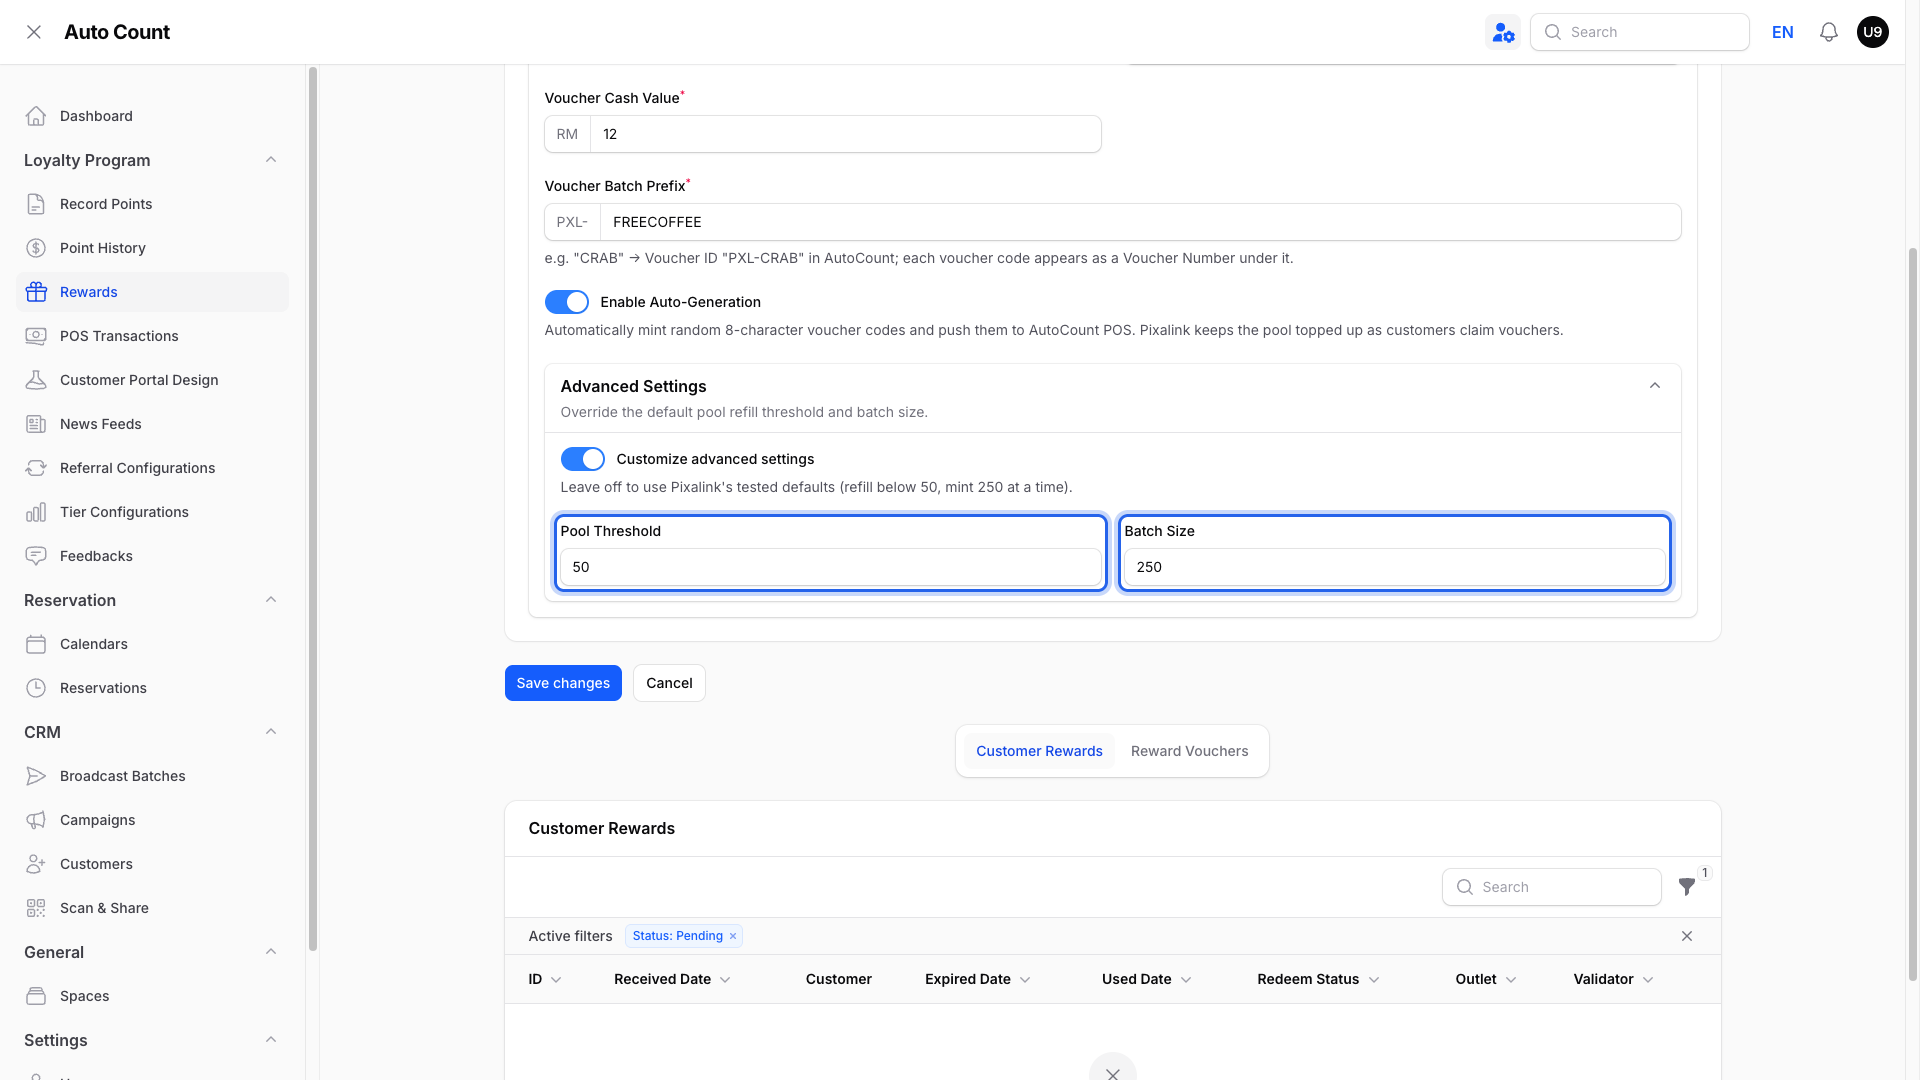
To change the refill settings, open Advanced Settings and switch on Customize advanced settings. Otherwise, skip this step.
-
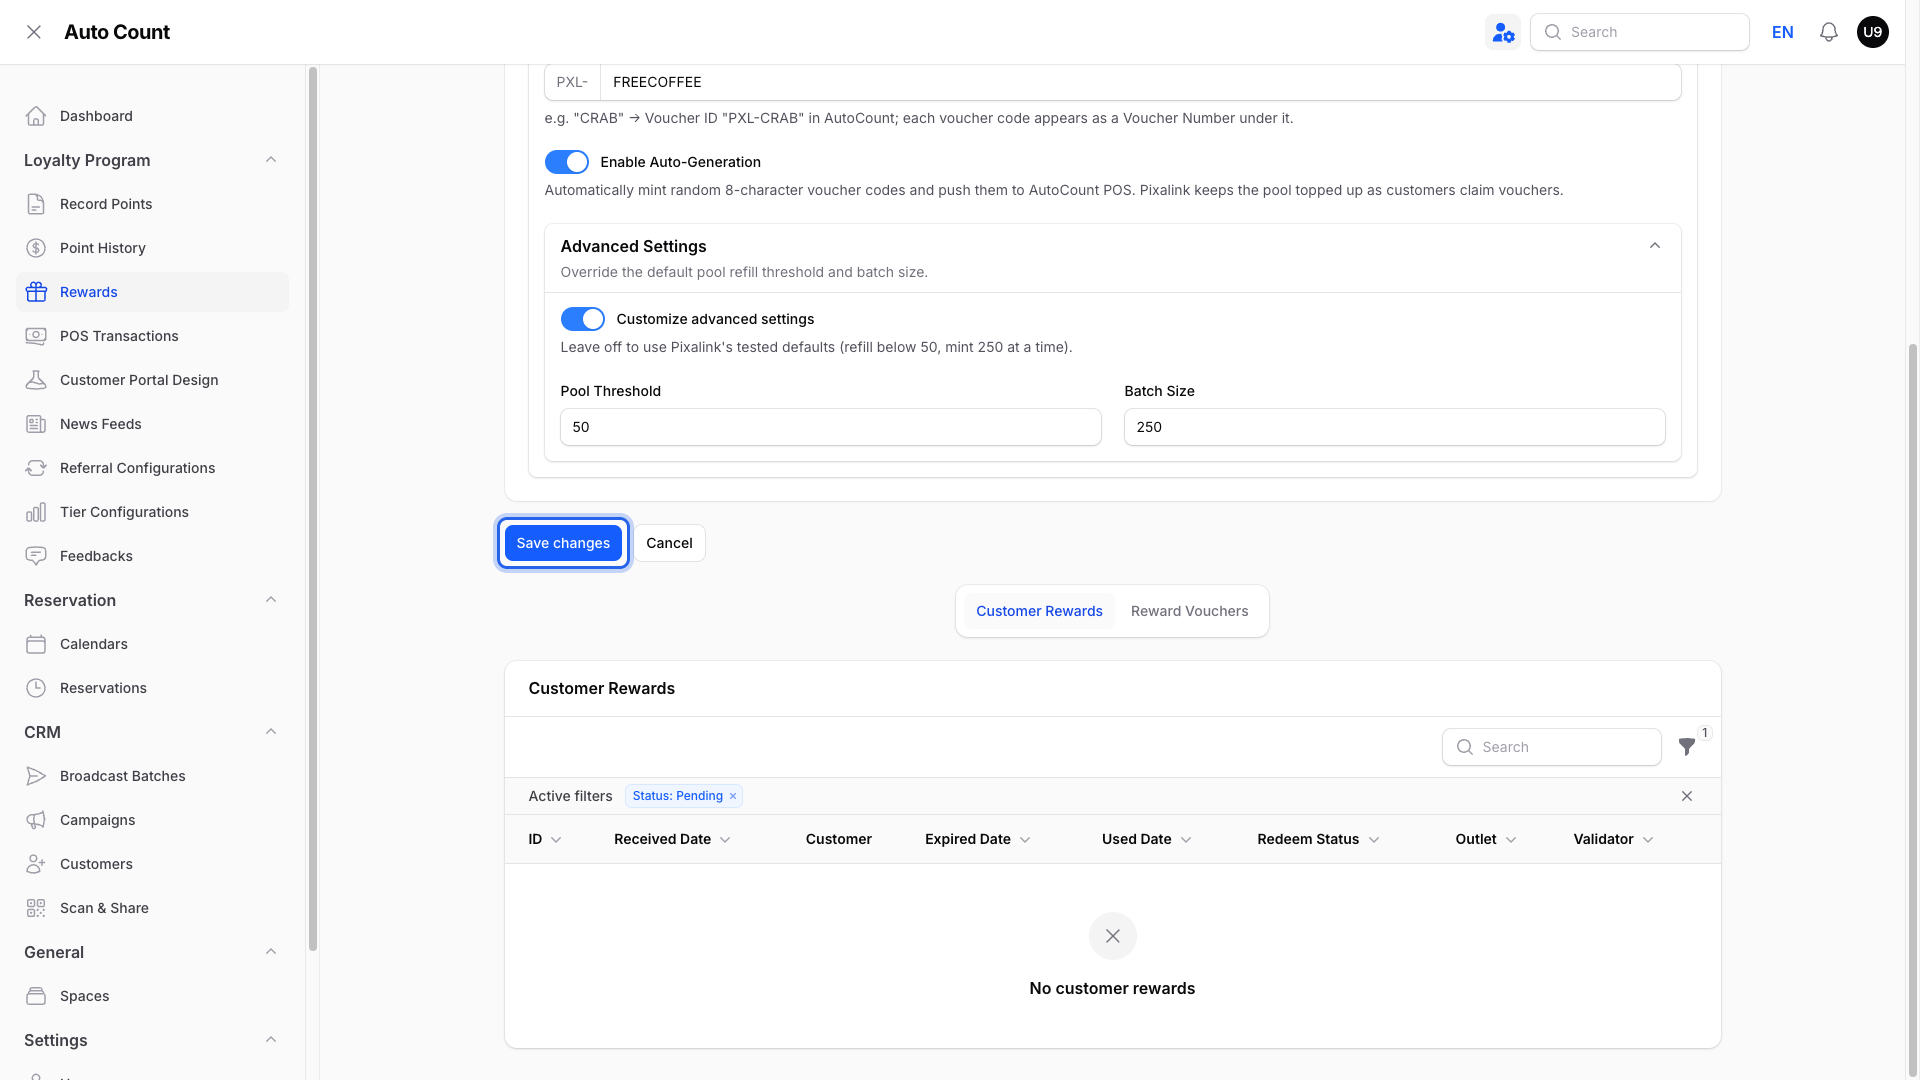
Click Save changes.
What Your Customers Will See
Your customers see a normal reward. When they claim it, they get a voucher code to show at your counter. The code is already synced, so staff can apply it straight away.
Good to Know
- Leave Voucher Type on Cash Value, the only choice.
- Give each reward its own prefix. No two rewards in your account can share the same one.
- Keep the prefix short: capital letters, numbers, hyphens, and underscores only, up to 10 characters, so the full Voucher ID stays readable at the AutoCount till.
- Choose the prefix before your first batch: once vouchers are created for the reward, it locks and cannot be changed.
- Each reward becomes one voucher batch in AutoCount, named PXL- plus your prefix.
- With the tested defaults, Pixalink makes 250 codes at a time and tops up before you run low.
Need Help?
Our support team is happy to help you set up your first voucher pool.