
How to Reward Members for Social Media Review Screenshots
How to Reward Members for Social Media Review Screenshots
What Is This?
A custom form lets members send you a photo as proof of something they did. Add an approval step and you can check each photo yourself before releasing points. Happy customers turn into public reviews, and nobody earns points for a review they never posted.
Real-Life Example
Aishah runs a cafe in Bangsar. She offered 200 points to any member who reviewed her on Google. Members post the review, screenshot it, and send it through her form. Aishah opens each one, looks at the photo, and approves the good ones. Points land in the member's account straight away. One blurry photo got a rejection note instead, so nothing was wasted.
How to Set It Up
-
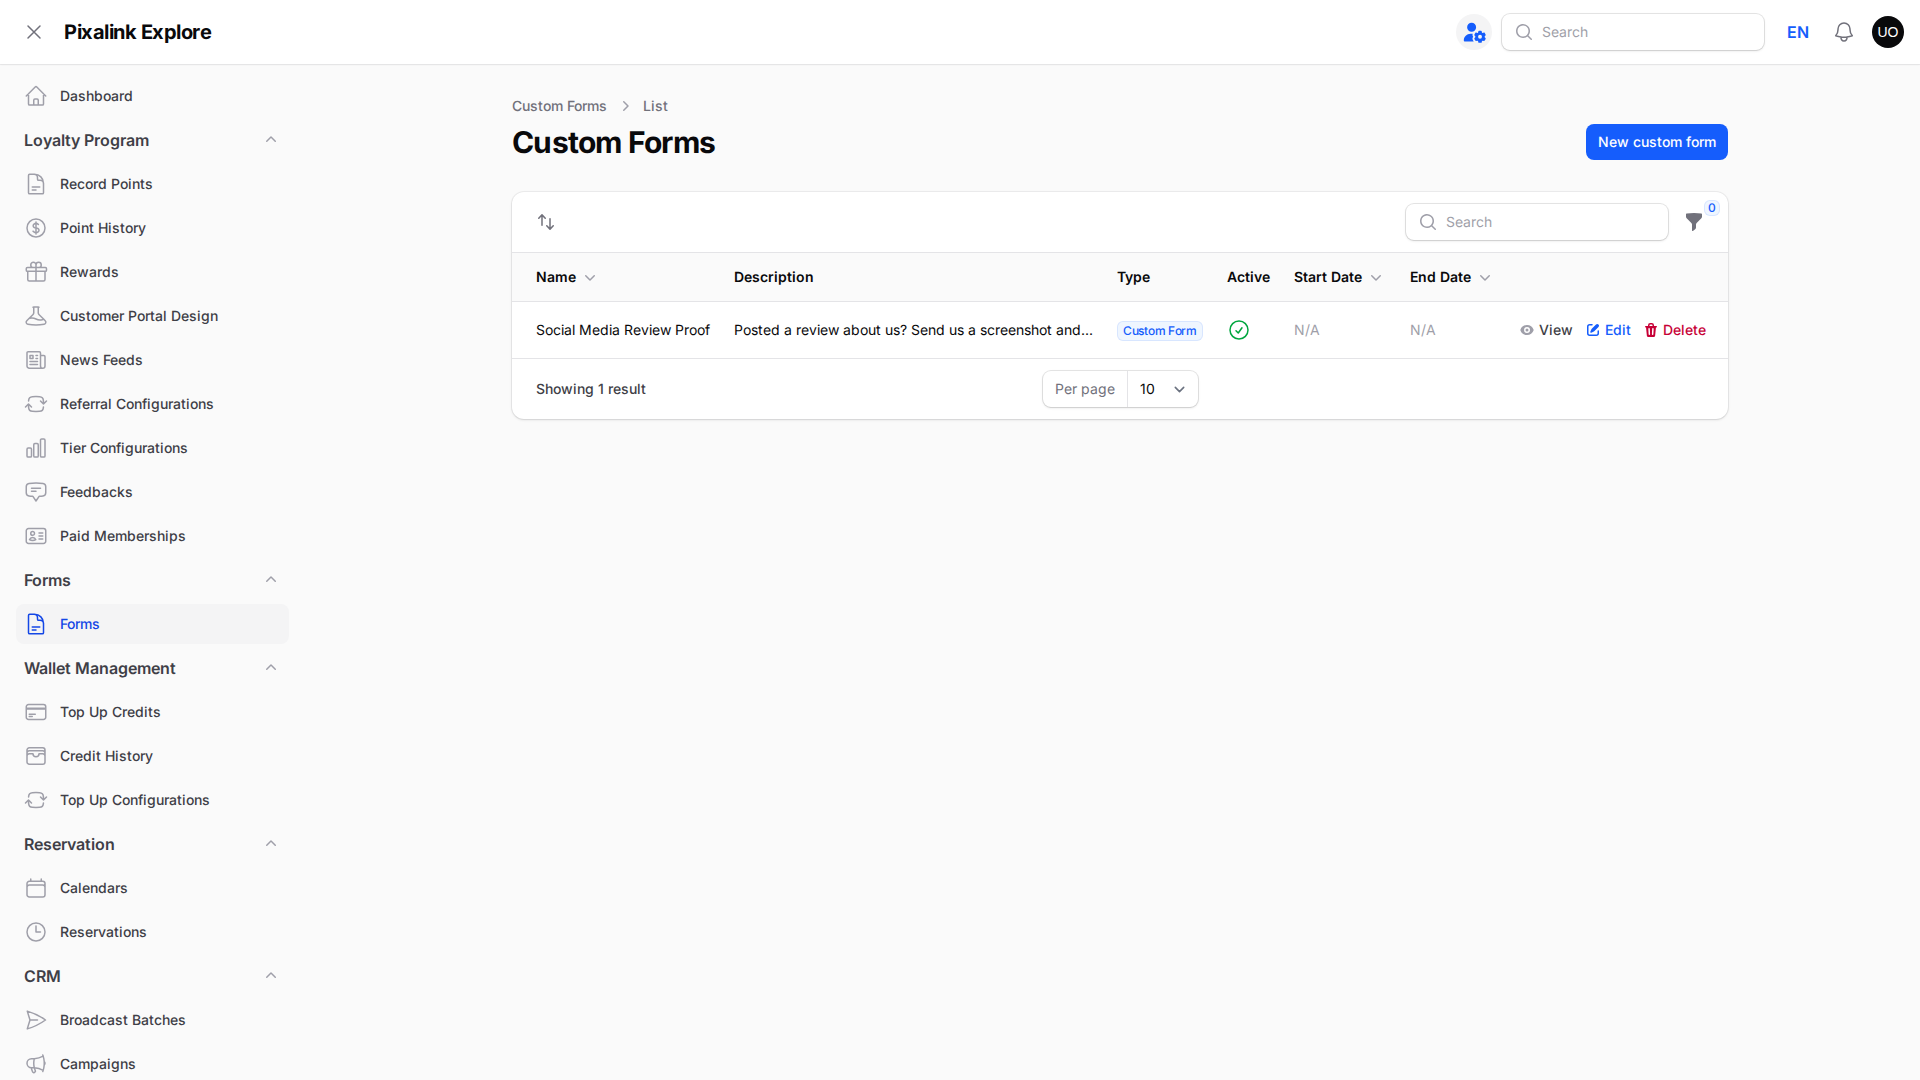
Go to Admin Panel → Forms, then click New custom form.
-
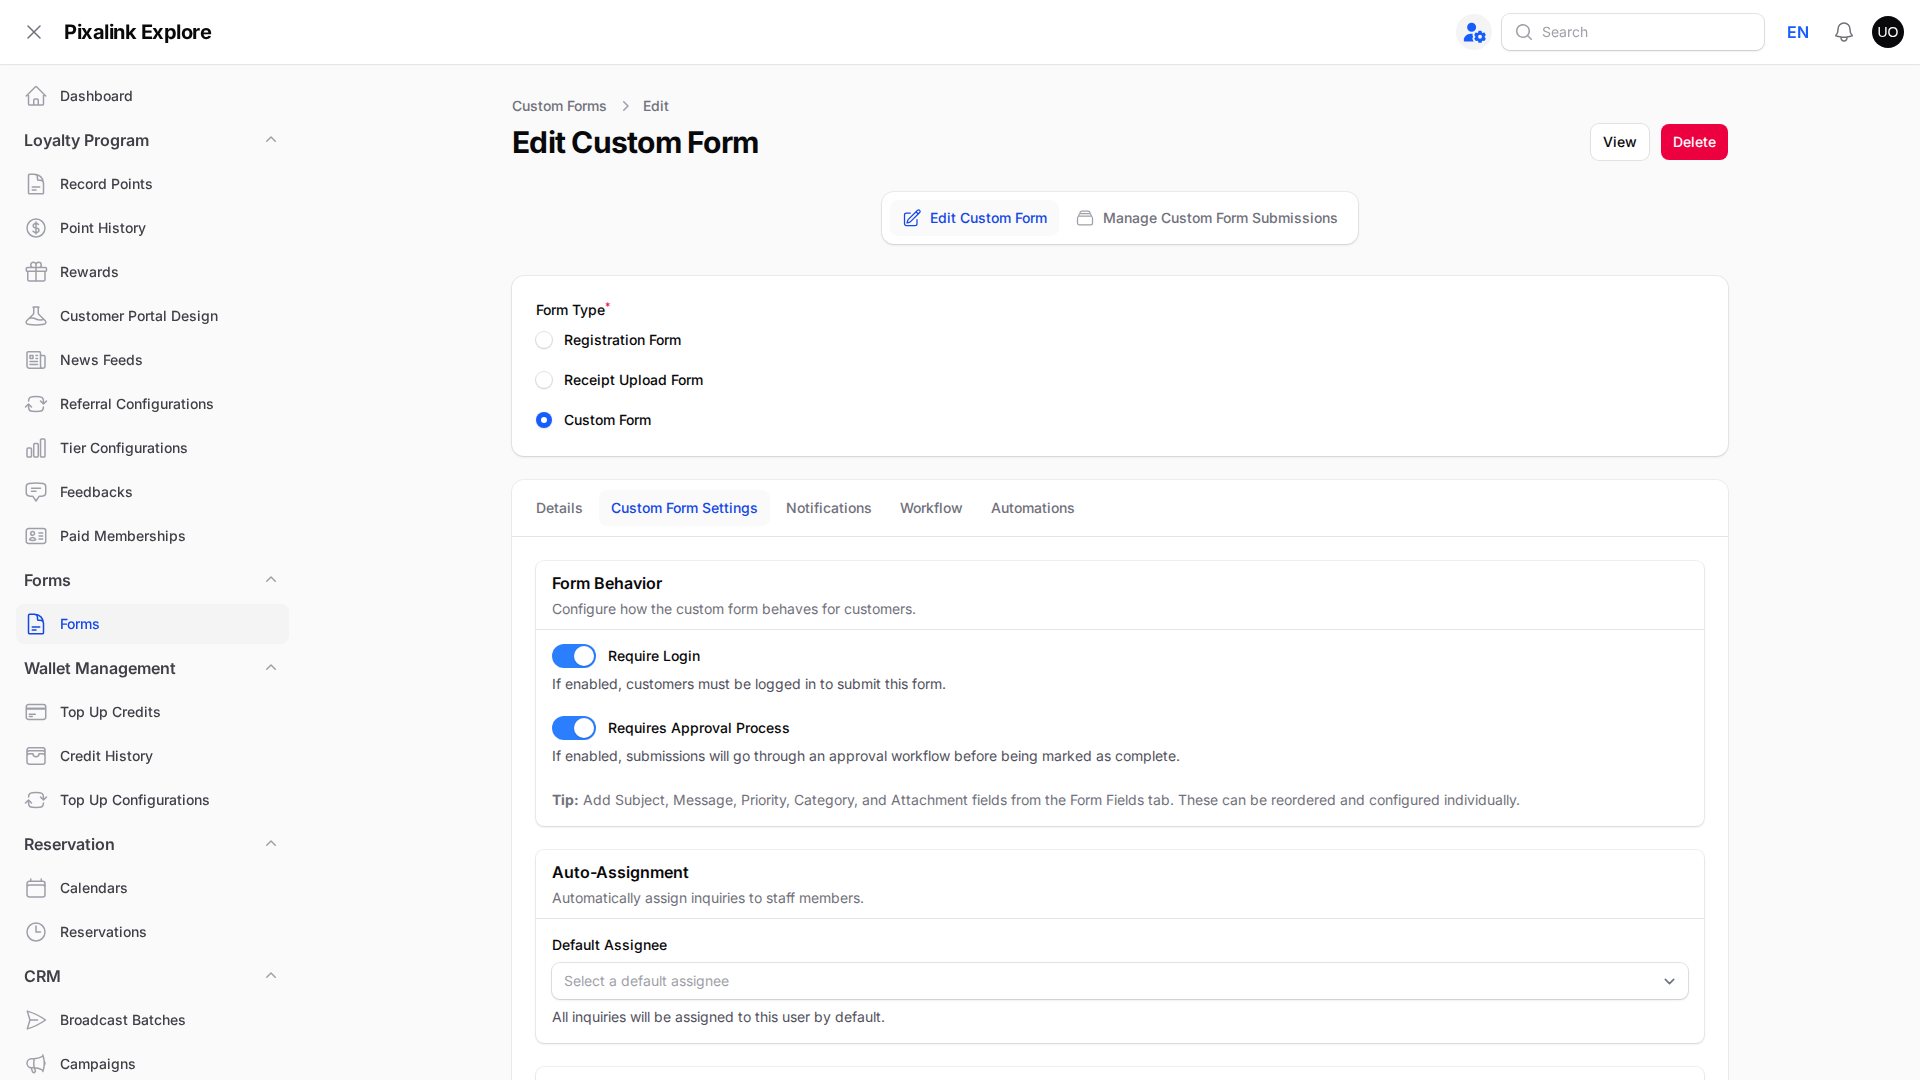
Pick Custom Form as the form type, name it, and keep Require Login on so every submission is tied to a member.
-
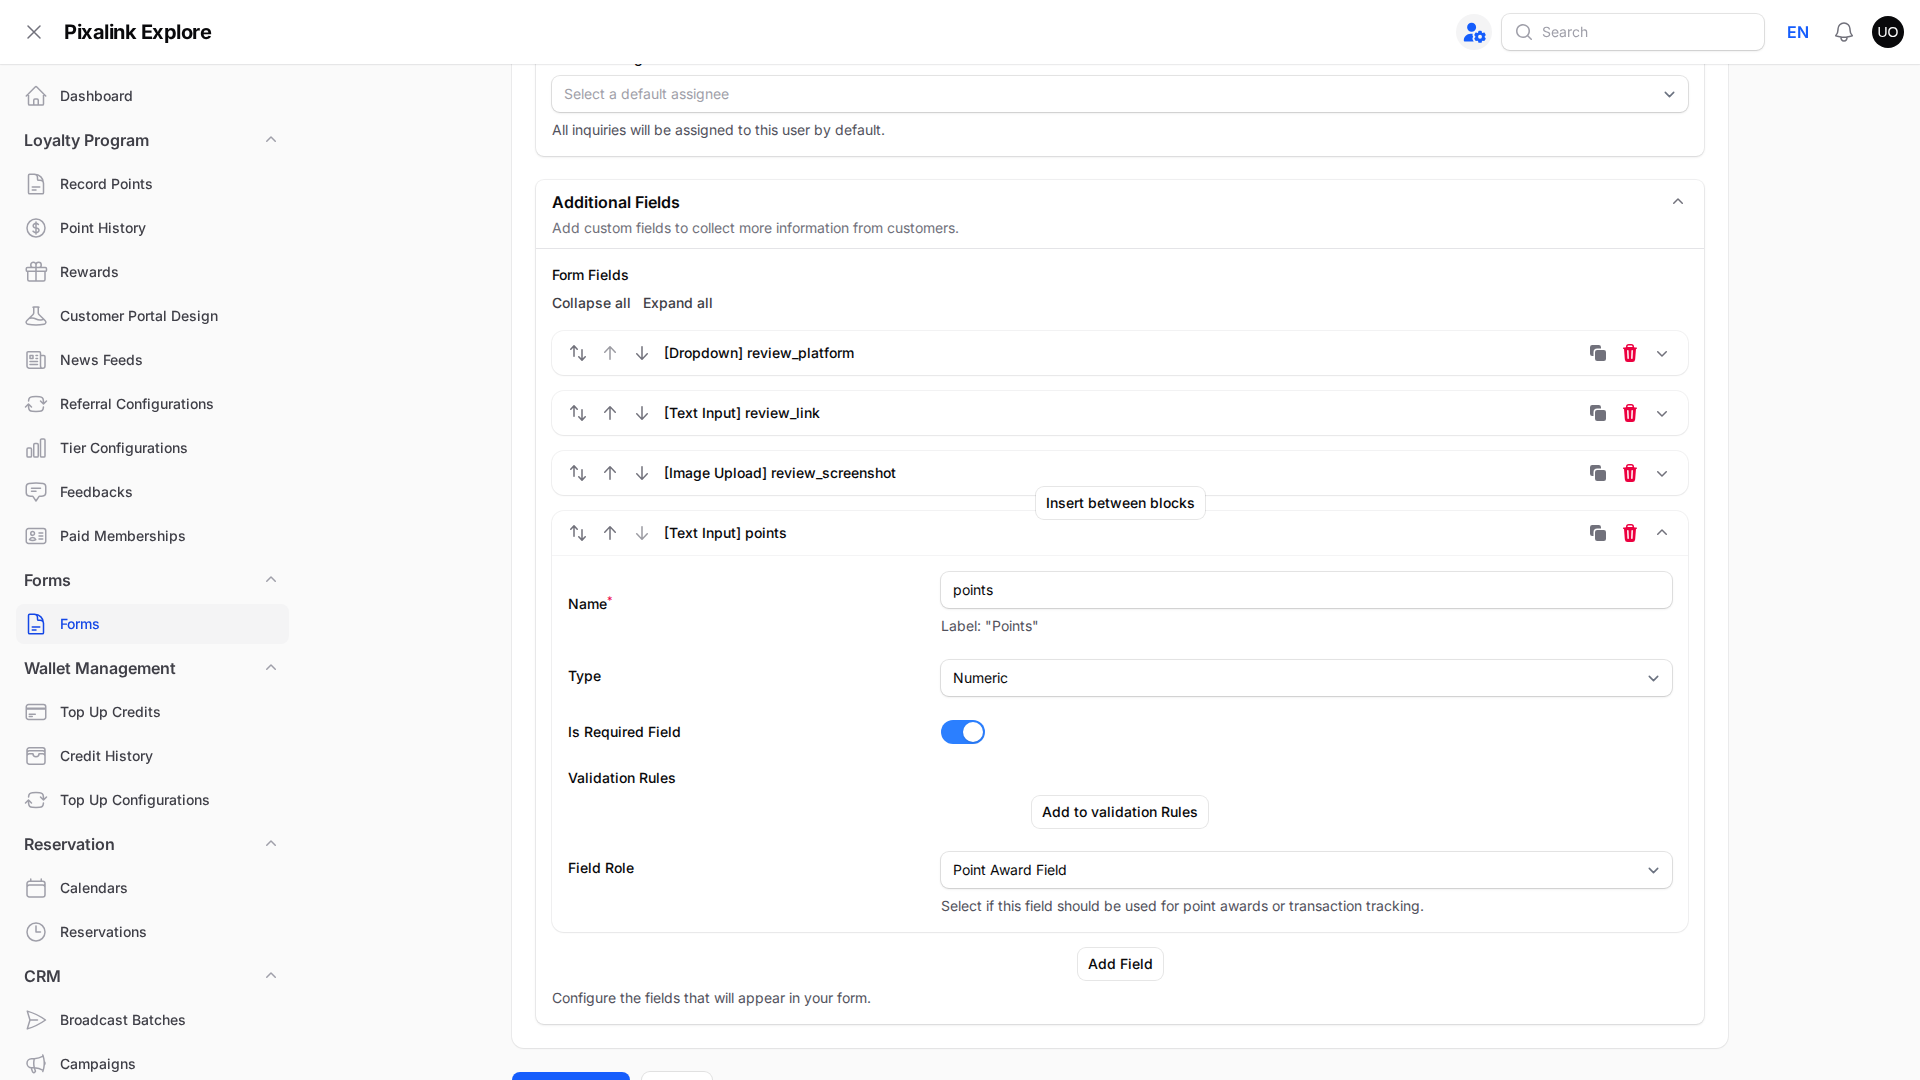
Open Additional Fields and add a dropdown for the platform, a text field for the review link, and a numeric field named points. Set the points field Field Role to Point Award Field.
-
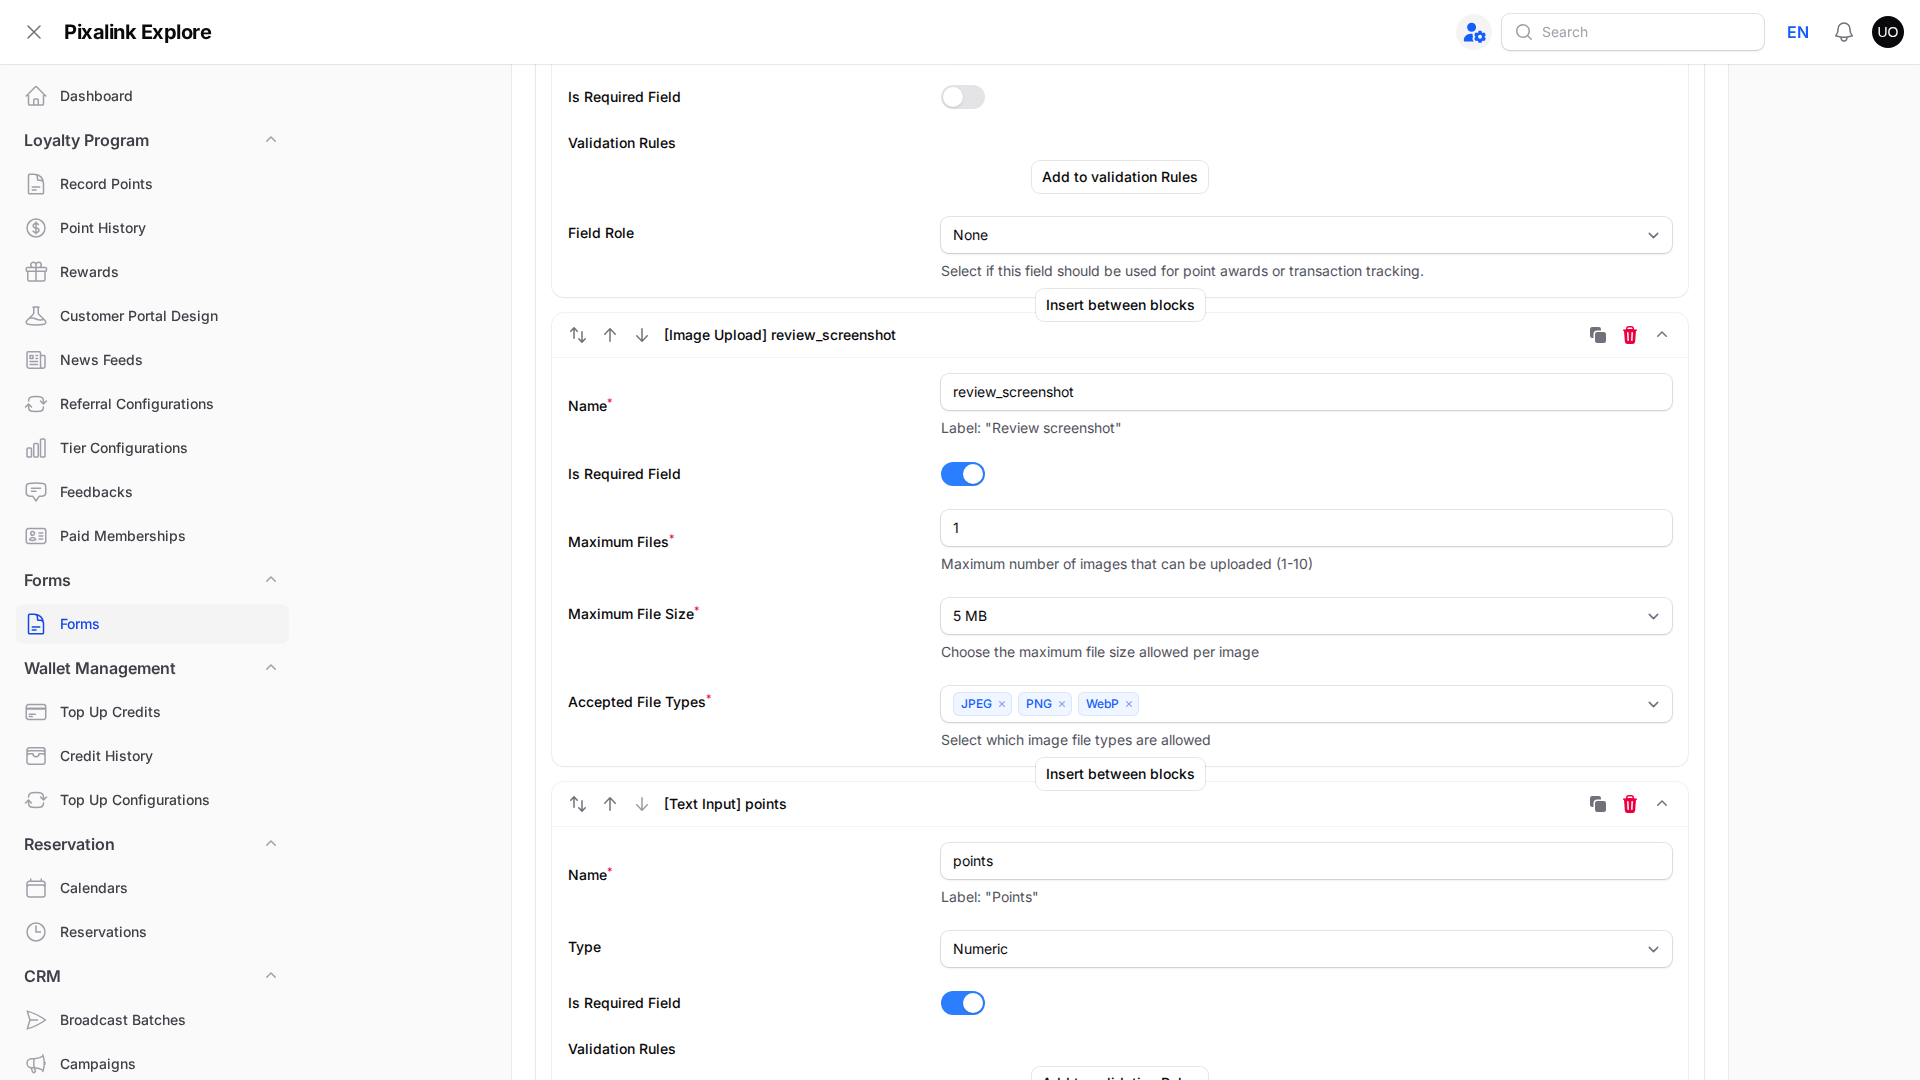
Add an [Image Upload] field for the screenshot. Set Maximum Files to 1 and Maximum File Size to 5 MB.
-
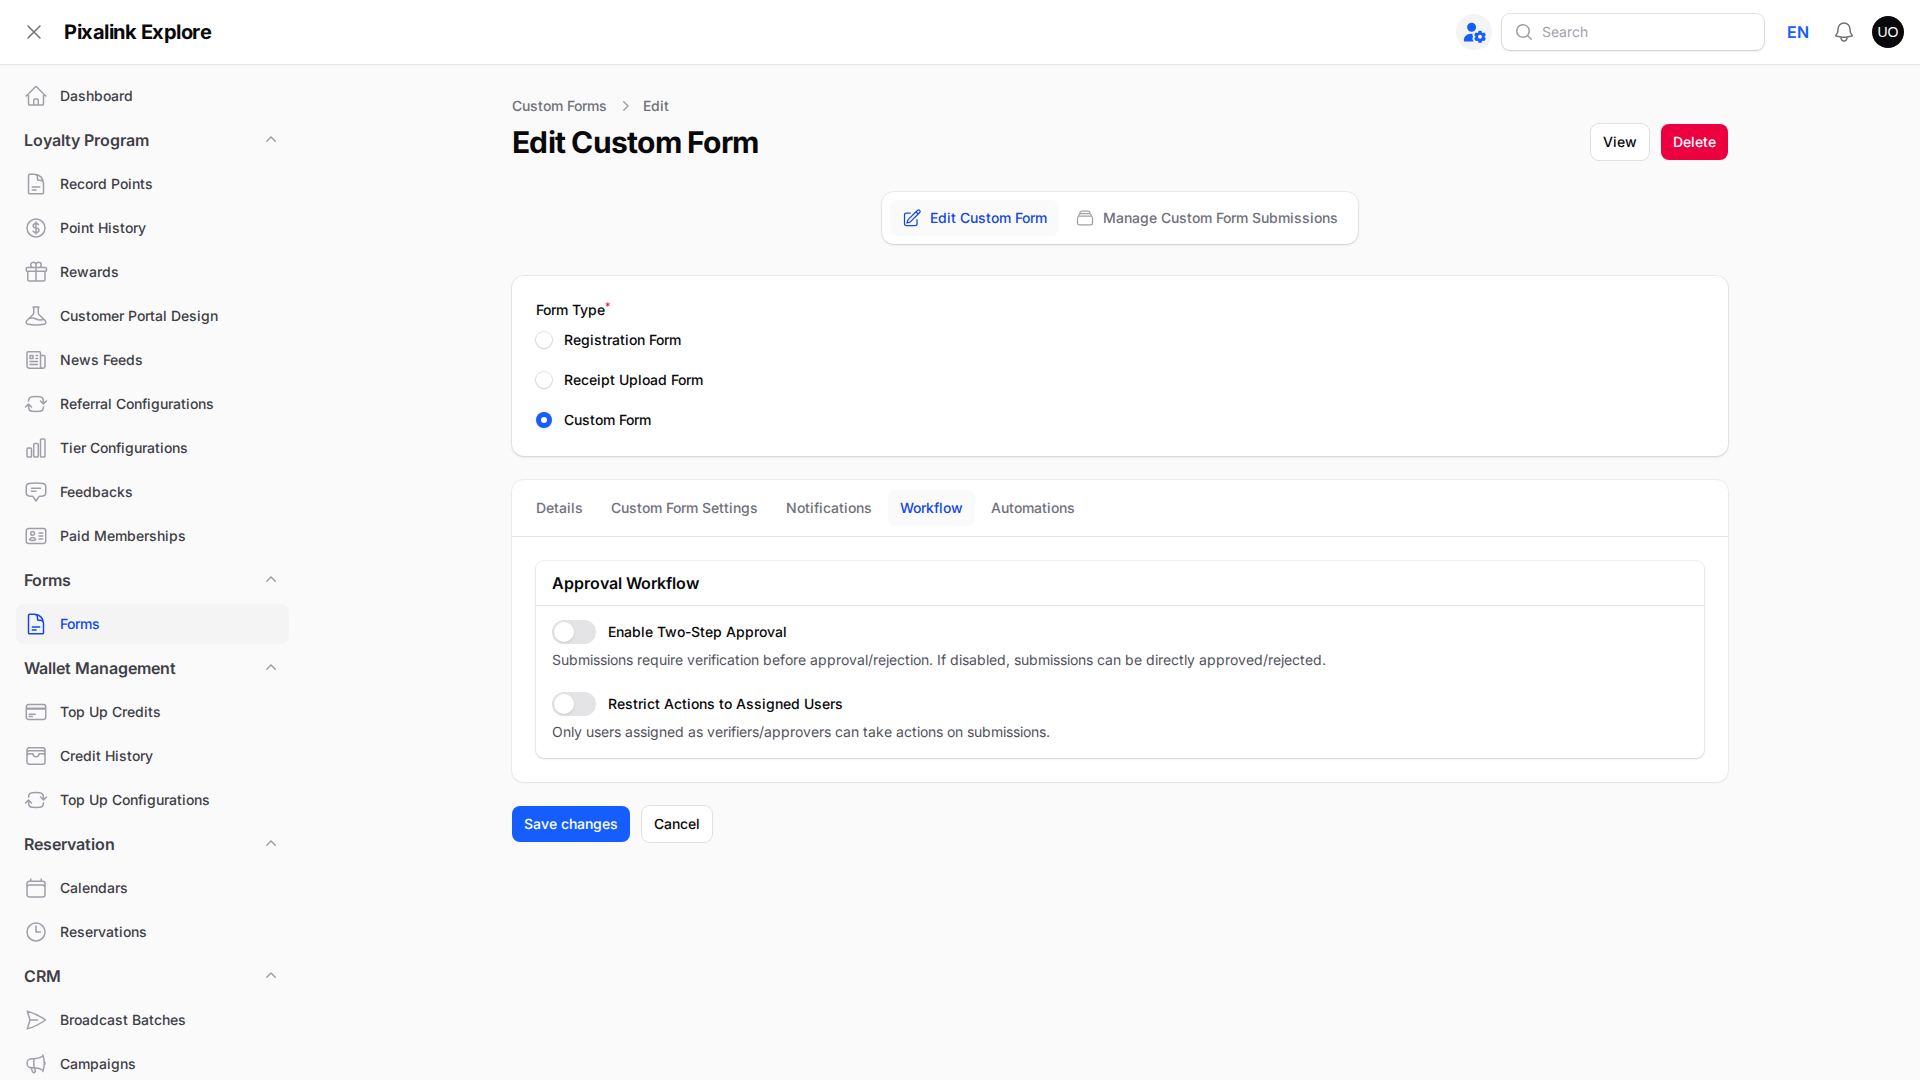
Open the Workflow tab and decide whether one person checks and another approves.
-
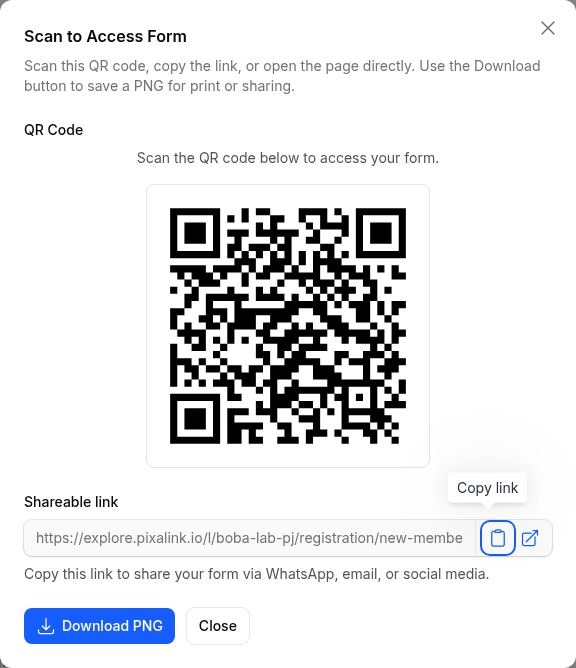
Save the form, open it, and click Show Form QR Code to get the link and poster code.
-
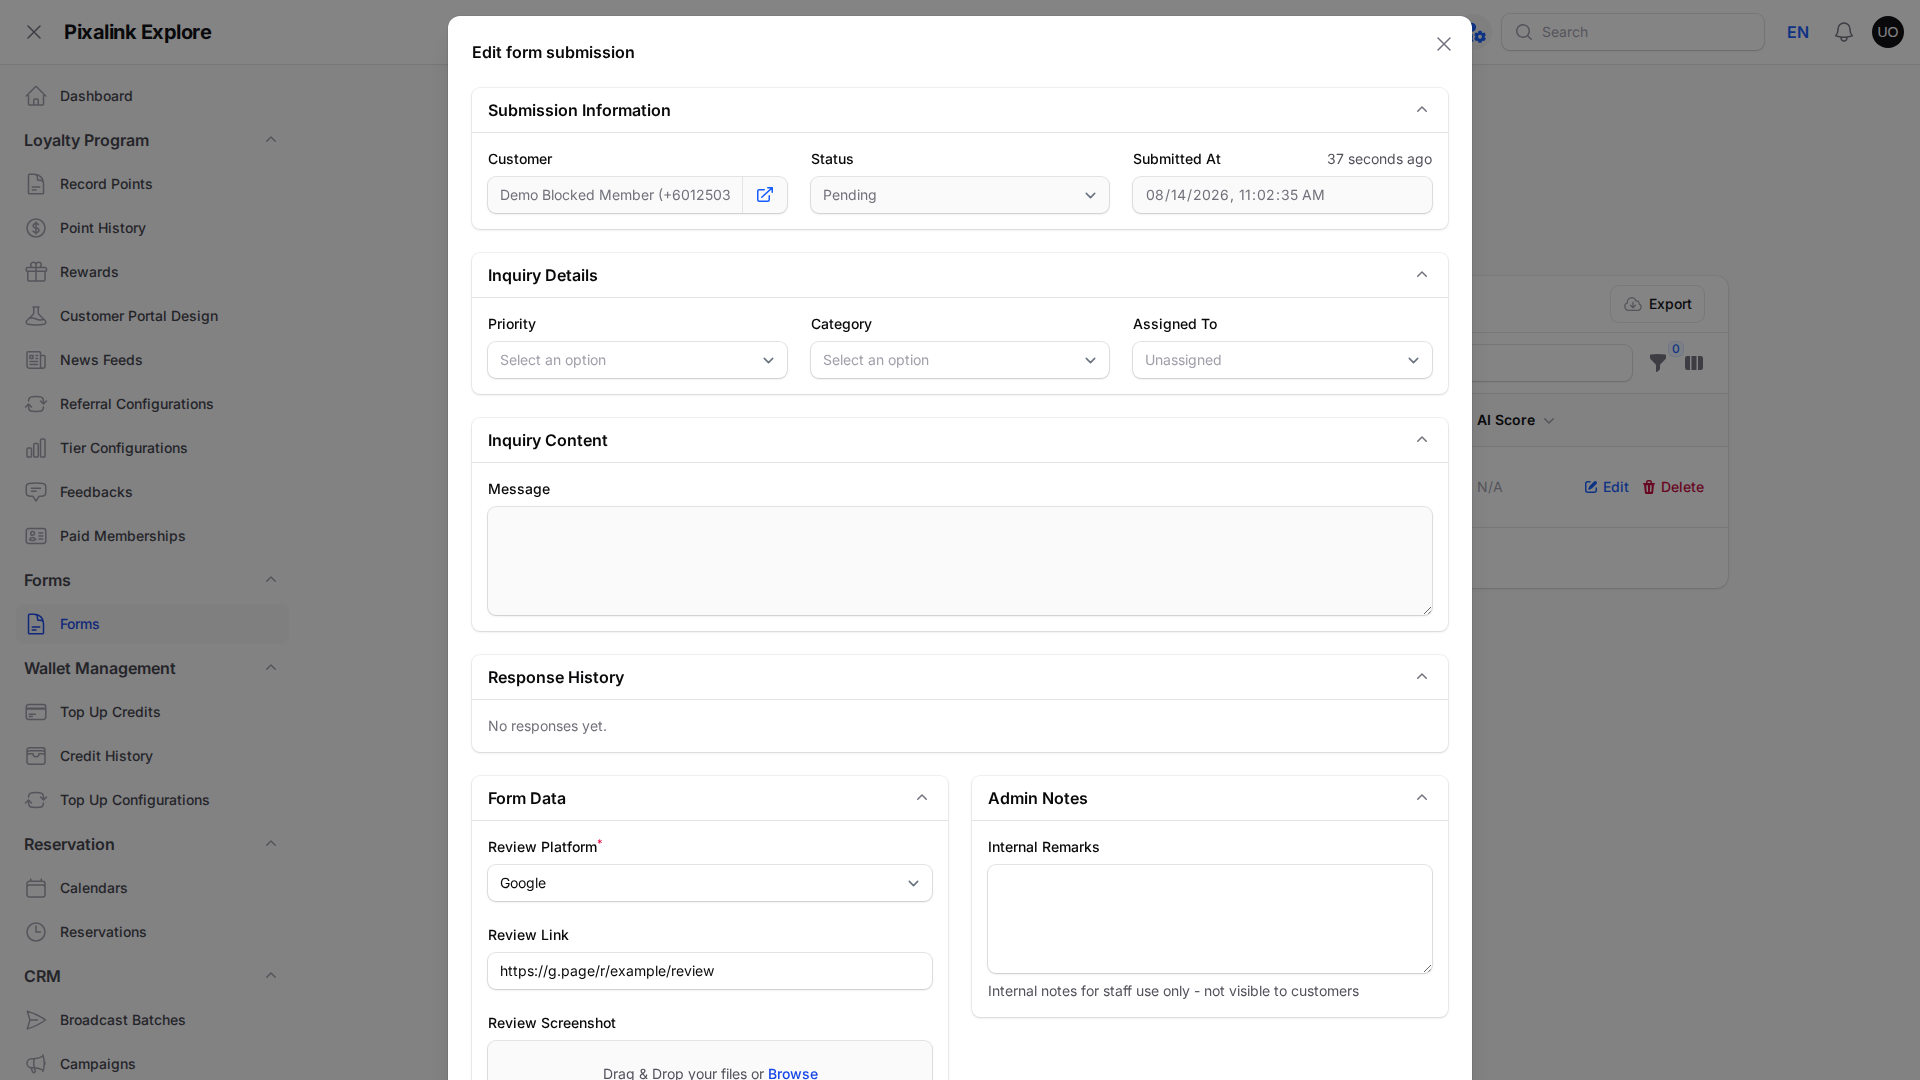
Open Manage Custom Form Submissions, click a row, check the screenshot, correct the points value, then click Approve & Award Points.
What Your Customers Will See
Members open the link and sign in. They pick where they posted, paste the review link, and attach the screenshot. Nothing happens until you approve it. Once you do, the points show up in their points balance in the customer portal.
Good to Know
Warning
Members type the points value themselves, so always check it before you approve.
- Rejecting asks you for a reason, and the member can be told why.
- A News Feed post cannot point at a form directly. Pick External Link and use the Generate link helper to build the address.
- To give points outside this form, use Record Points instead.
Giving a Voucher Instead of Points
You can give a voucher, such as RM5 off, instead of points. There is no need to hand it out one by one.
- Create the voucher in Rewards with Points to Redeem set to 0.
- Open your form and go to the Automations tab.
- Under Rewards Assignment, pick the voucher and set the quantity.
The voucher lands in the member's account as soon as they send the form, before you check the screenshot. Each member gets it only once. If you want to check every screenshot first, use points with Approve & Award Points instead.
Need Help?
Reach out to our support team and we will help you set up your form.