
How to Group Your Rewards into Categories
How to Group Your Rewards into Categories
What Is This?
Reward categories let your customers browse your rewards by type instead of scrolling one long list. You group rewards under names you choose, like Drinks or Birthday Treats. Customers tap a category and see only those rewards, so the thing they want is easier to find. A shorter hunt usually means more rewards claimed, and a claimed reward is a customer walking back through your door.
Real-Life Example
Aishah runs Boba Lab, a bubble tea shop in Petaling Jaya. Over two years her rewards list grew to twenty items. Regulars kept telling her they gave up before finding the free drink voucher. Aishah created three categories: Drinks, Snacks and Birthday Treats. She then opened each reward and put it in the right group. Now a customer taps Drinks and sees four rewards instead of twenty mixed ones. Redemptions climbed within the first month, because people stopped scrolling and started claiming.
Video Walkthrough
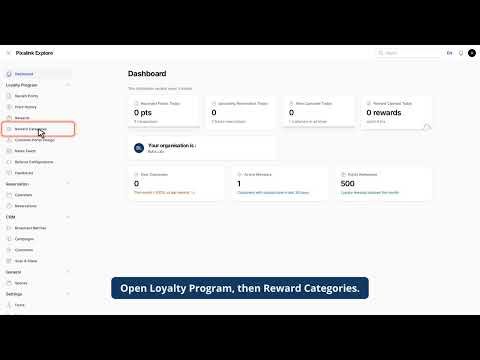
How to Set It Up
-
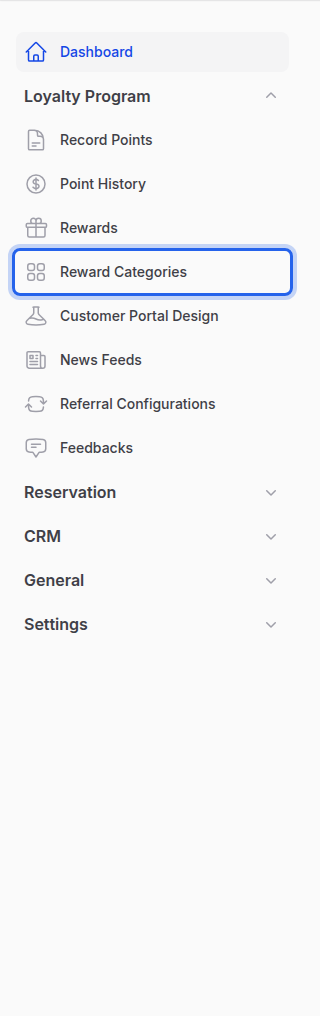
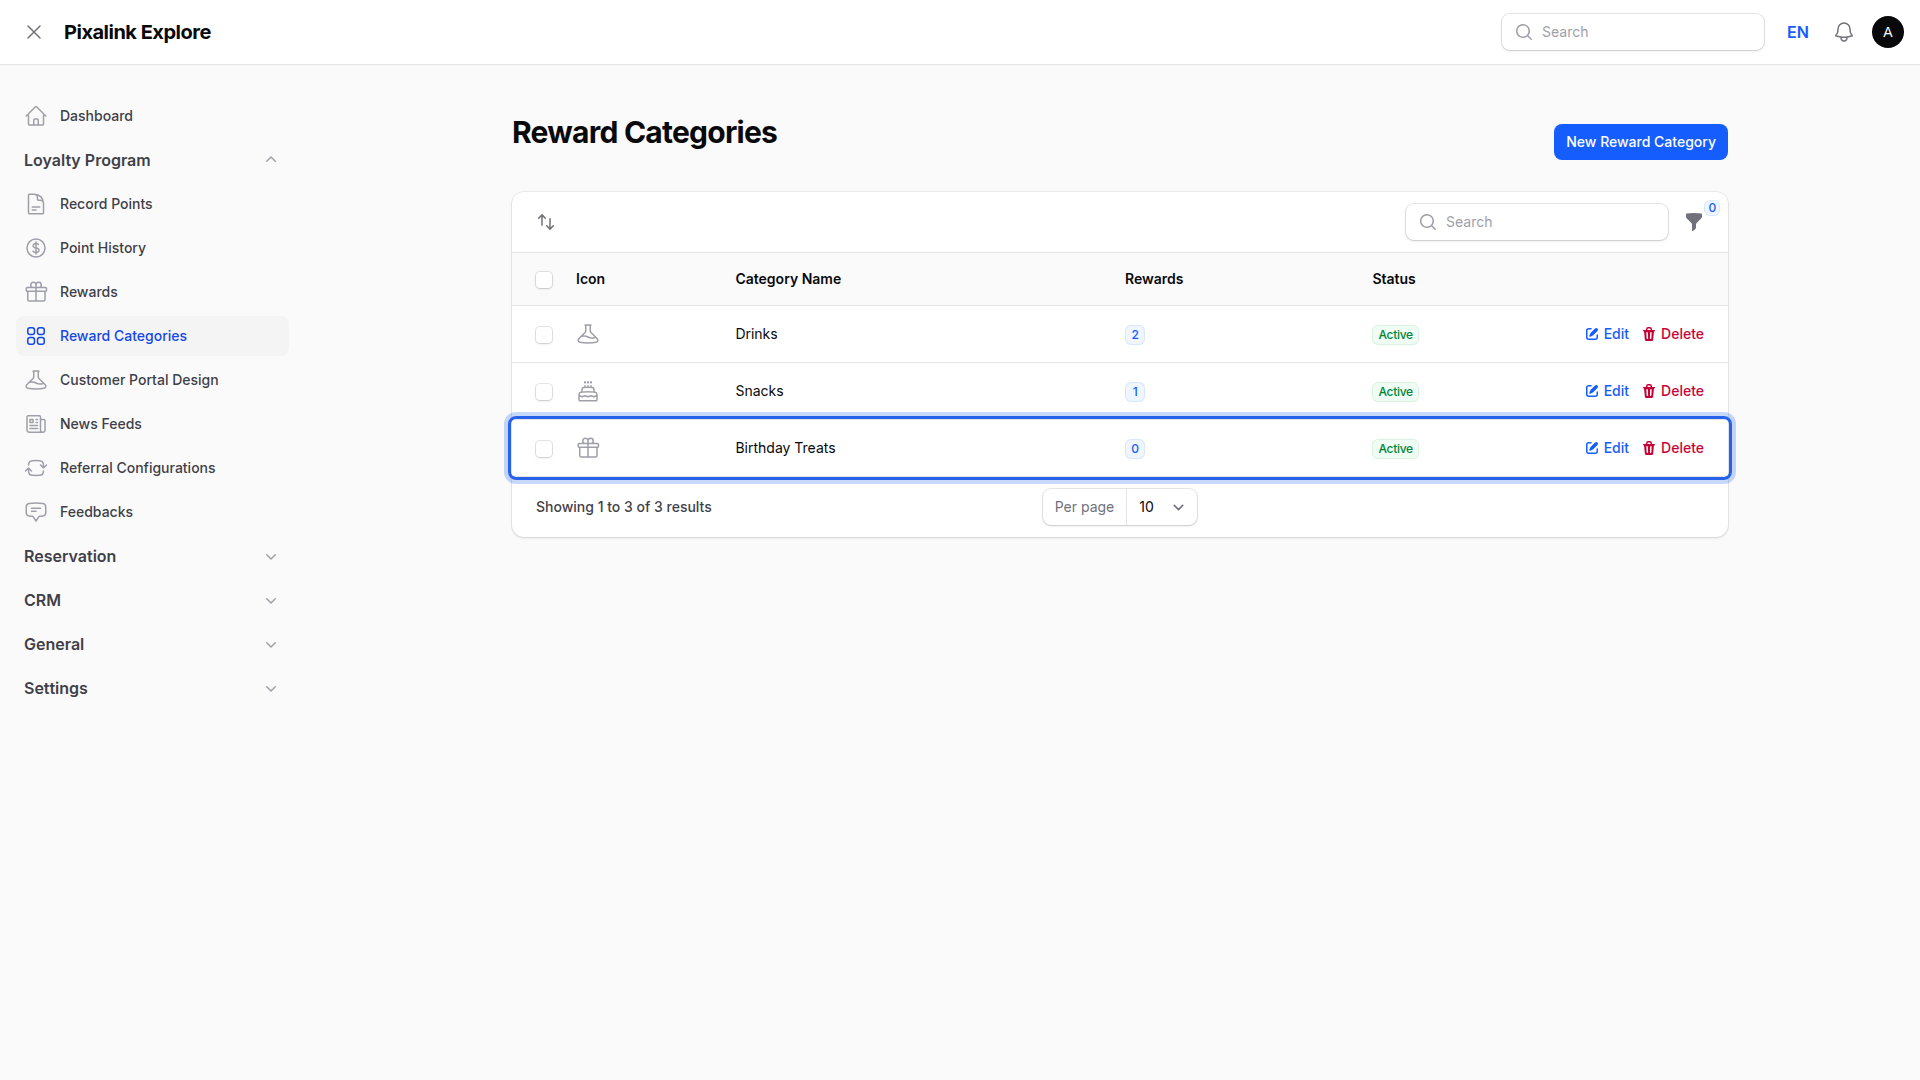
Go to Admin Panel → Loyalty Program → Reward Categories.
-
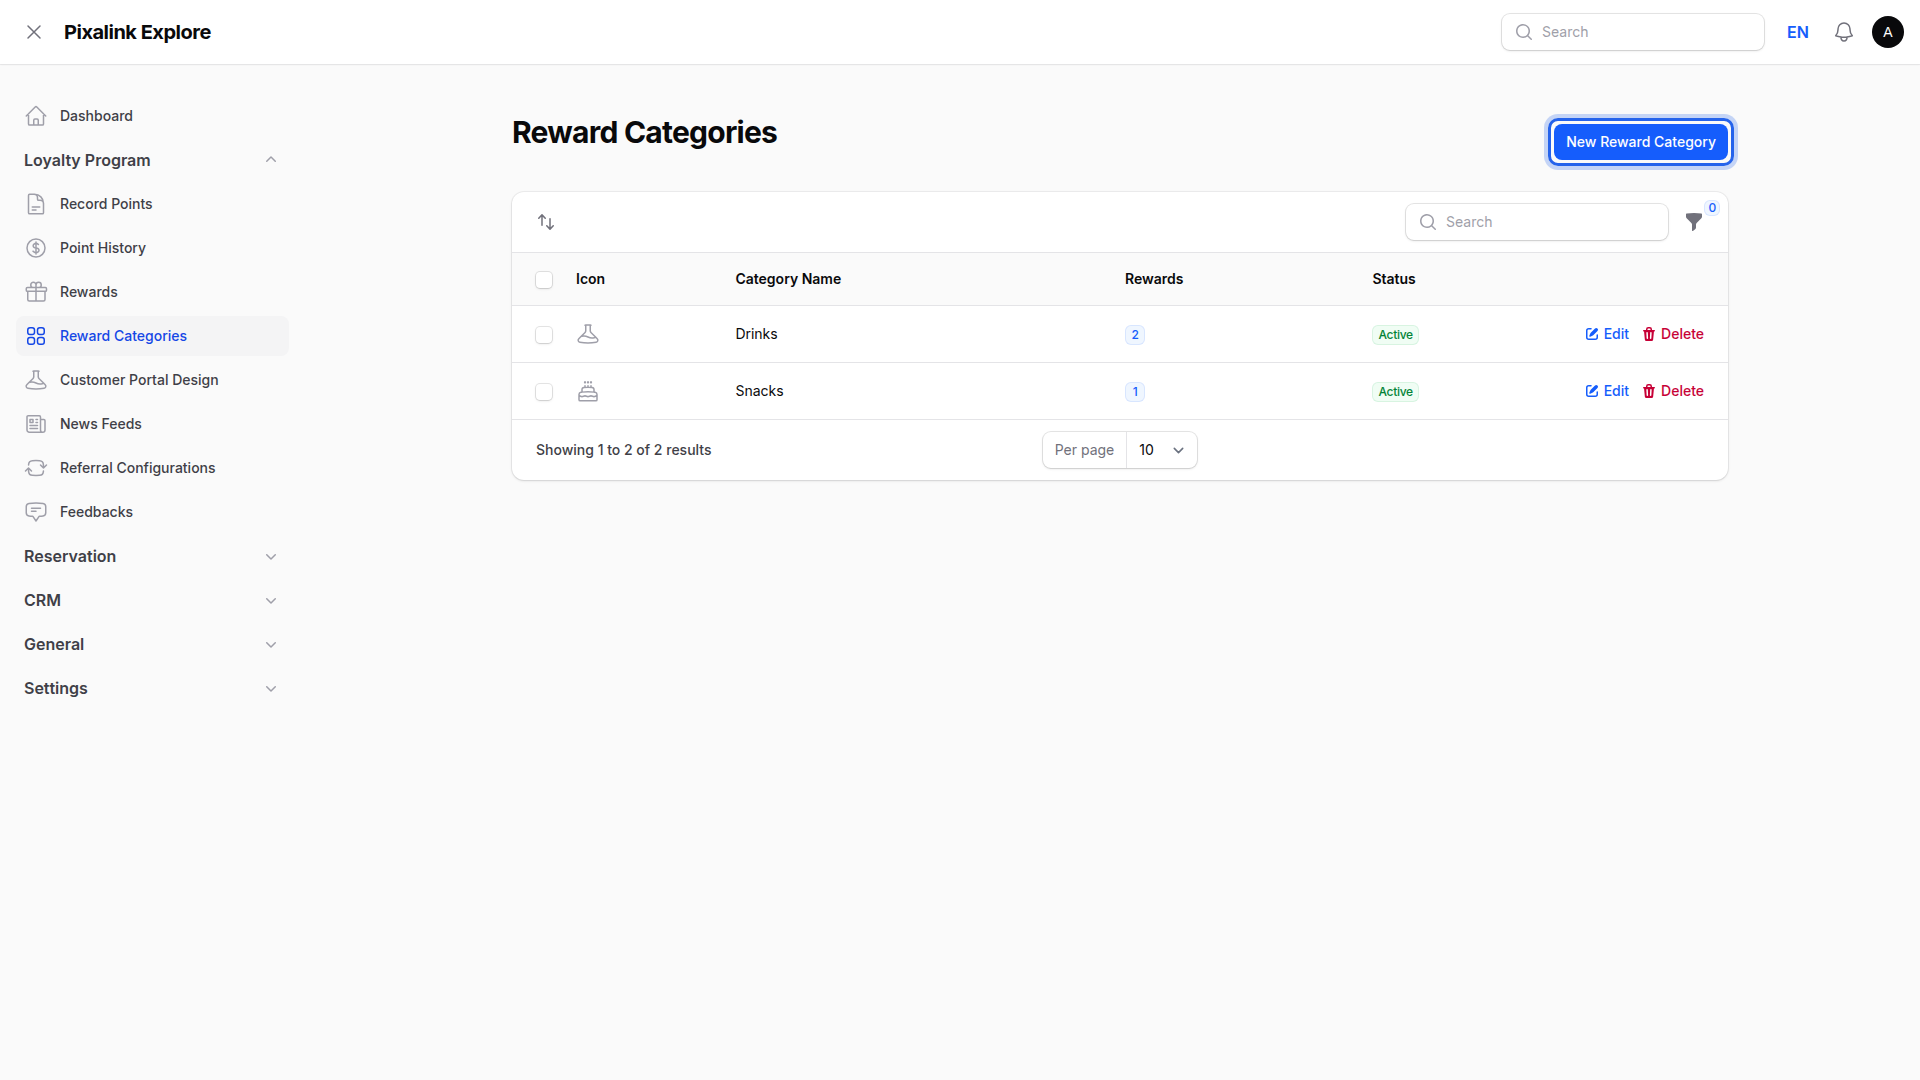
Click New Reward Category at the top right.
-
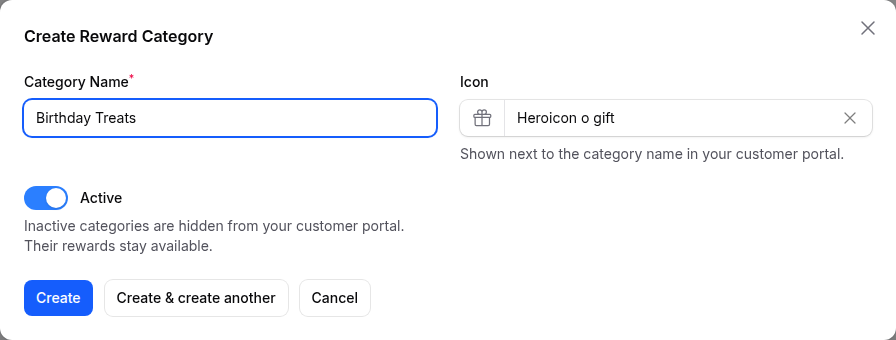
Type a Category Name, pick an Icon, and leave Active switched on.
-
Click Create. Your new category joins the list straight away.
-
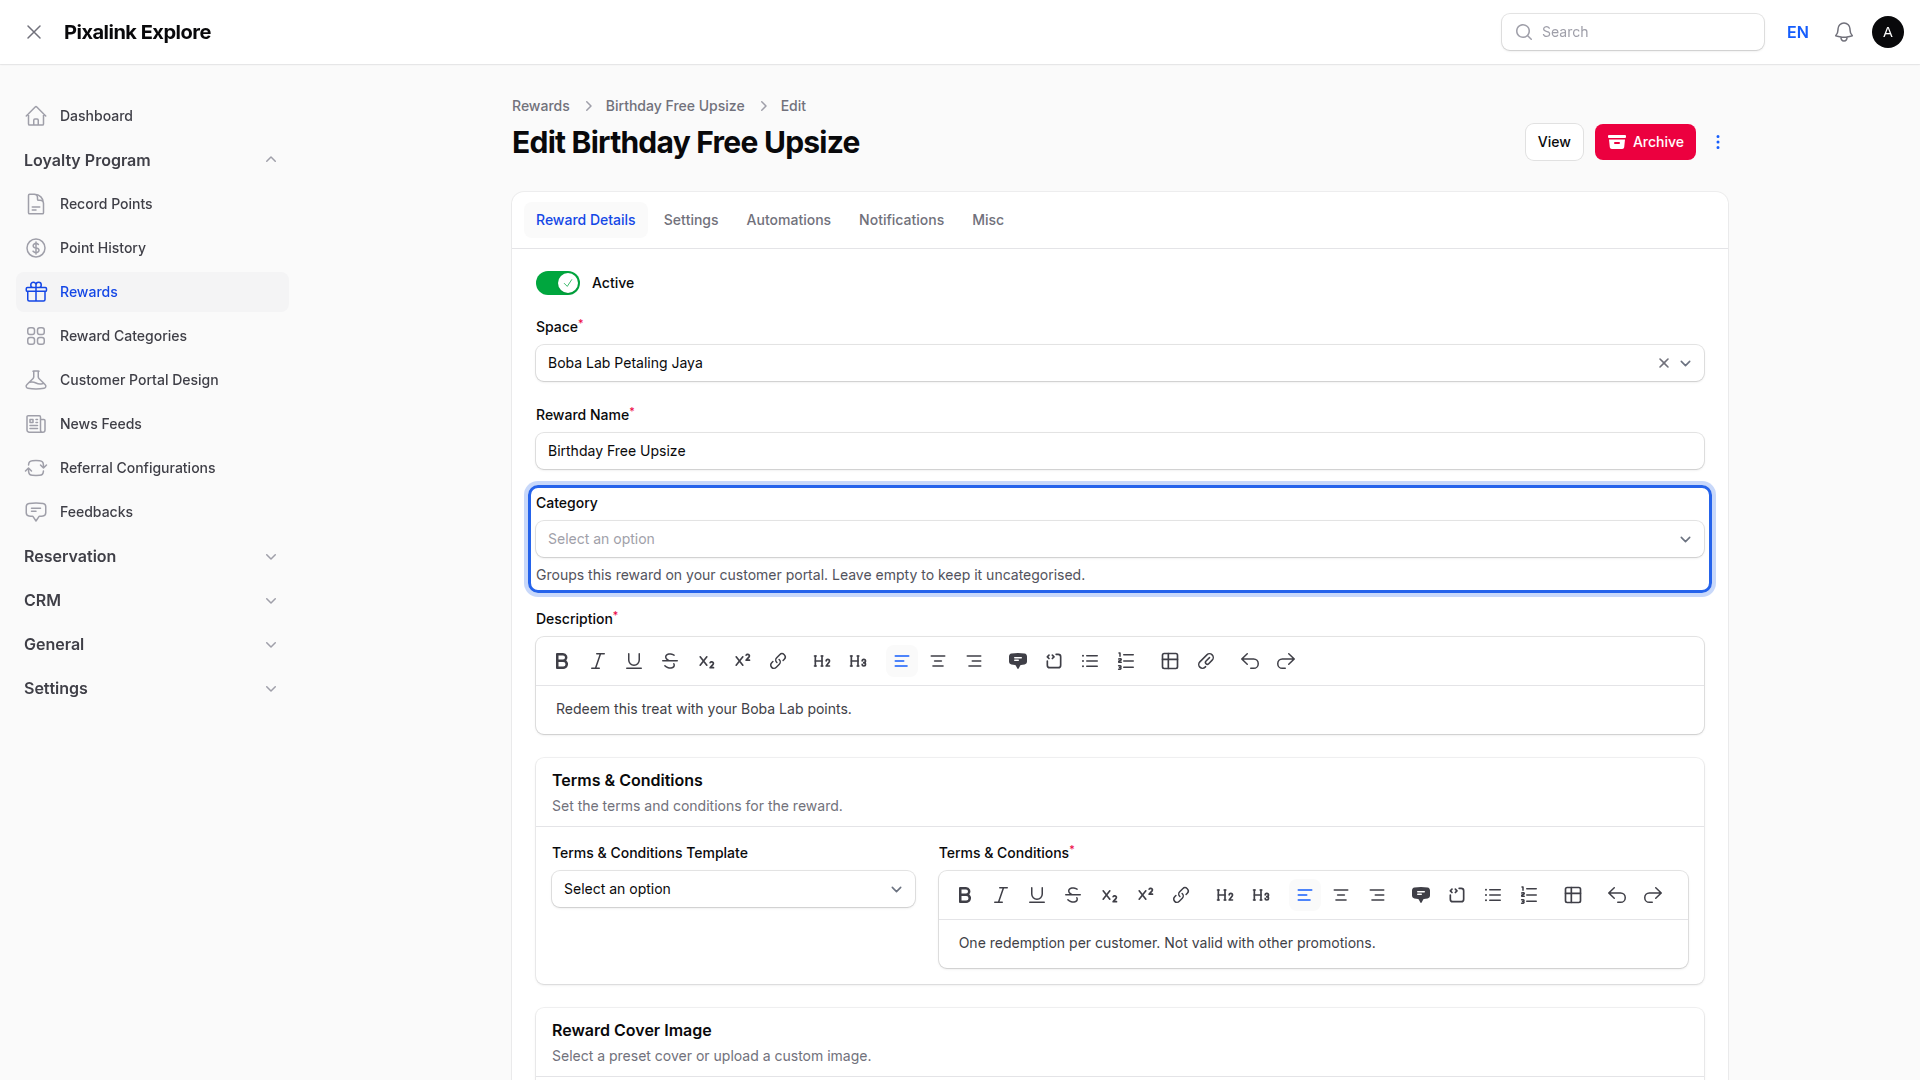
Open a reward and pick your category in the Category field. Leave it empty to keep that reward ungrouped.
-
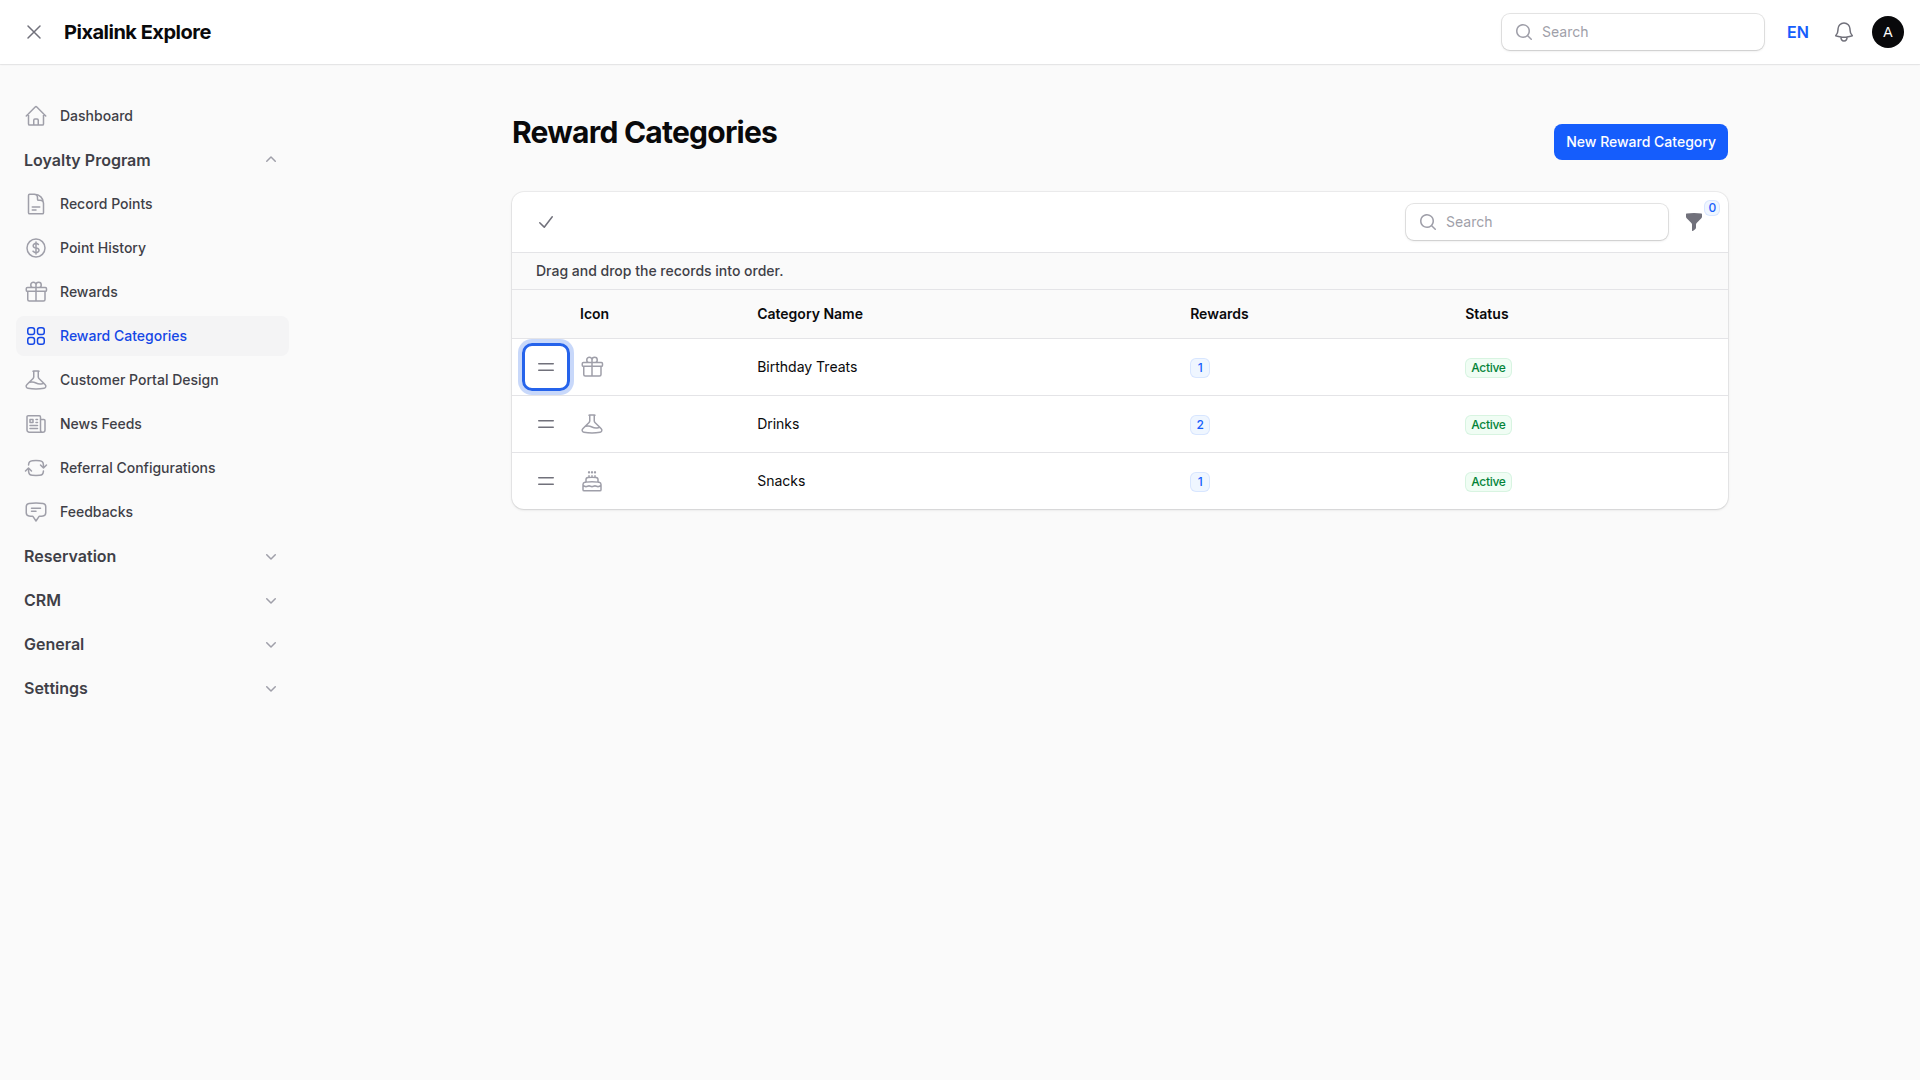
Click the reorder button above the list, then drag your categories into the order you want customers to see.
What Your Customers Will See
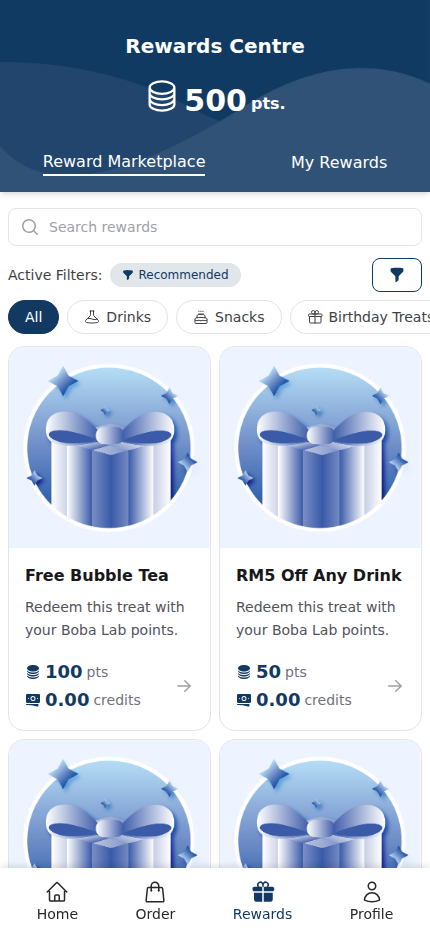
Your customers see a row of category buttons above the rewards. Tapping one narrows the list to that group. Tapping All brings the whole list back.
Good to Know
- A category only shows up for a customer once it holds at least one reward that customer can see.
- Switching a category off hides its button. The rewards inside it stay available under All.
- Categories cover your whole business, not one outlet. A reward still belongs to its own outlet.
- A brand new category sits at the end of the list until you drag it somewhere else.
- A reward belongs to one category at a time. Pick the group your customers would look in first.
- You can rename a category or swap its icon at any time. Your customers see the change on their next visit.
Need Help?
Still stuck? Contact our support team and we'll walk you through it.