
Bulk Upload Points with a CSV
Adding points one customer at a time is slow when you have a whole list to bring in. The Upload Transactions tool adds points to many customers at once from a single spreadsheet.
Video walkthrough

Steps
- Go to Admin Panel, then Loyalty Program, then Point History.
- Click the three dot menu at the top right and choose Upload Transactions.
- Click Download example CSV file, then open it in your spreadsheet app.
- Keep the first row as it is, and fill your data from row two down, one customer per row.
- Put the points in the Amount column and the phone number in the Customer column.
- Save the file, drag it into the upload box, match the columns, then click Import.
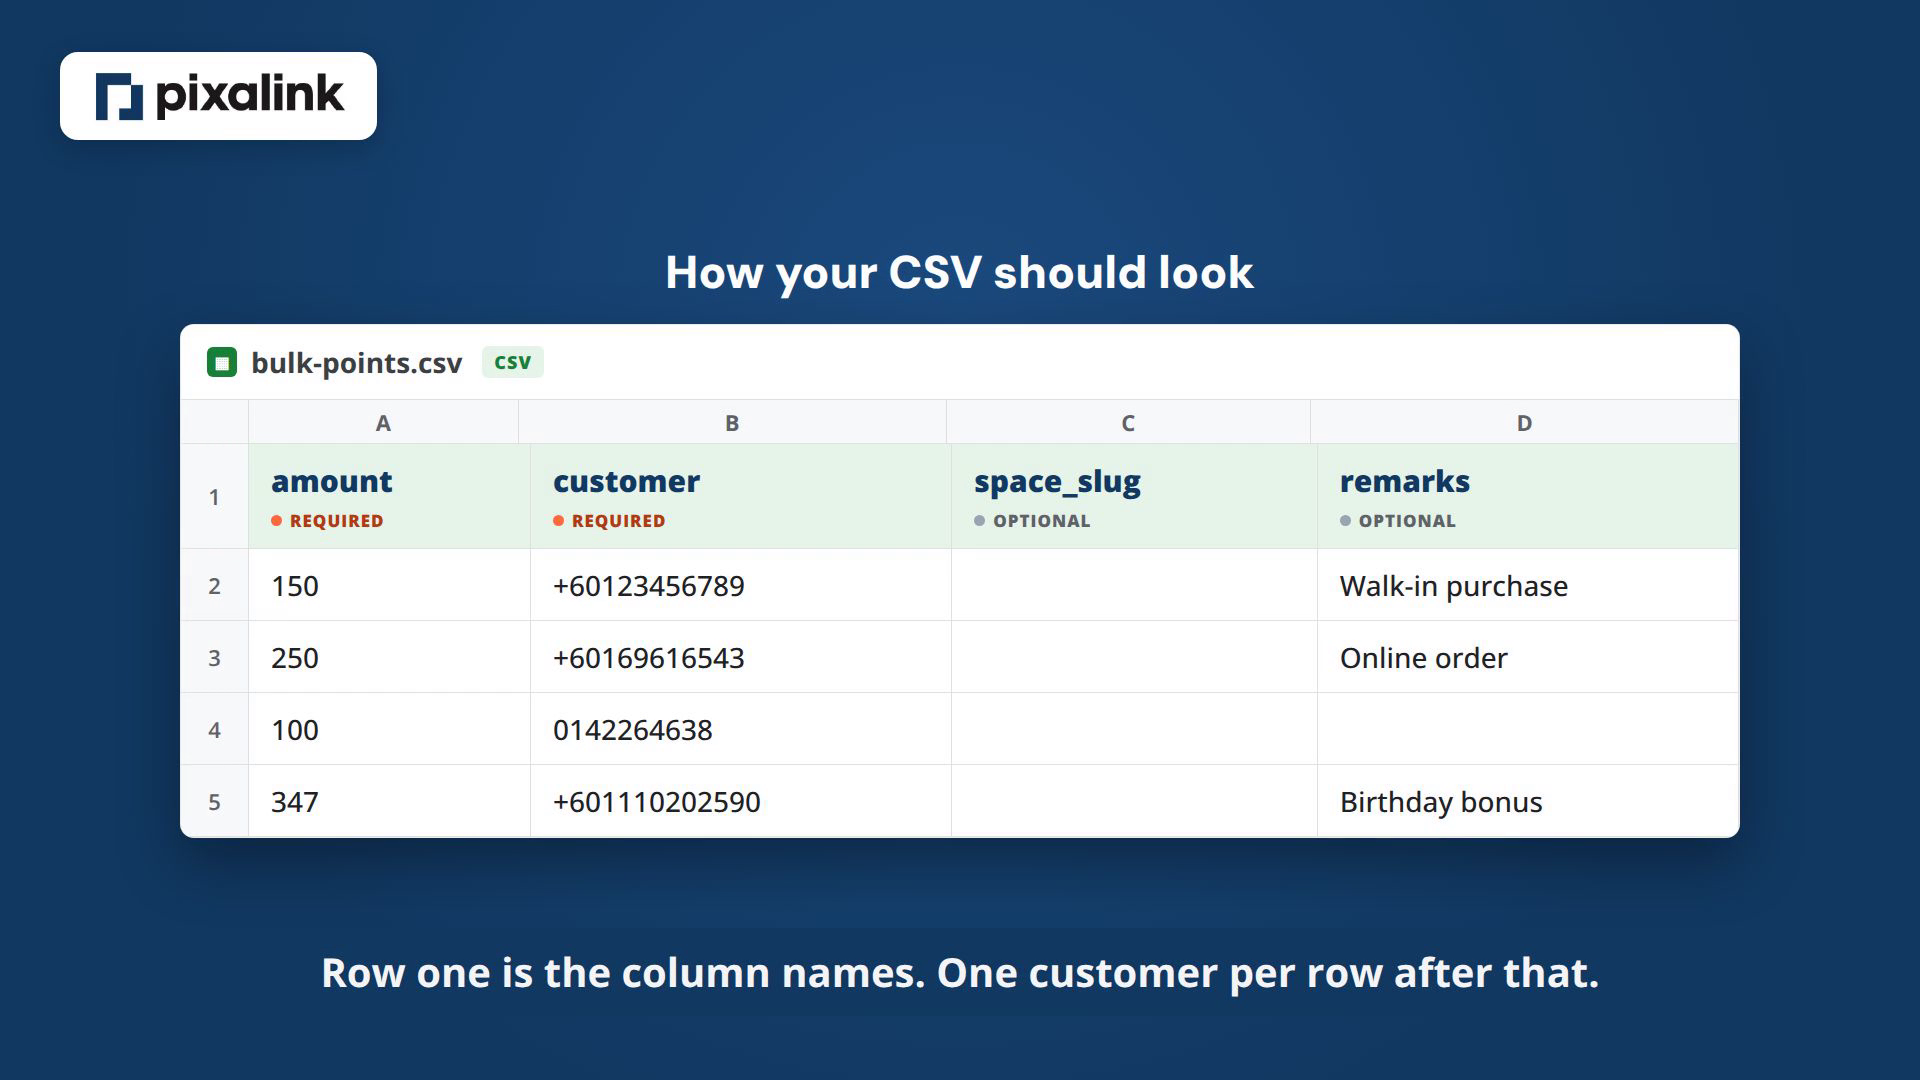
Your file should look like this, tall and thin, with one customer on each row:
Good to know
A red message about duplicate column headers means your data is sideways in one row, or the header row was deleted. Reshape it tall and thin, then re-upload.
Video transcript: Bulk Upload Points with a CSV
Bringing your customers points into Pixalink takes one spreadsheet. The trick is the shape of the file. This video shows the layout that works, and the red warning to watch for.
In the Admin Panel, open the Loyalty Program group, then Point History.
The top right is where the tools live. Record Points handles one customer. Beside it, the actions menu holds the bulk options. Open it and choose Upload Transactions.
This upload box appears. From here, you can download an example file to start from.
If your points and phone numbers run sideways across one row, Pixalink reads them as column titles, and shows a duplicate column headers error. Reshaping the file is what fixes it.
Think of it like a spreadsheet. The first row is the column names, exactly as shown. Then one customer per row going down. Amount is the points to add, and Customer is the phone number. The last two columns are optional, so you can leave them blank.
Fill the example in that shape, drag it into the upload box, check that the Amount and Customer columns are matched, then click Import. Each balance goes up on its own within a few minutes.
When the import finishes, Pixalink shows a green success message with the number of transactions added. Every customer balance updates on its own, so there is nothing else to do.