
How to Send a Welcome Back Voucher to Imported Regulars
How to Send a Welcome Back Voucher to Imported Regulars
What Is This?
If you've moved to Pixalink from another loyalty system, you probably have a list of regulars who've been supporting you for years. This guide shows you how to tag that imported list, build a one-time voucher just for them, and send it out over WhatsApp — so your loyal customers feel recognised from day one.
Real-Life Example
Aishah runs a small cafe in Bangsar. She's been tracking her regulars in a spreadsheet for three years. When she switched to Pixalink, she uploaded her 480-customer list as a CSV and tagged every row with welcome-back-2026. She then built a free RM15 meal voucher, set it to single redemption, and limited visibility to the welcome-back-2026 tag. A WhatsApp blast went out to those 480 regulars that same evening. Within 48 hours, 312 customers had claimed the voucher — and because the voucher was one-time only, nobody could abuse it. Her new signups never saw the offer at all.
Video Walkthrough
How to Set It Up
Before you start, make sure your Rewards and Campaigns modules are enabled on your organisation.
-
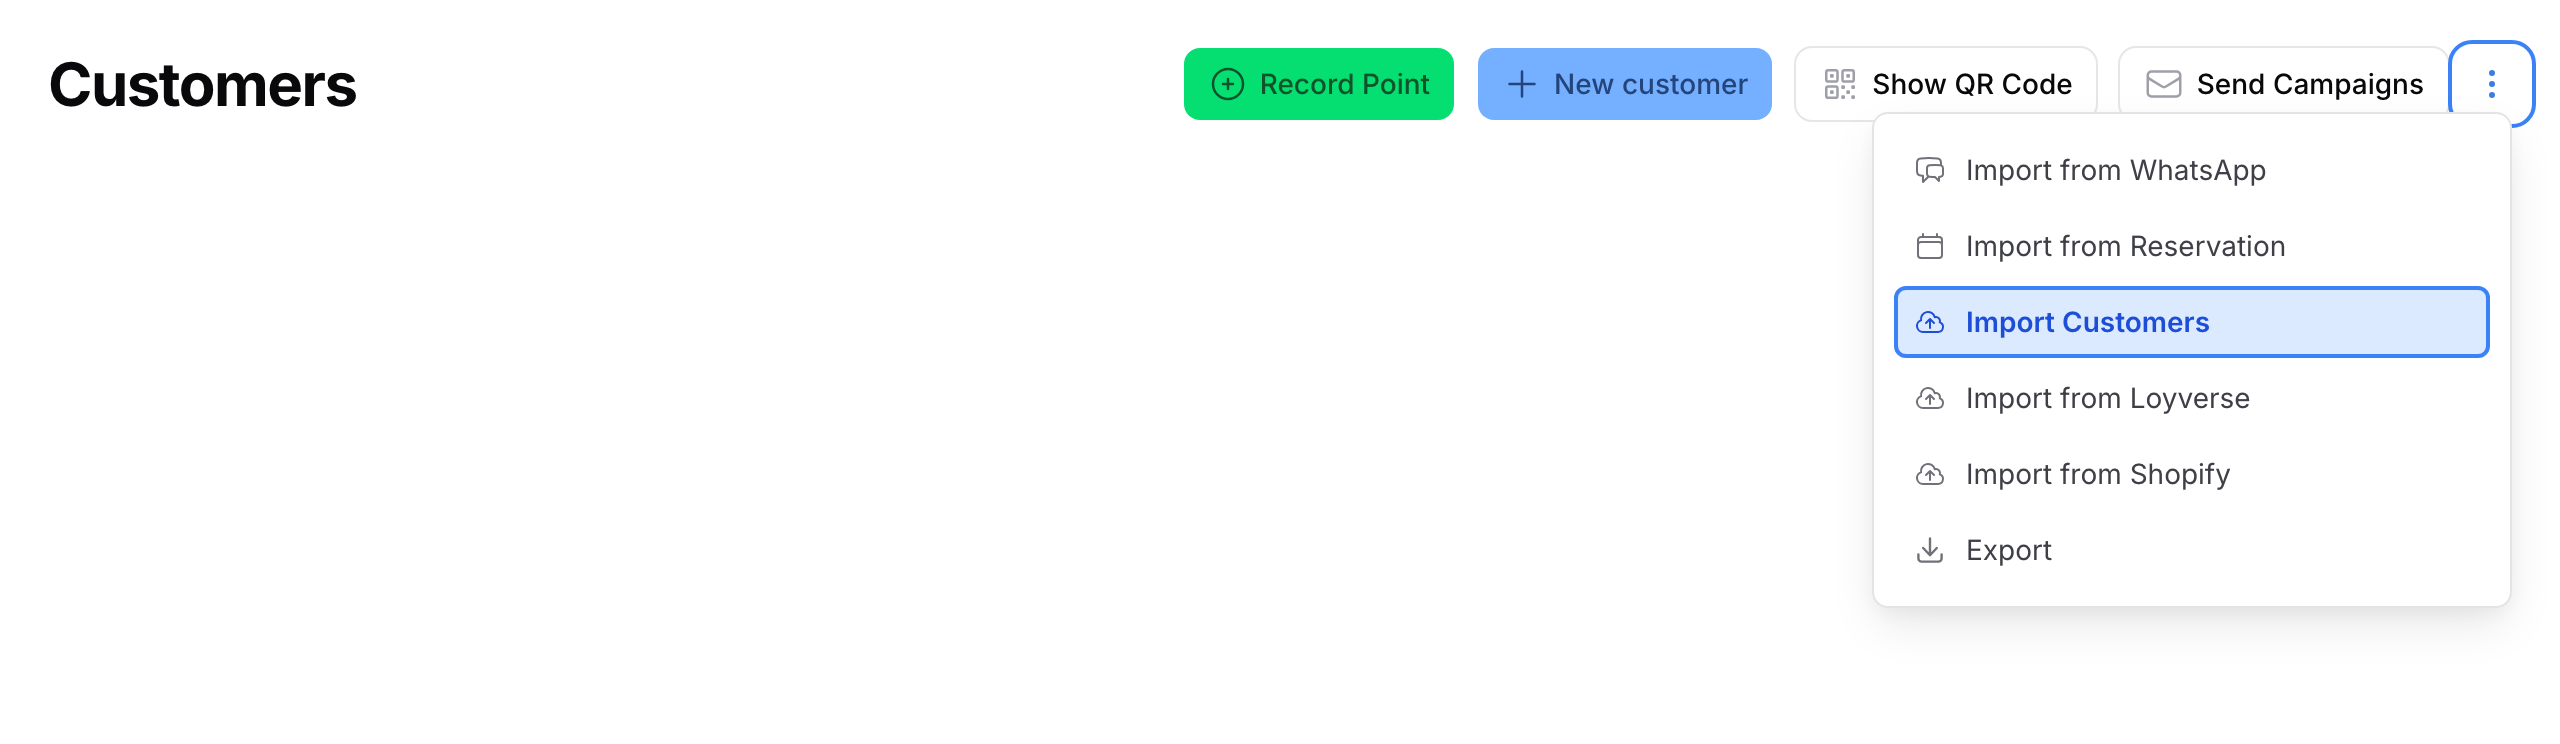
Go to Admin Panel → CRM → Customers, open the more actions menu (the three-dot button in the top-right), and click Import Customers.
-
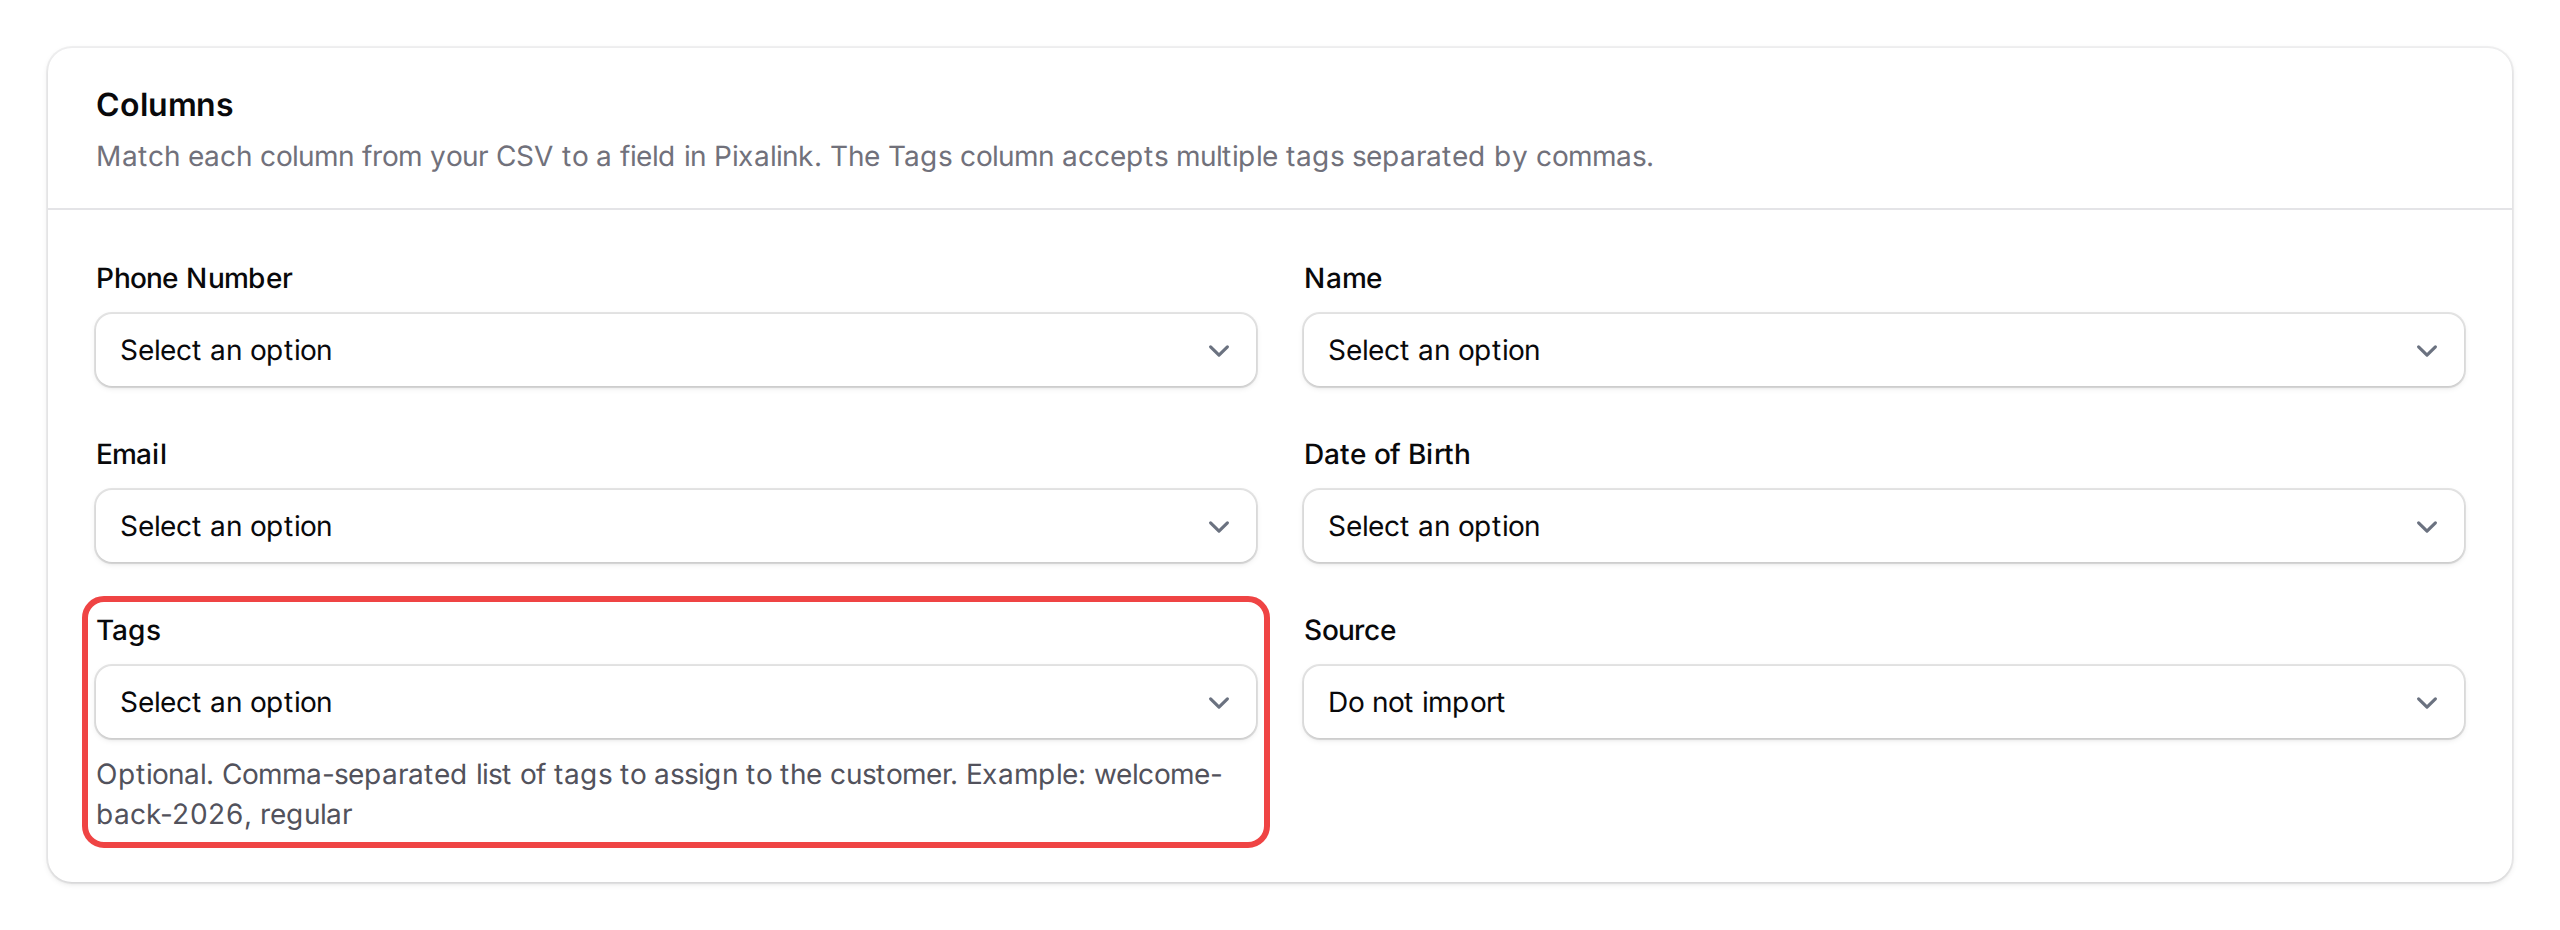
Upload your CSV file. In the column mapping screen, map your CSV's Tags column to Pixalink's Tags field. Pixalink accepts multiple tags per customer separated by commas (for example
welcome-back-2026, imported-2024, regular). Every tag you list will be attached to that customer when the row is imported. Click Import.Your file should look like this, with the tag in its own column:
phone_number name tags 60123450901 Nur Hidayah welcome-back-2026 60123450902 Jason Lim welcome-back-2026 60123450903 Priya Devi welcome-back-2026, regular Put the same tag on every regular. To give someone two tags, separate them with a comma, as in the last row.
-
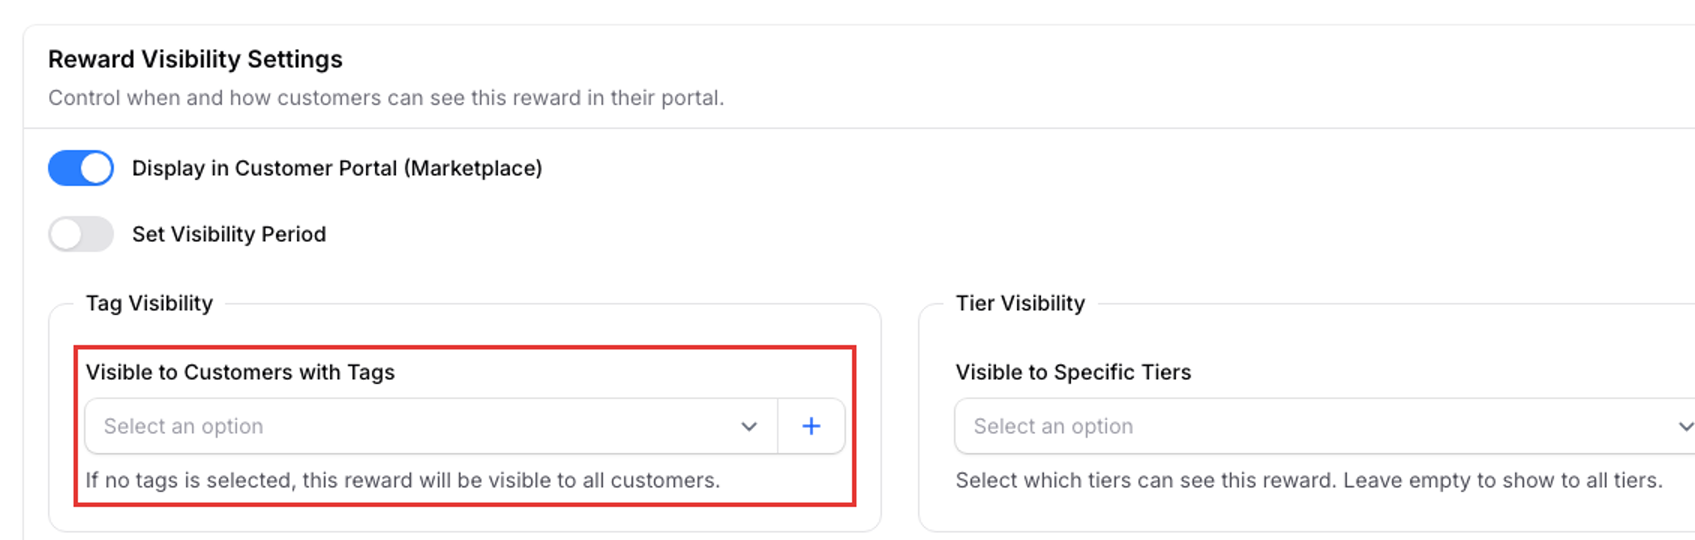
Go to Admin Panel → Loyalty Program → Rewards and click New Reward. Fill in the name and description, then open the Settings tab and find Reward Visibility Settings. Leave Display in Customer Portal (Marketplace) on (it's on for a new reward). The Tag Visibility section only shows while it's on. Then pick your tag under Visible to Customers with Tags. Only customers carrying that tag will see the voucher.
-
Still on the Settings tab, set Points to Redeem to
0so the voucher is free to claim. Turn on Single Redemption — this is the switch that stops each customer from claiming the voucher more than once. Leave Distributable on so customers can claim it themselves, then click Create.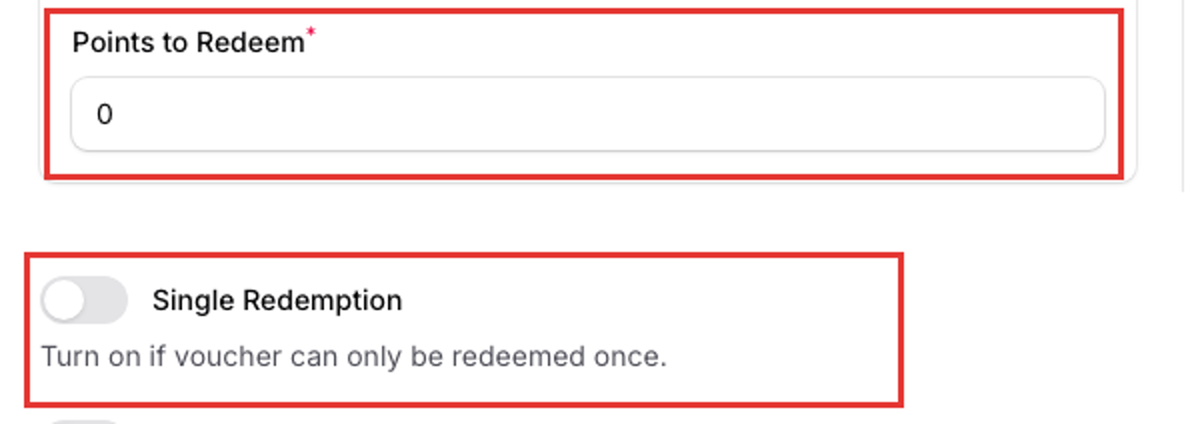
-
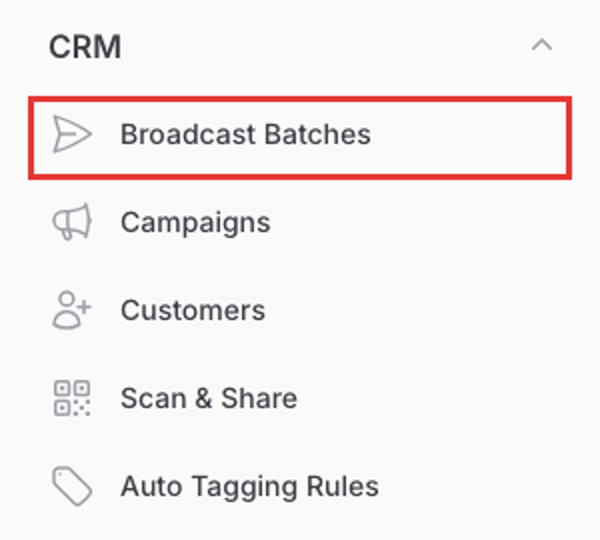
First, create a campaign under Admin Panel → CRM → Campaigns with your welcome back message. To send customers straight to the voucher, turn on Customer Direct Link Access on the reward's Settings tab and paste that link into the message. Then go to Admin Panel → CRM → Broadcast Batches, click New Broadcast Batch, and pick your Welcome Back campaign under Campaigns.
-
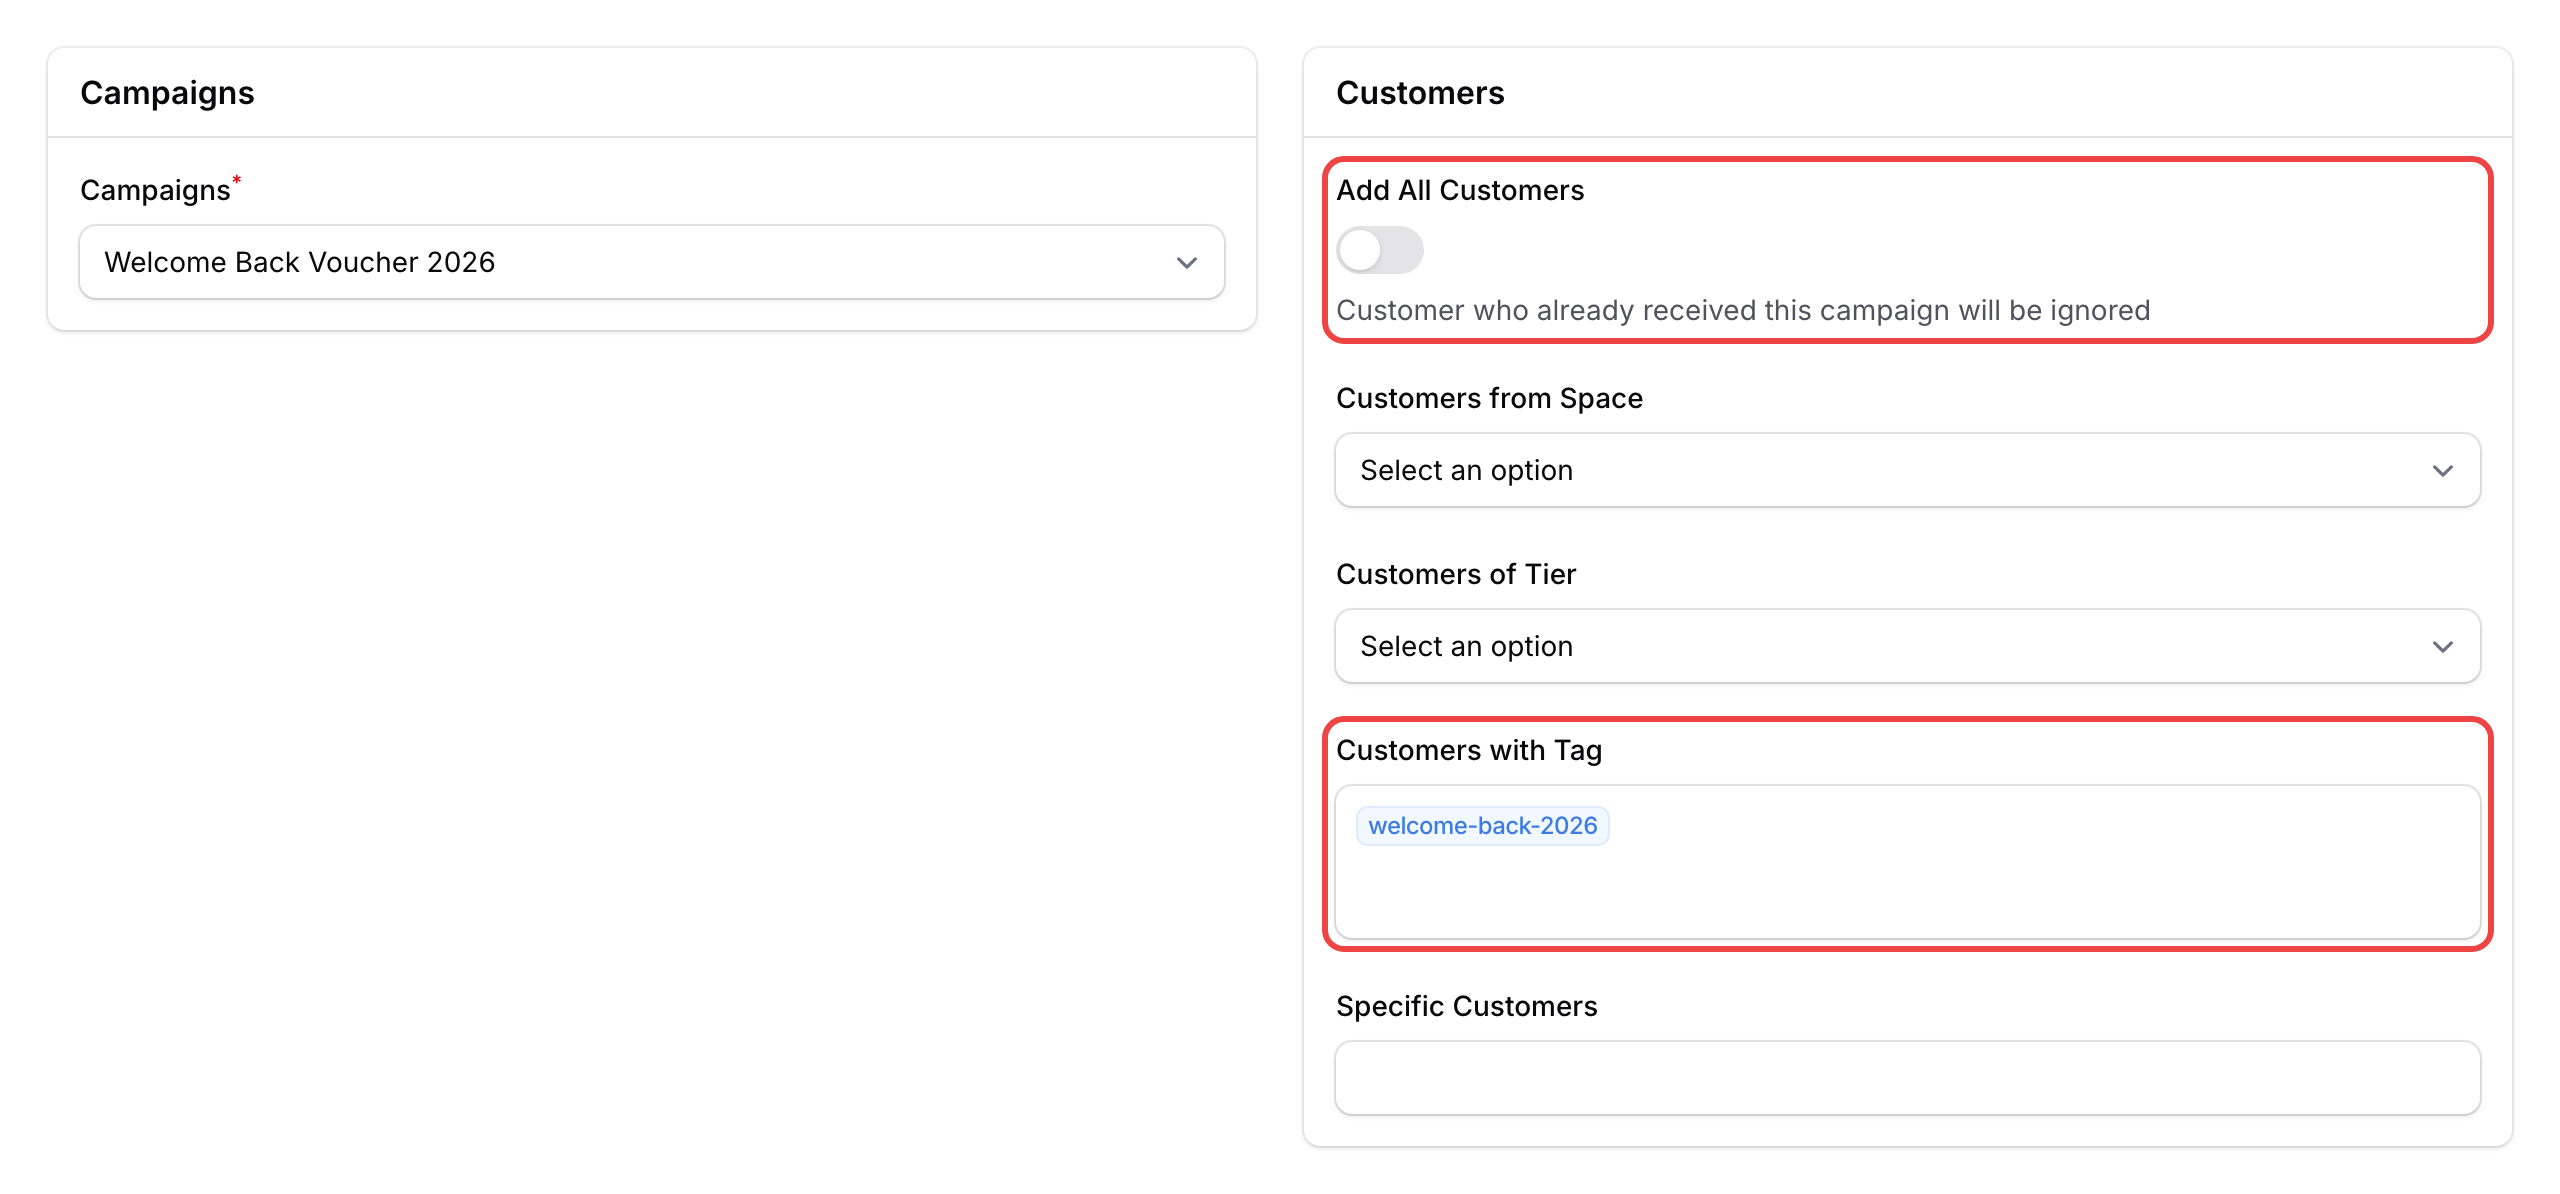
Leave Add all customers off, and select your tag under Customers with Tag. The system will only queue messages for customers who carry that tag. Customers marked Do Not Contact are left out.
-
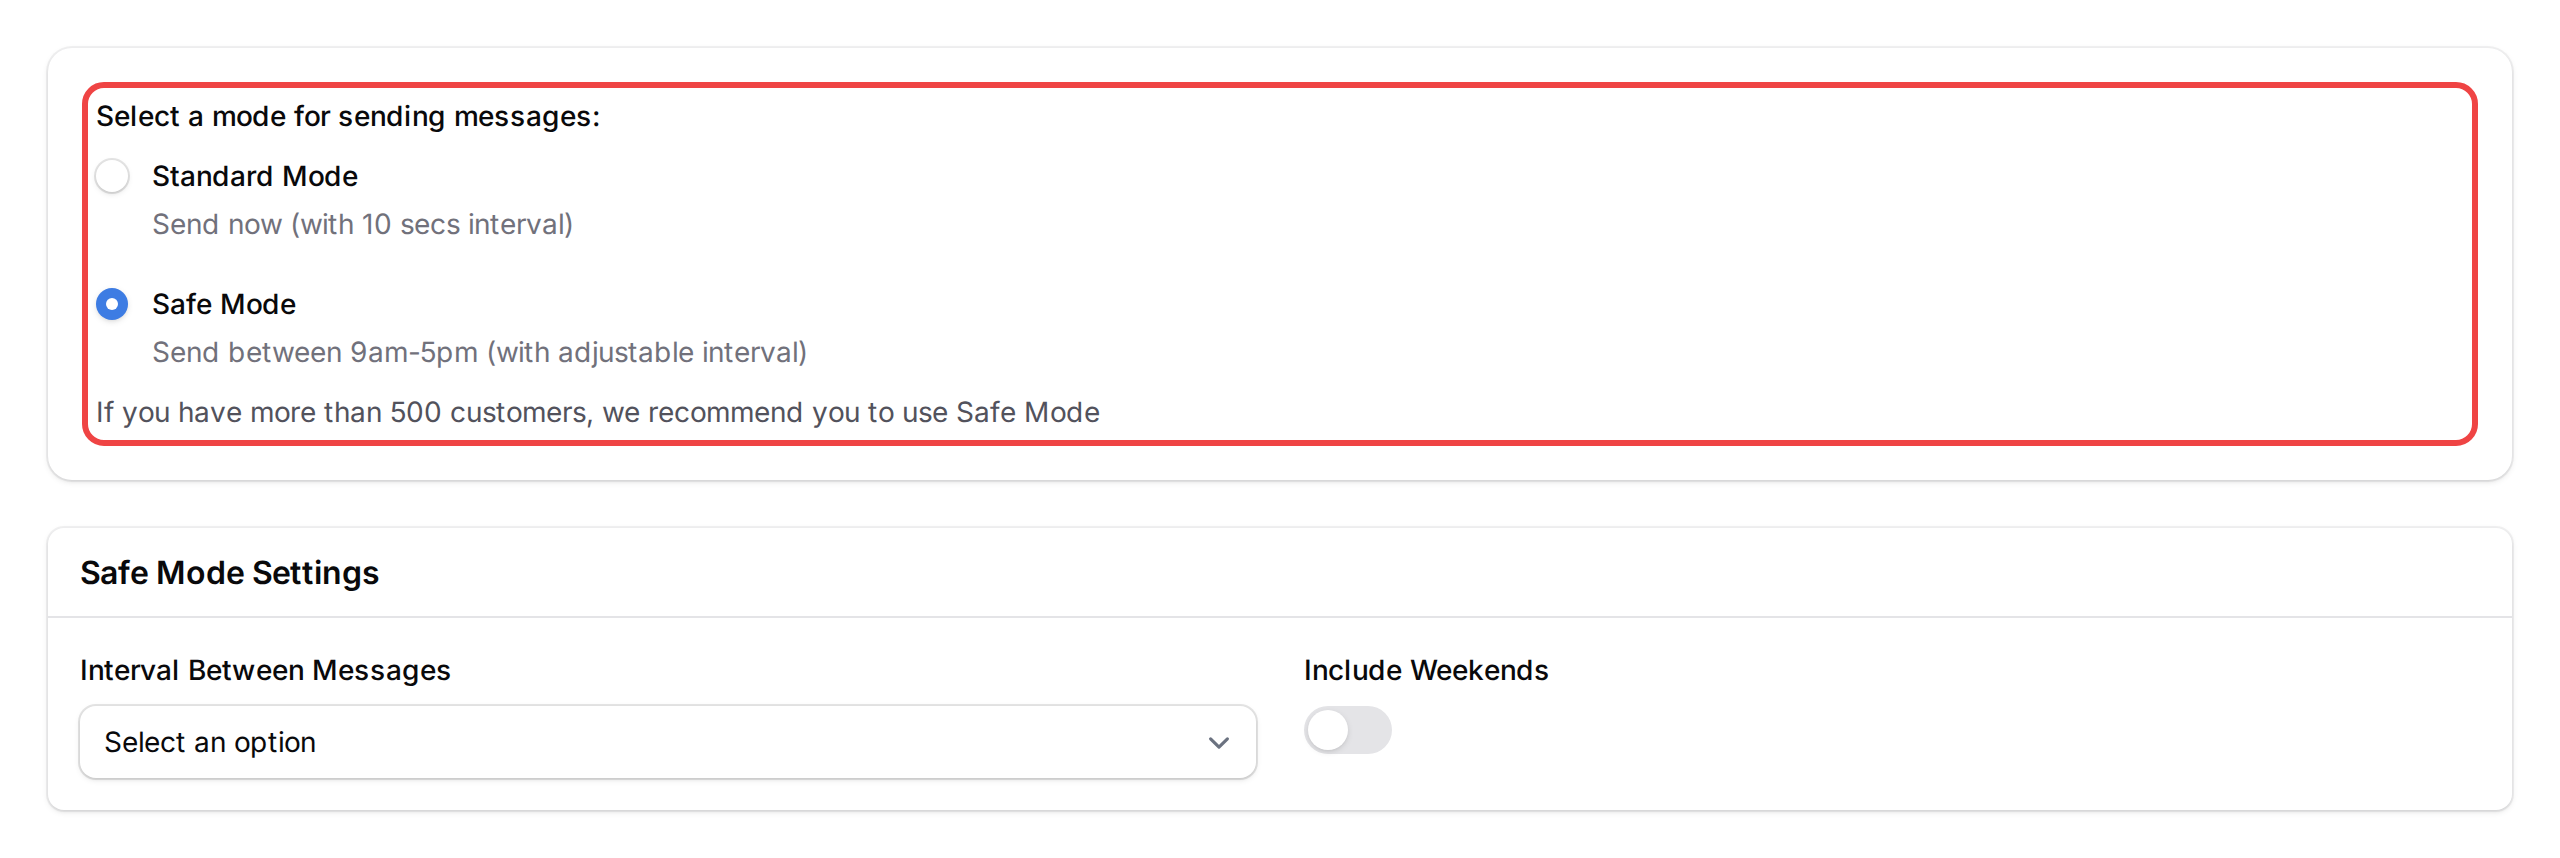
Complete the wizard steps until you reach Configuration, then pick a send mode. Safe Mode is recommended for large lists — it sends between 9am-5pm with an adjustable interval so your messages look natural. Confirm and your imported regulars will start receiving the WhatsApp message at the scheduled time.
What Your Customers Will See
Each tagged regular gets a WhatsApp message with your welcome back note and a link. When they tap through, they land on their customer portal where the voucher is waiting as a free claim. After they redeem it once, the voucher stays in their marketplace but its page shows You have redeemed this reward, so nobody can grab a second one.
Good to Know
- Tag names are case-sensitive.
welcome-back-2026andWelcome-Back-2026are two different tags. - New signups after the import do not carry the tag, so they will not see the voucher or receive the blast.
- If you forgot the tag during import, open the customer list, tick the customers you imported, and use the Add Tags bulk action to tag them.
- The broadcast step respects the same tag filter, so you only pay for messages to the right audience.
- Keep the voucher's validity short to create urgency: set an Expiration Date, or turn on Custom Valid Day(s) after redemption and use 7 to 14 in Valid Day(s).
Need Help?
Reach out to our support team — we're happy to walk you through your first import.
What's Next?
- Win Back Lost Customer Campaign — automate re-engagement for customers who stop visiting
- Custom Fields for Customer Profiles — capture extra data during import