
How to Sell a Paid Membership at Eats365 POS
What Is This?
Selling a paid membership normally means sending customers to your portal to pay online. With Eats365 you can sell it at the counter instead. Your cashier rings up a normal menu item and the customer joins straight away.
Video Walkthrough

Real-Life Example
Aishah sells a RM50 monthly membership at her cafe. Regular customer Wei Lin asks to join while paying for her latte. The cashier looks her up, adds the membership item to the order, and closes the bill. Wei Lin leaves already enrolled. She earns no points on the RM50 membership line, but still earns points on the latte.
How to Set It Up
Steps 1 to 5 happen in Eats365. Steps 6 to 9 happen in Pixalink.
-
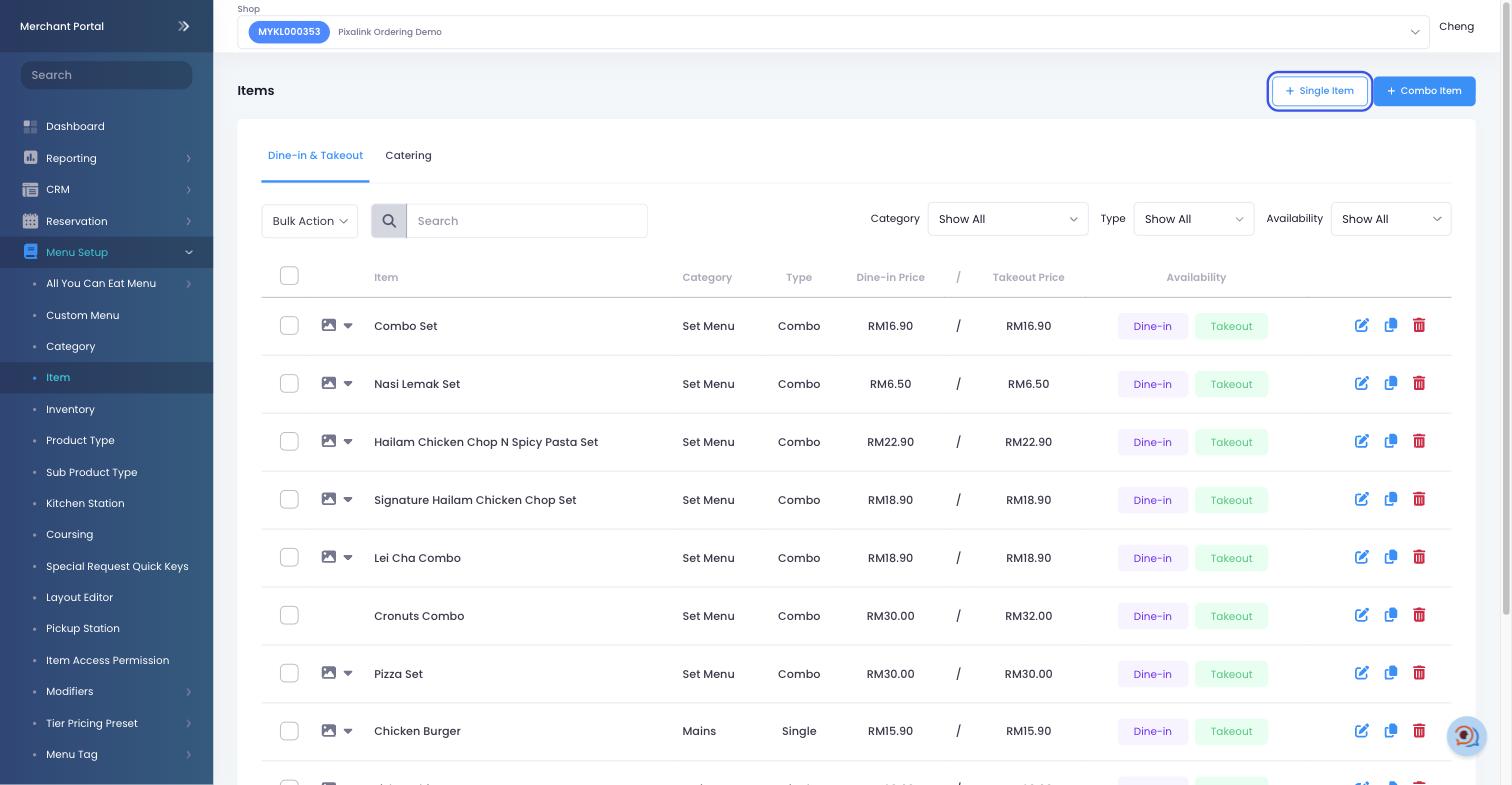
Open Menu Setup > Item and click Single Item.
-
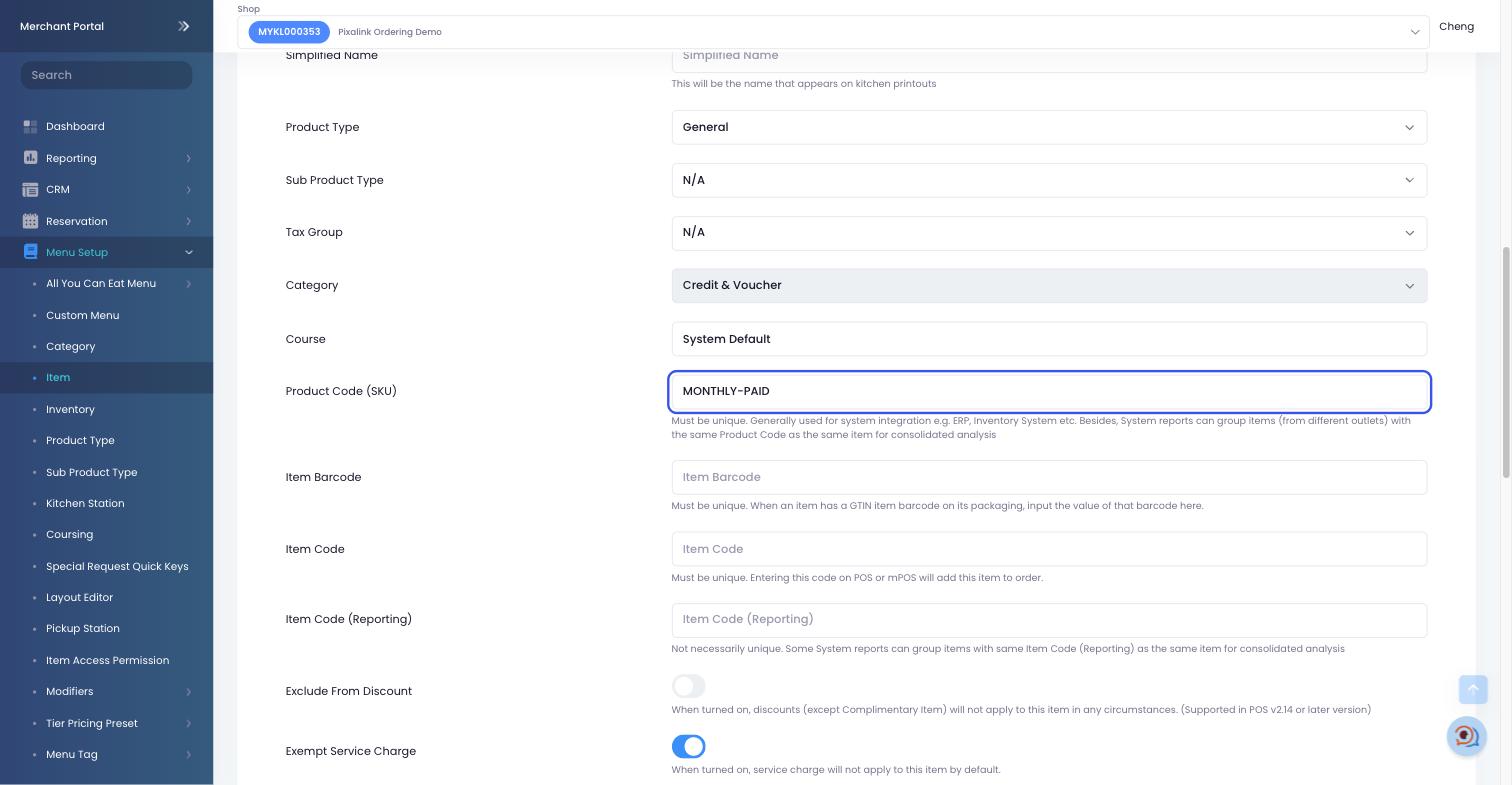
Give the item a unique Product Code (SKU). Pixalink matches on this code, so do not change it later. An item with no code never appears in Pixalink's menu list, even when everything else is set up.
-
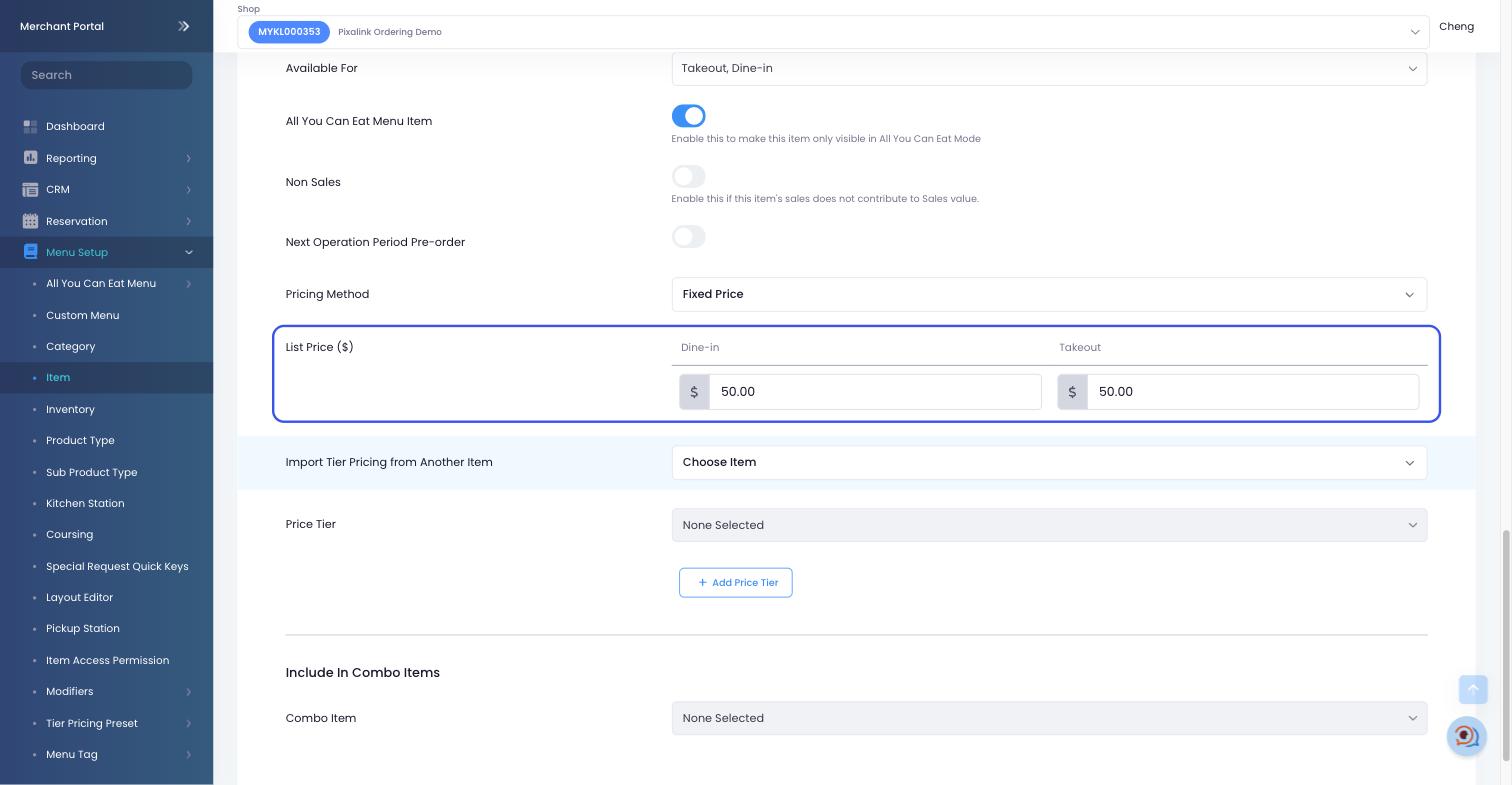
Set the List Price for dine-in and takeout. This is what your cashier charges.
-
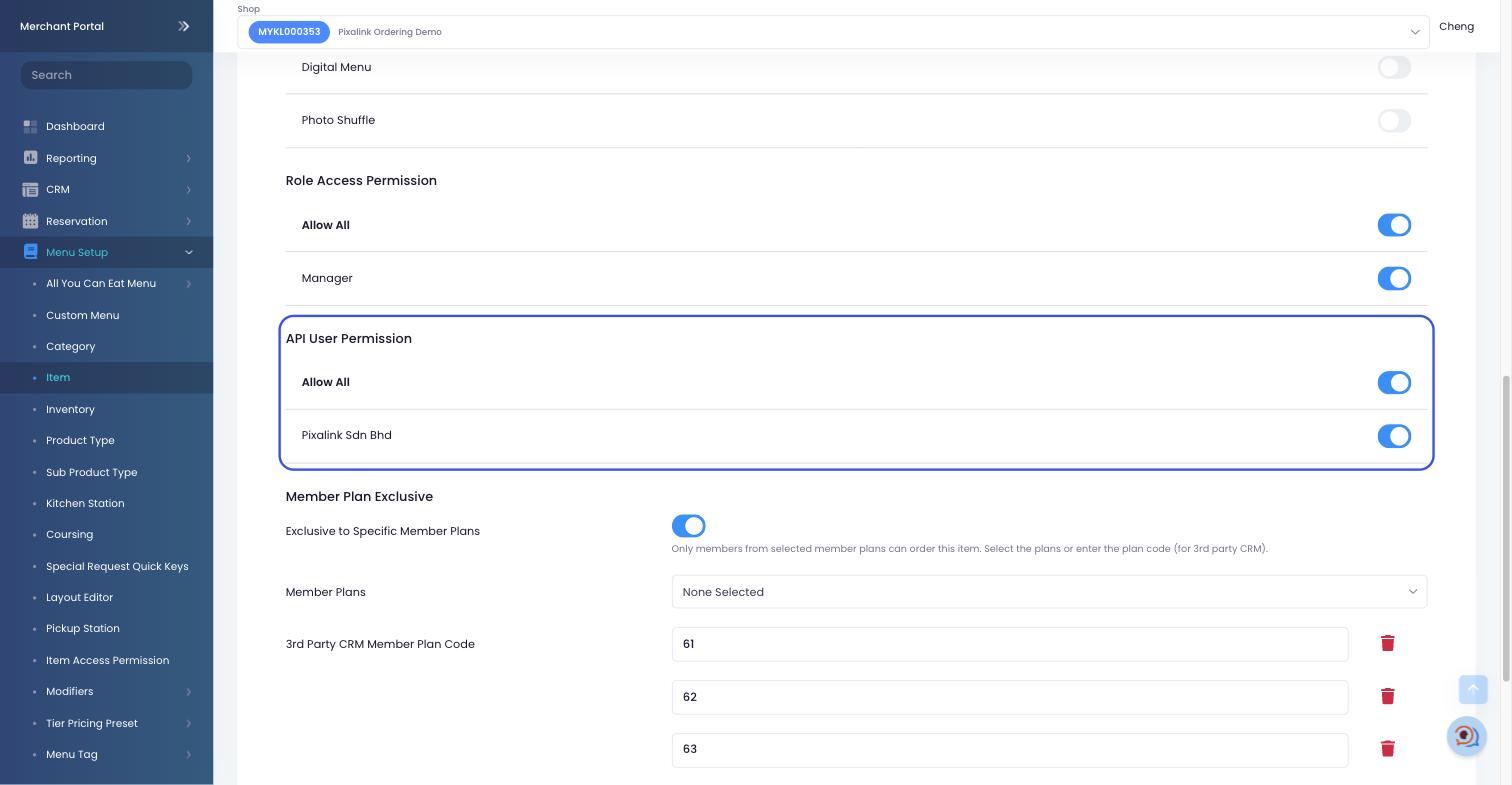
Open Additional Details and switch on Pixalink Sdn Bhd. Without this, the item stays hidden from Pixalink.
-
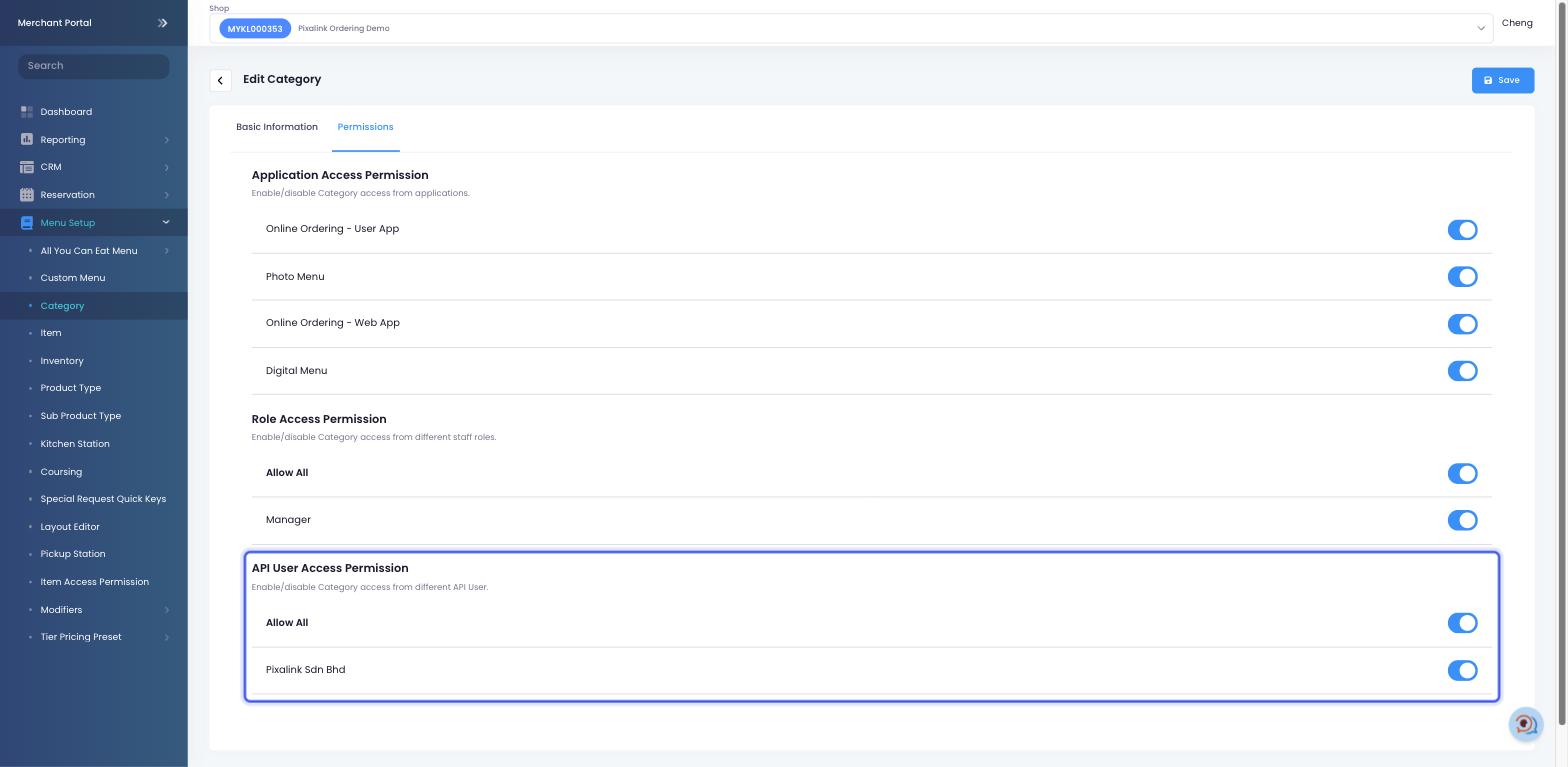
Open Menu Setup > Category, edit the category your item sits in, open the Permissions tab, and switch on Pixalink Sdn Bhd under API User Access Permission. The item stays hidden until its category allows Pixalink too. Then fully close and reopen your POS app so it picks up both changes.
-
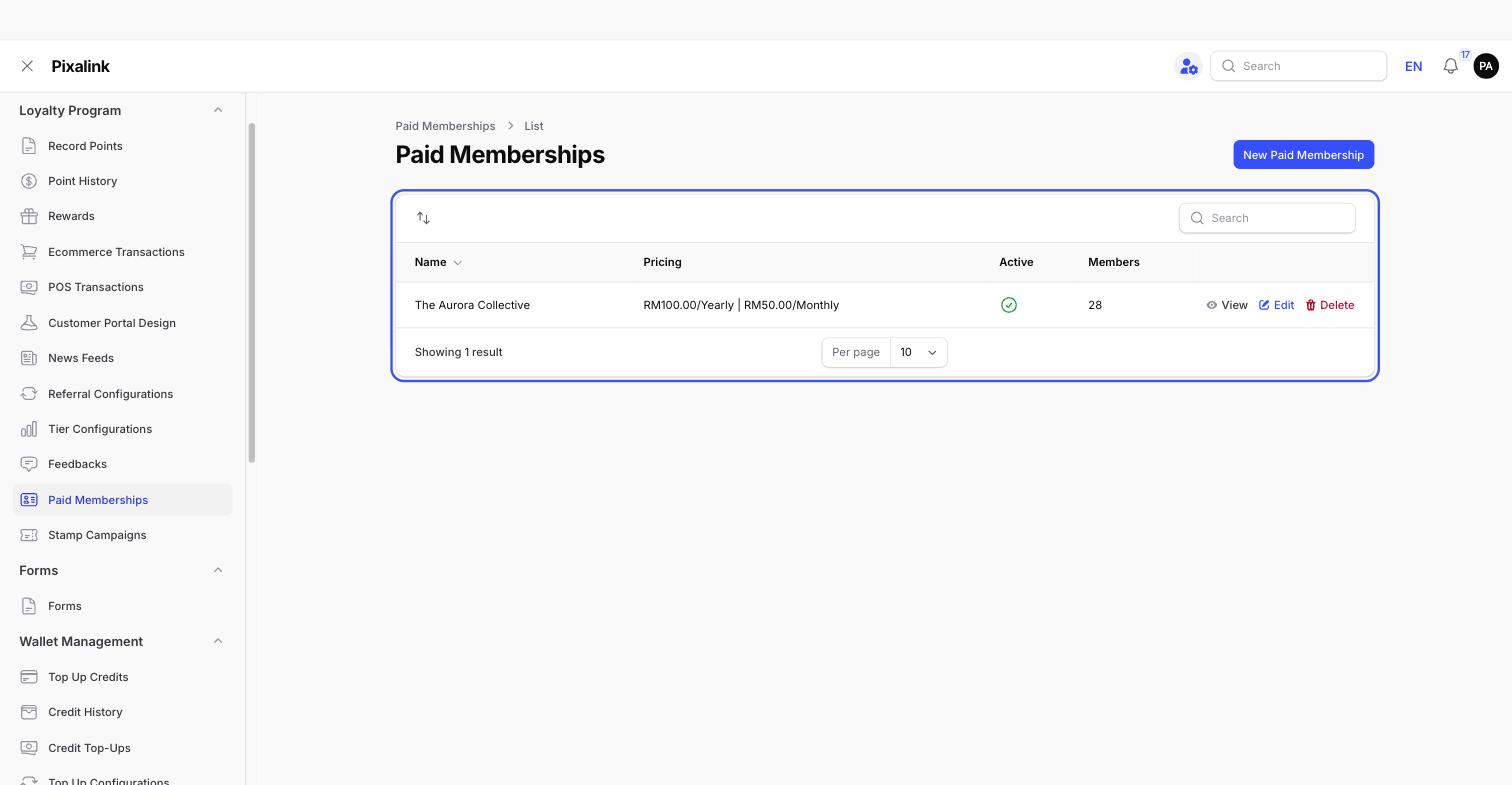
In Pixalink, go to Loyalty Program > Paid Memberships and check that your membership is active.
-
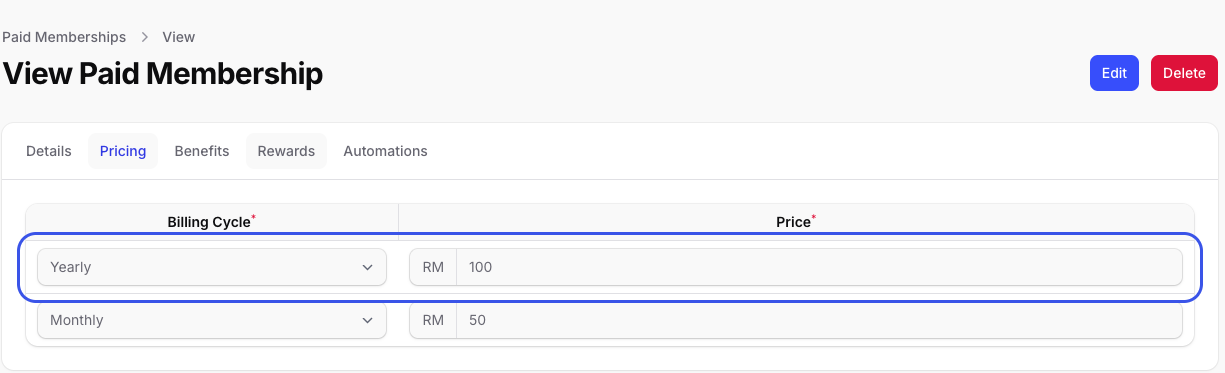
Open it and check the Pricing tab. Only cycles priced here can be sold at the till.
-
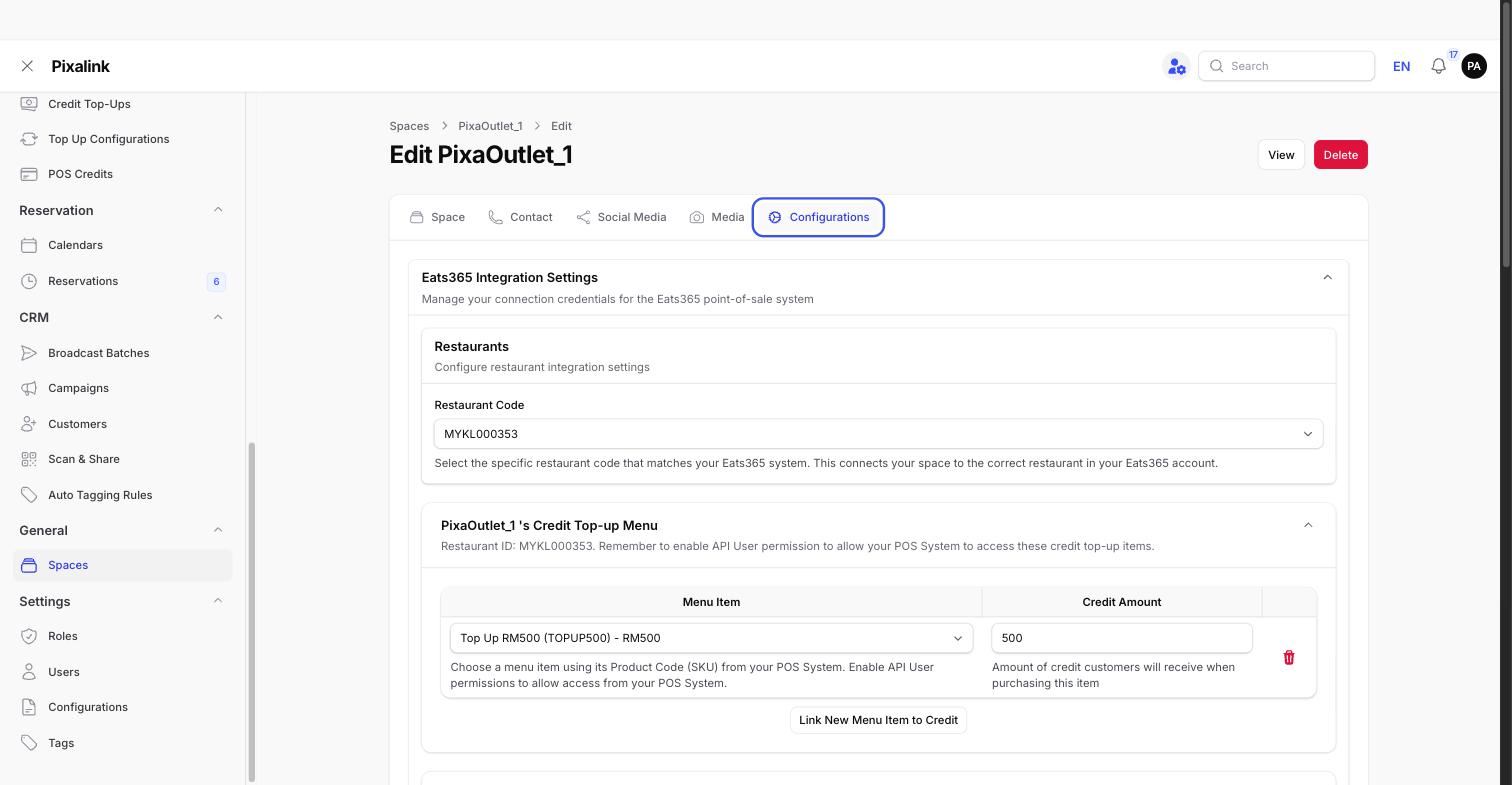
Go to General > Spaces, click Edit on your outlet, and open the Configurations tab. A Restaurant Code must be set.
-
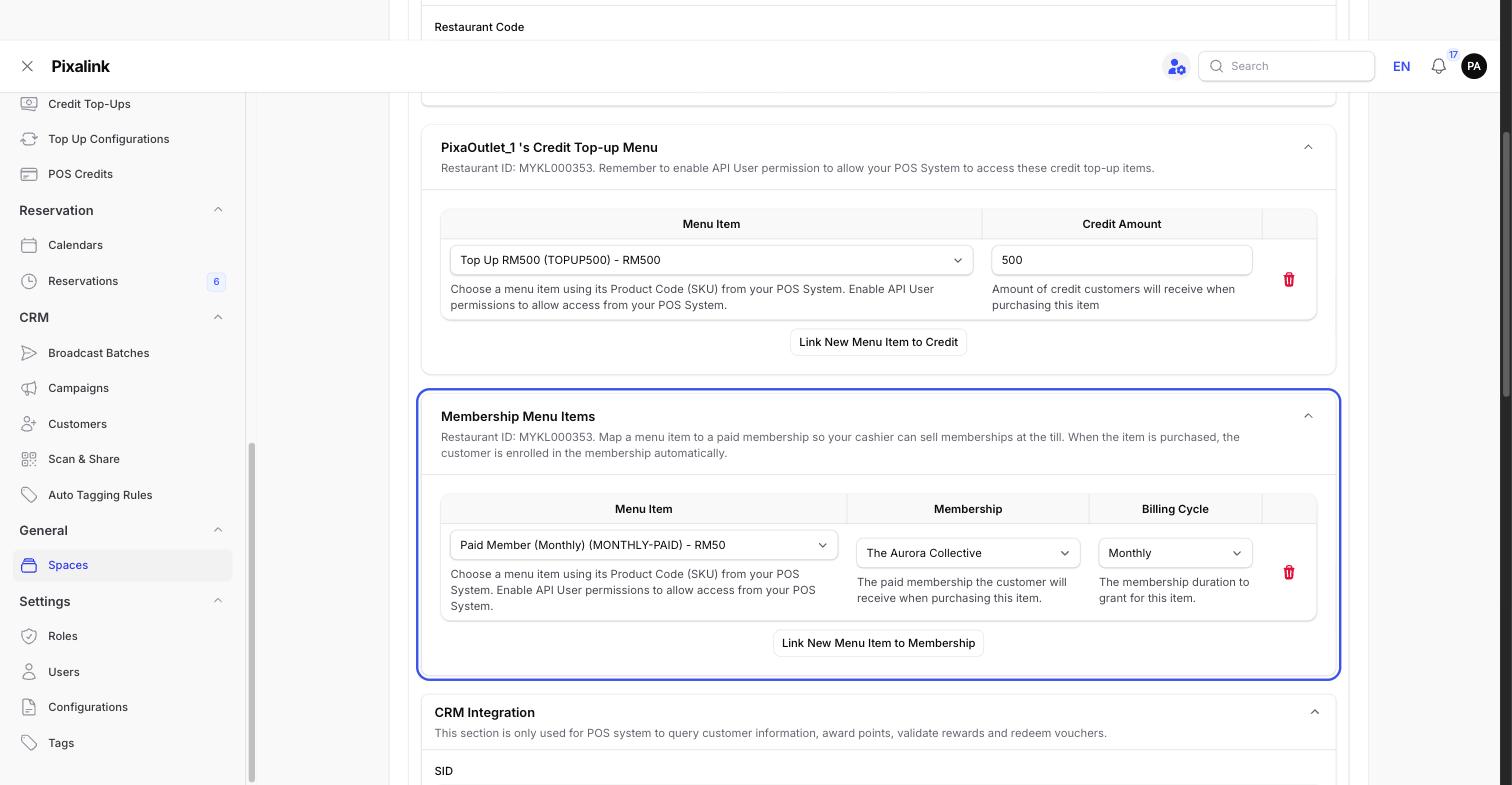
Scroll to Membership Menu Items, click Link New Menu Item to Membership, pick your item, membership and billing cycle, then save.
What Your Customers Will See
The cashier must look the customer up before closing the bill. The membership then shows on their profile and portal, and welcome vouchers are issued right away.
Good to Know
- One sale, one membership. Ringing up two of the same item still enrols the customer once.
- Selling the same plan again extends it. If the customer already holds that exact membership (same plan, same monthly/yearly cycle), the counter sale adds another cycle on top of their current expiry date — the days they have left are not lost, and they keep their original join date.
- Selling a different plan replaces the old one. Switching a customer to another membership stops the previous one immediately, and any remaining days on it are forfeited. The product code you mapped is treated as the instruction, so nothing at the counter asks for confirmation.
- Lifetime members are protected. If a customer already holds a lifetime membership, the counter sale is ignored.
- Voiding the bill does not remove the membership. Remove it by hand from the customer profile.
- Each outlet is set up on its own. Repeat steps 8 and 9 for every outlet.
Need Help?
If a cycle is missing, price it first in step 7.
If the Menu Item list is empty or your item is missing, the connection is usually fine — Pixalink only lists items that carry a Product Code and are shared with Pixalink. Check step 2 (Product Code filled in), step 4 (item shared) and step 5 (category shared), then reload the Space page. Most new menus have no Product Codes at all, which makes the list completely empty.
Still stuck? Contact your Pixalink support team.