
Eats365 Voucher 2.0 Integration — Setup Guide
The Eats365 Voucher 2.0 integration lets your customers redeem Pixalink reward vouchers directly through the Eats365 ordering system. You create a reward in Pixalink, set up a matching discount in Eats365, and your customers can apply the voucher at checkout — automatically.
Example: Aishah runs a nasi lemak restaurant using Eats365 POS. She creates a "RM10 OFF" voucher in Pixalink with discount code
V0001, then adds the same code as a Merchant Discount in Eats365. When her loyal customer Ahmad redeems the voucher through the Customer Portal and orders via Eats365, the RM10 discount applies automatically at checkout.
This guide walks you through setting up the Eats365 Voucher 2.0 integration.
Step 1: Create the Reward in Pixalink
- Go to Admin Panel > Loyalty Program > Rewards.
- Click + New Reward, or open the reward you want to connect.
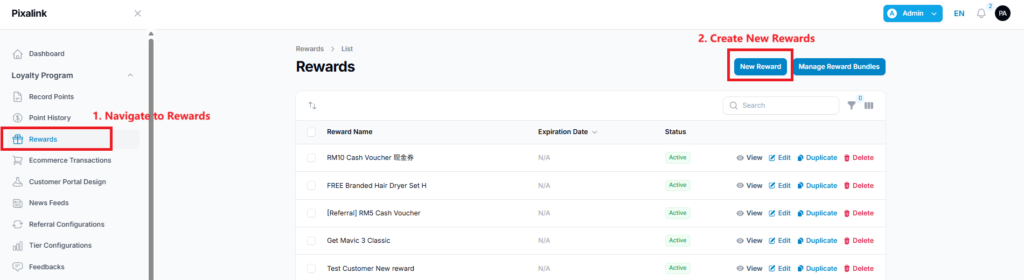
- Complete the reward details, including the applicable Space, reward name, description, terms and conditions, and cover image.
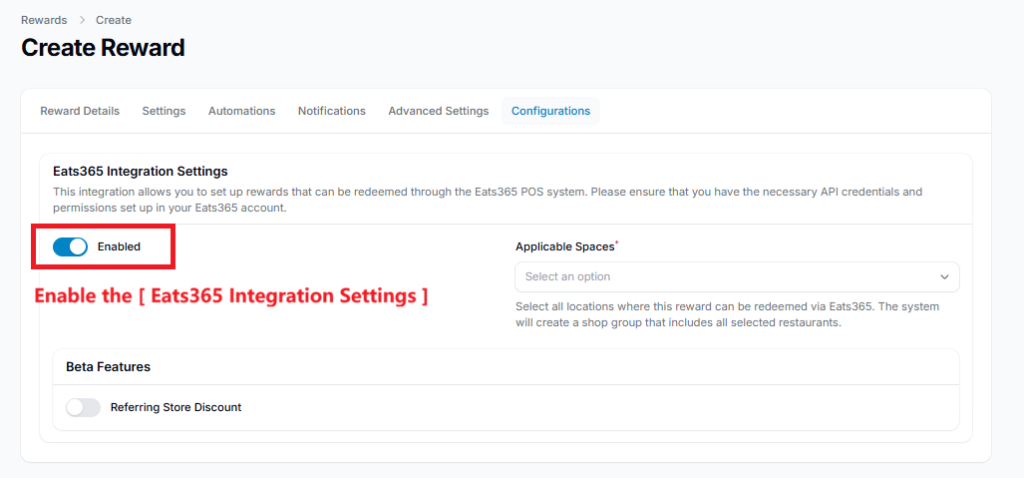
- Open the Configurations tab.
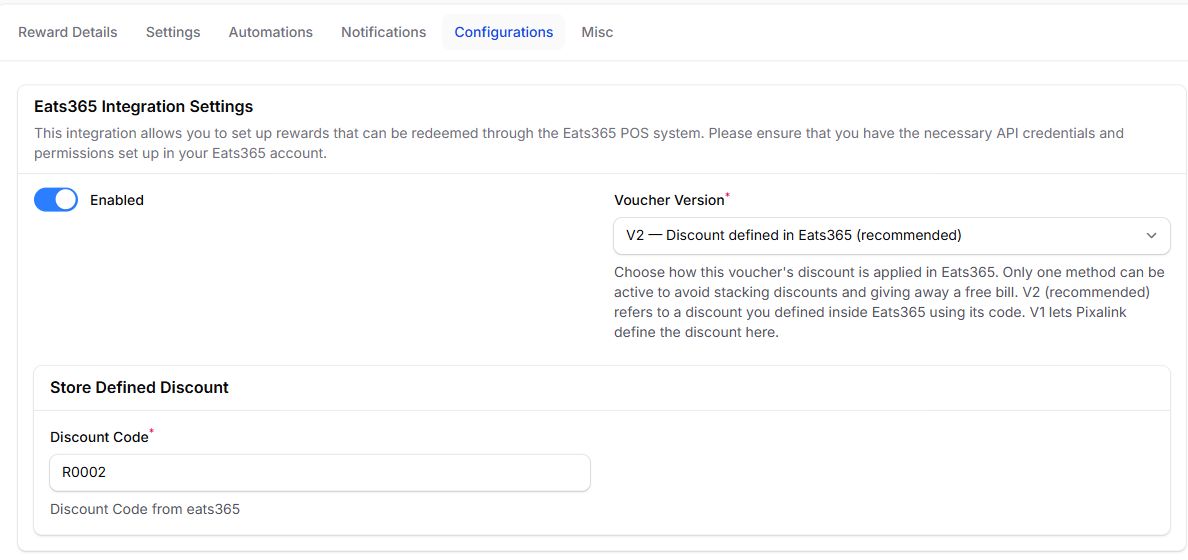
- Under Eats365 Integration Settings, configure all three required fields:
- Enabled — turn this ON.
- Voucher Version — select V2 — Discount defined in Eats365 (recommended).
- Discount Code — enter the code from the matching Eats365 Discount 2.0 record.
Important
The Pixalink Discount Code must match the Eats365 Discount Code exactly. A different character, space, or letter case will stop the voucher from matching.
- Click Save changes.
Discount Code Naming Conventions
Use a unique, consistent code for each discount:
| Voucher Type | Suggested prefix | Example |
|---|---|---|
| Tiering voucher | T |
T0001 |
| Marketplace voucher | V |
V0001 |
| Referral voucher | CMPG |
CMPG0001 |
The prefixes are organisational suggestions. The technical requirement is that the code is unique and identical in both systems.
Step 2: Configure Discount 2.0 in Eats365
- Log in to the Eats365 Merchant Portal.
- Go to Discount > Discount and confirm that the merchant is using the Discount 2.0 screen.
- Create a new Order Discount, or edit the Discount 2.0 record that should be linked to Pixalink.
- Complete the discount name, description, conditions, offer, availability dates, and time slots.
- In Discount Details, enter a unique Discount Code. Copy it exactly into the Pixalink reward's Configurations tab.
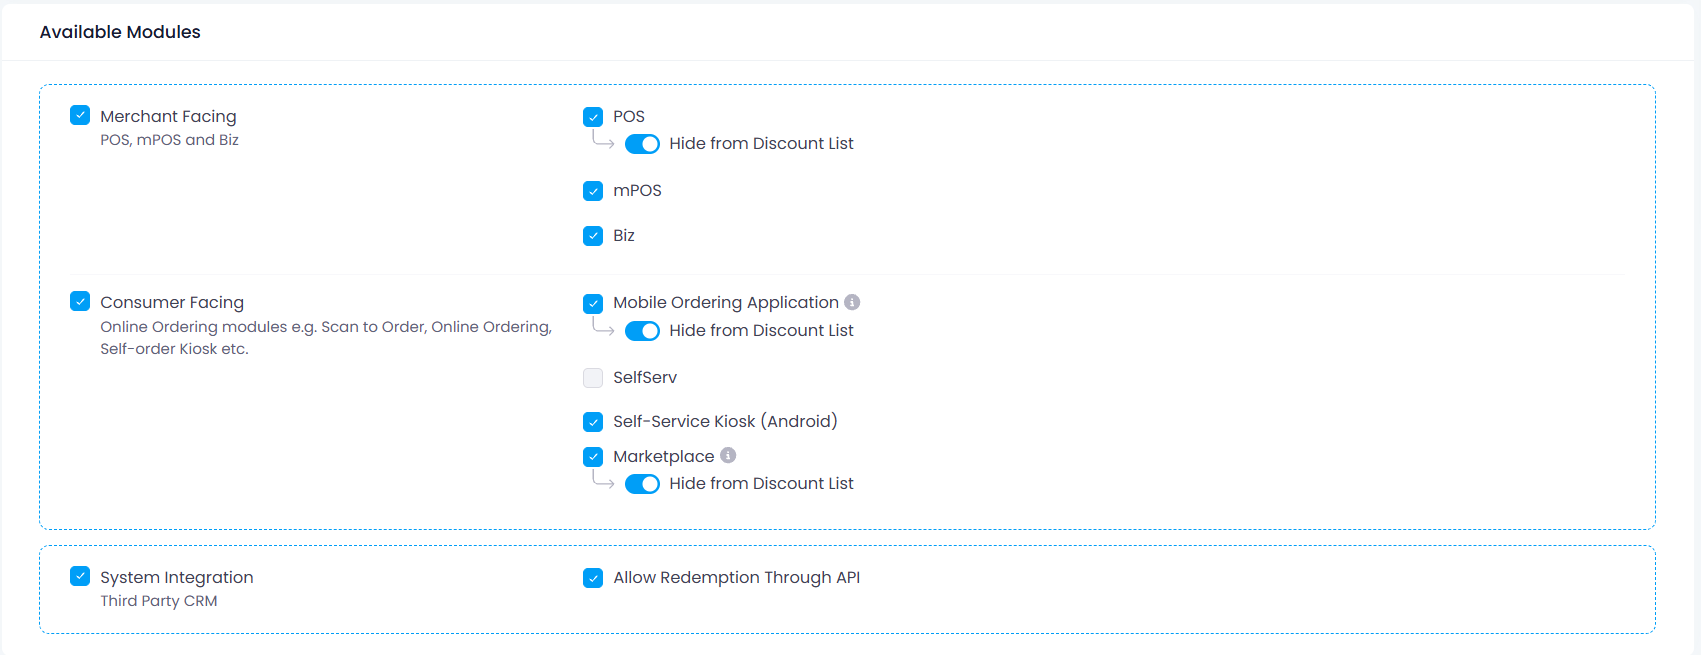
- Under Available Modules:
- Select every merchant-facing and consumer-facing module where the voucher should work. If the voucher is intended for all channels, select all available modules.
- Turn on Hide from Discount List for every selected module where that switch is available, including POS, Mobile Ordering Application, and Marketplace when used.
- Select System Integration.
- Select Allow Redemption Through API so Pixalink can redeem the voucher through the Eats365 integration.
Important
Hide from Discount List does not disable the discount. It keeps the integration voucher out of the normal manual discount list while still allowing the matched Pixalink voucher to redeem through the API.
- Set Status to Active.
- Click Save.
Note
Some modules can appear disabled when they are not enabled for the Eats365 account. Select all modules that are available and genuinely used by the merchant.
Step 3: Test the Customer Redemption Flow
Once both sides are configured, test the full flow to ensure everything works:
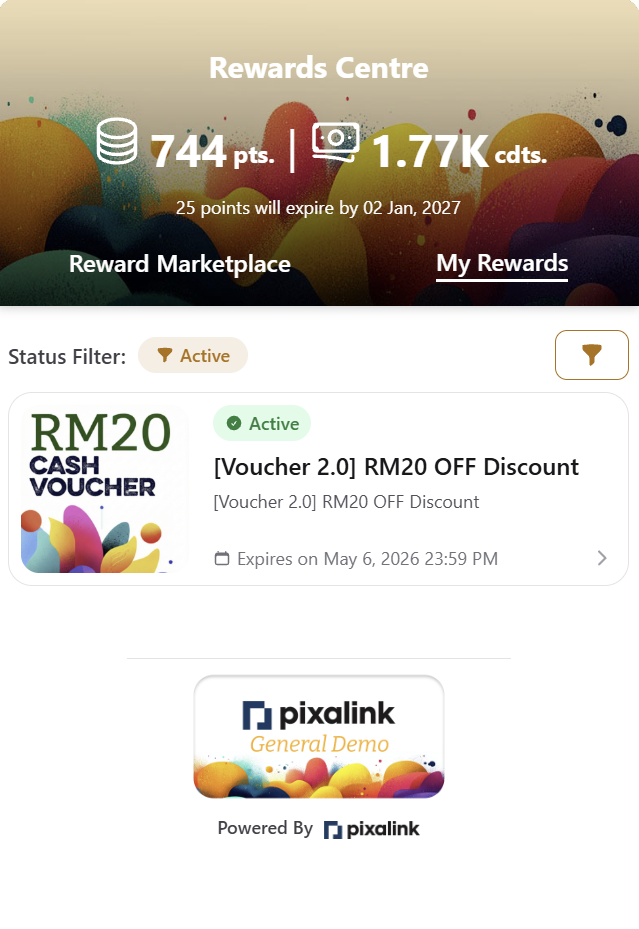
- Open your Customer Portal (Pixalink).
- Go to Rewards and click Redeem Now on your new voucher.
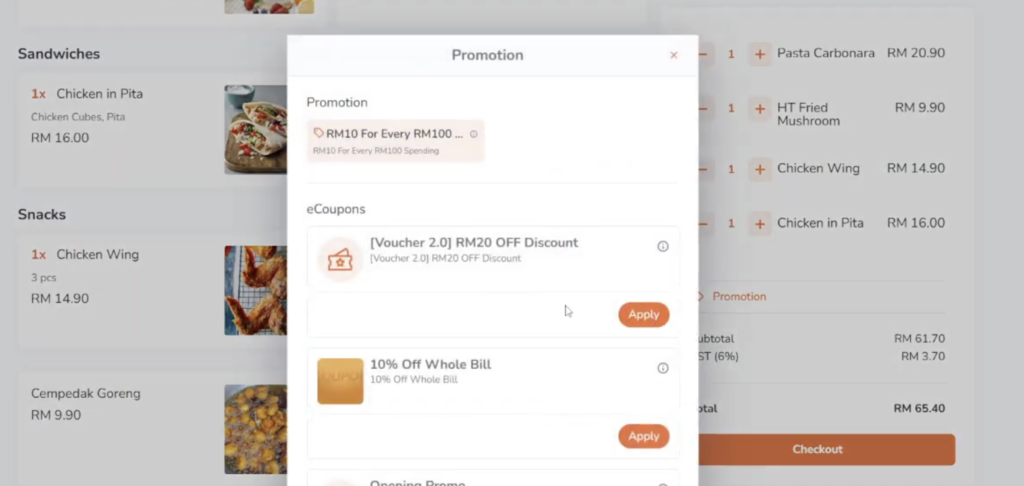
- Open your Eats365 Ordering Page.
- Add items to the cart and proceed to Checkout.
- Click Apply when the voucher appears under Promotions.
- Place the order and confirm that the discount is deducted correctly.
Troubleshooting
| Issue | Likely cause | What to check |
|---|---|---|
| Voucher does not match the Eats365 discount | Codes differ | Confirm the Discount Code is identical in Pixalink and Eats365, including case and spaces |
| Voucher cannot be redeemed through Pixalink | API settings are off | In Eats365, enable System Integration and Allow Redemption Through API |
| Voucher does not work on a channel | The module is not selected | Under Available Modules, select the relevant POS, mPOS, Biz, ordering, kiosk, or marketplace module |
| Integration voucher appears in the manual discount list | The hide switch is off | Enable Hide from Discount List for each selected module where the switch is available |
| Voucher appears but cannot be applied | Status, date, time, or conditions block it | Confirm Status = Active, then check availability dates, time slots, conditions, and offer rules |
| Discount amount is wrong | The Eats365 offer is configured incorrectly | Update the Discount 2.0 Offer settings in Eats365 |
| Pixalink uses the wrong redemption method | Voucher Version is not V2 | In Pixalink, choose V2 — Discount defined in Eats365 (recommended) |
Good to Know
- For this integration, use an Eats365 Discount 2.0 record with a Discount Code.
- Keep the Pixalink integration Enabled and use Voucher Version V2.
- The discount code must be unique and must match exactly in Eats365 and Pixalink.
- Select all modules where the voucher should work; a disabled module may require the Eats365 service plan or module to be enabled first.
- Enable Hide from Discount List on the applicable channels to prevent manual selection of the integration-only voucher.
- System Integration and Allow Redemption Through API are required for Pixalink redemption.
- Test one voucher from the customer portal through checkout after saving both systems.
FAQs
Should I select every Available Module?
Select every module the merchant actually uses. If the voucher must work across all channels, select all available modules. A greyed-out module cannot be selected until it is enabled in Eats365.
Must Hide from Discount List be enabled?
Yes, enable it for each selected channel where the switch is available. The voucher remains redeemable through the Pixalink integration but stays out of the normal manual discount list.
Which Voucher Version should I choose in Pixalink?
Choose V2 — Discount defined in Eats365 (recommended) for the Discount 2.0 setup in this guide.
Why is Allow Redemption Through API required?
Pixalink sends the voucher redemption through the Eats365 integration. Without System Integration and Allow Redemption Through API, the matching discount cannot be redeemed through that API flow.
What is the most common setup mistake?
The most common mistake is using different discount codes. Copy the code directly and confirm it is identical in both systems before testing.