
How to Change Quick Links in the Customer Portal
How to Change Quick Links in the Customer Portal
What Is This?
Quick Links are the four round buttons that sit at the top of your customer portal home page. They give your customers one-tap access to the things they use most — placing an order, viewing rewards, checking points, or making a reservation. You can change the heading, icon, and what each button opens, so the portal points to whatever matters most to your business.
Real-Life Example
Aishah runs a small café in Bangsar. By default, her customer portal showed Order Now, Rewards, Membership, and Reservations. But Aishah doesn't take online orders — her customers walk in. She replaced the Order Now button with a "Menu" button that opens her digital menu in a pop-up. Within a week she noticed customers tapping the new button before they even ordered. Less confusion at the counter and faster service for everyone.
Before You Start
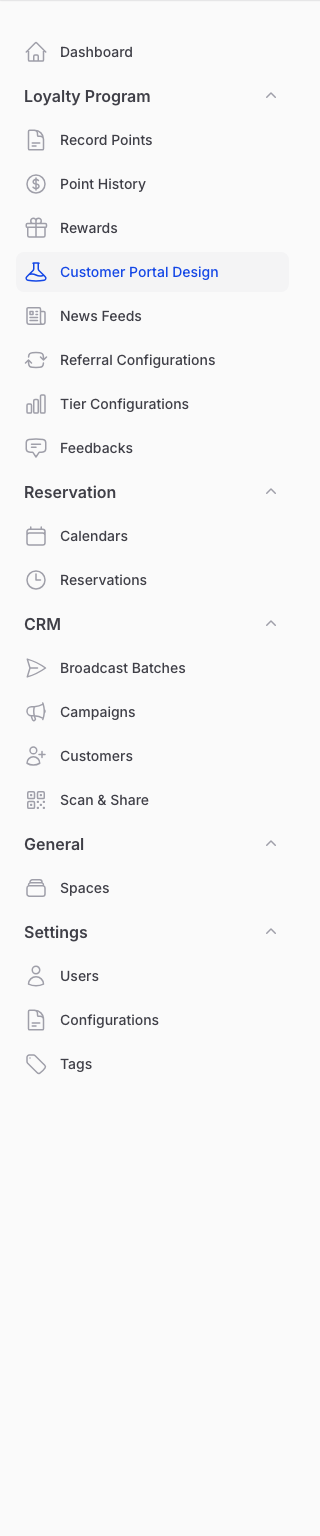
- Customer Portal Design appears under the Loyalty Program menu only when the Loyalty Program is enabled for your account.
- The Layout tab is available on plans that include the Custom Layout feature. If you don't see a Layout tab in Step 2, contact Pixalink support to check whether your plan includes it.
How to Set It Up
-
Go to Admin Panel → Loyalty Program → Customer Portal Design and open the design you want to edit.
-
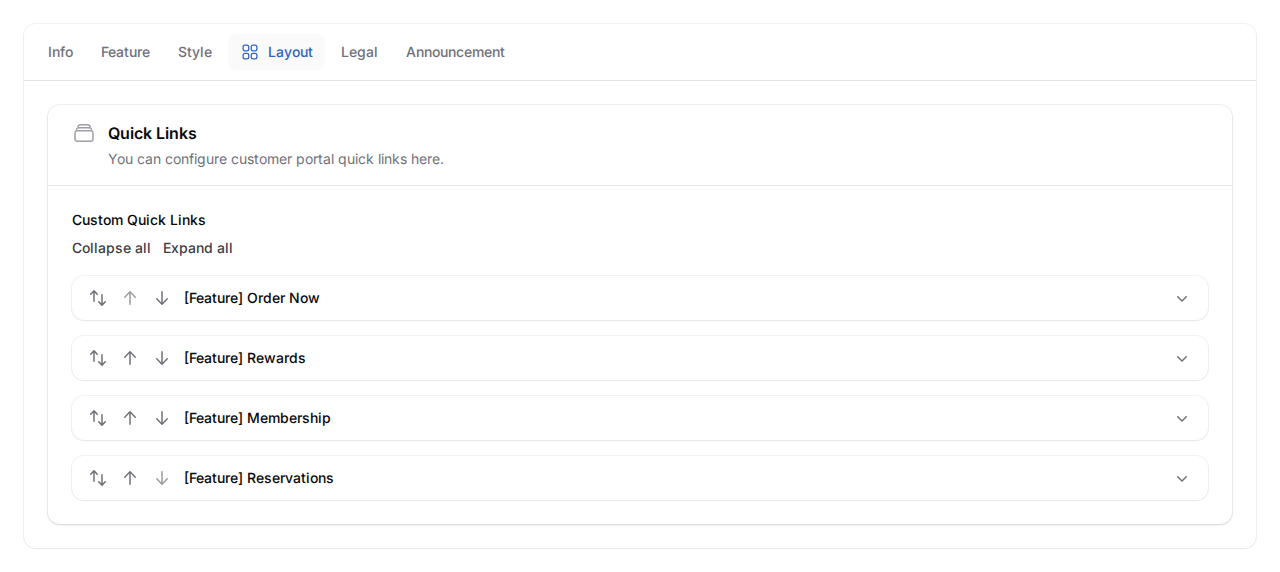
Click the Layout tab and scroll to the Quick Links section. You'll see your four current buttons listed as cards.
-
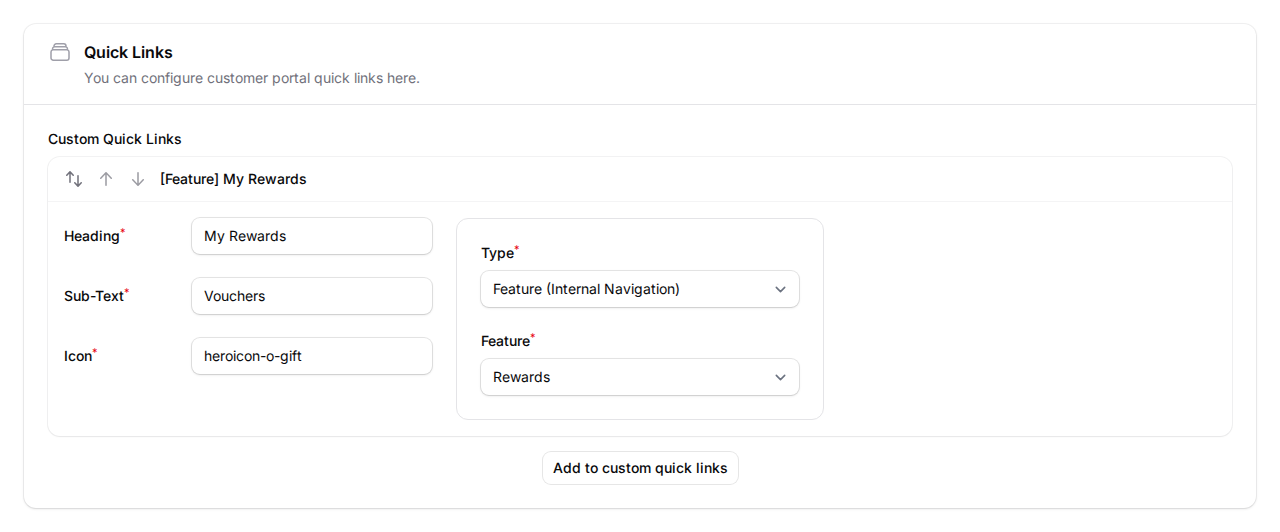
Click any card to open it. Update the Heading (max 12 characters), Sub-Text (max 12 characters), and Icon. Then pick a Type:
- Feature (Internal Navigation) — link to a built-in portal page. You'll then choose which one from a list that includes Ordering, Rewards, Membership, Reservations, Profile, Credits, Receipt Upload, Referral, and more.
- Pop-Up — open a styled message or image inside the portal. A Content editor appears where you can add formatted text and images (great for menus or terms).
- External Link — open any web address in a new tab. A URL field appears where you paste the destination address.
-
To change the order of the buttons, collapse any open card and use the up and down arrow buttons on the right of each card header to move it.
-
Click Save at the bottom of the page. Your changes go live on the customer portal right away.

What Your Customers Will See
Your customers see four round buttons across the top of the portal home page. Each button has the icon, heading, and sub-text you chose. Tapping a button opens the page, pop-up, or external site you linked. The buttons use your brand's primary colour, so they always match the rest of your portal.
Good to Know
- You can have up to four quick links — that's the limit. To swap one out, edit an existing card instead of trying to add a fifth.
- Headings and sub-text are capped at 12 characters each, so keep wording short. "Order Now" (9 characters) works, "Order Right Now Please" (22 characters) won't fit.
- The Use Default action restores all four default quick links — including their headings, sub-text, and icons — replacing any changes you've made. Defaults are Order Now / Delivery, Rewards / Vouchers, Membership / Points, and Reservations / Timeslot.
- If you pick the Pop-Up type, you can add formatted text and images using the editor — useful for menus, opening hours, or quick announcements.
- Changes apply to the design you're editing. Most businesses use one design across all their outlets, so you only need to make these changes once. If you're not sure which design your customers see, contact Pixalink support.
Need Help?
If a button isn't appearing or behaving the way you expect, contact Pixalink support and we'll help you sort it.