How to Add a Widget to Your Space
What Is This?
Widgets are interactive elements you can embed into your space's customer portal page. They add functionality beyond the standard loyalty features — like showing your Google Maps location, embedding a YouTube video, displaying a 3D virtual tour, or linking to your reservation calendar.
Real-Life Example
Puan Hana runs Casa de Hana boutique hotel in Langkawi. She adds three widgets to her space: a Google Maps embed so guests can find the hotel easily, a YouTube video showcasing the rooms, and a Reservation Widget linking to her booking calendar. Guests visiting the portal get a complete experience without leaving the page.
How to Add a Widget
Step 1: Open Your Space
From the Admin Panel sidebar, go to General → Spaces. Click on the space you want to edit.
Step 2: Find the Widgets Section
In the space edit page, scroll down to the Widgets relation manager section (or look for the Widgets tab).
Step 3: Create a New Widget
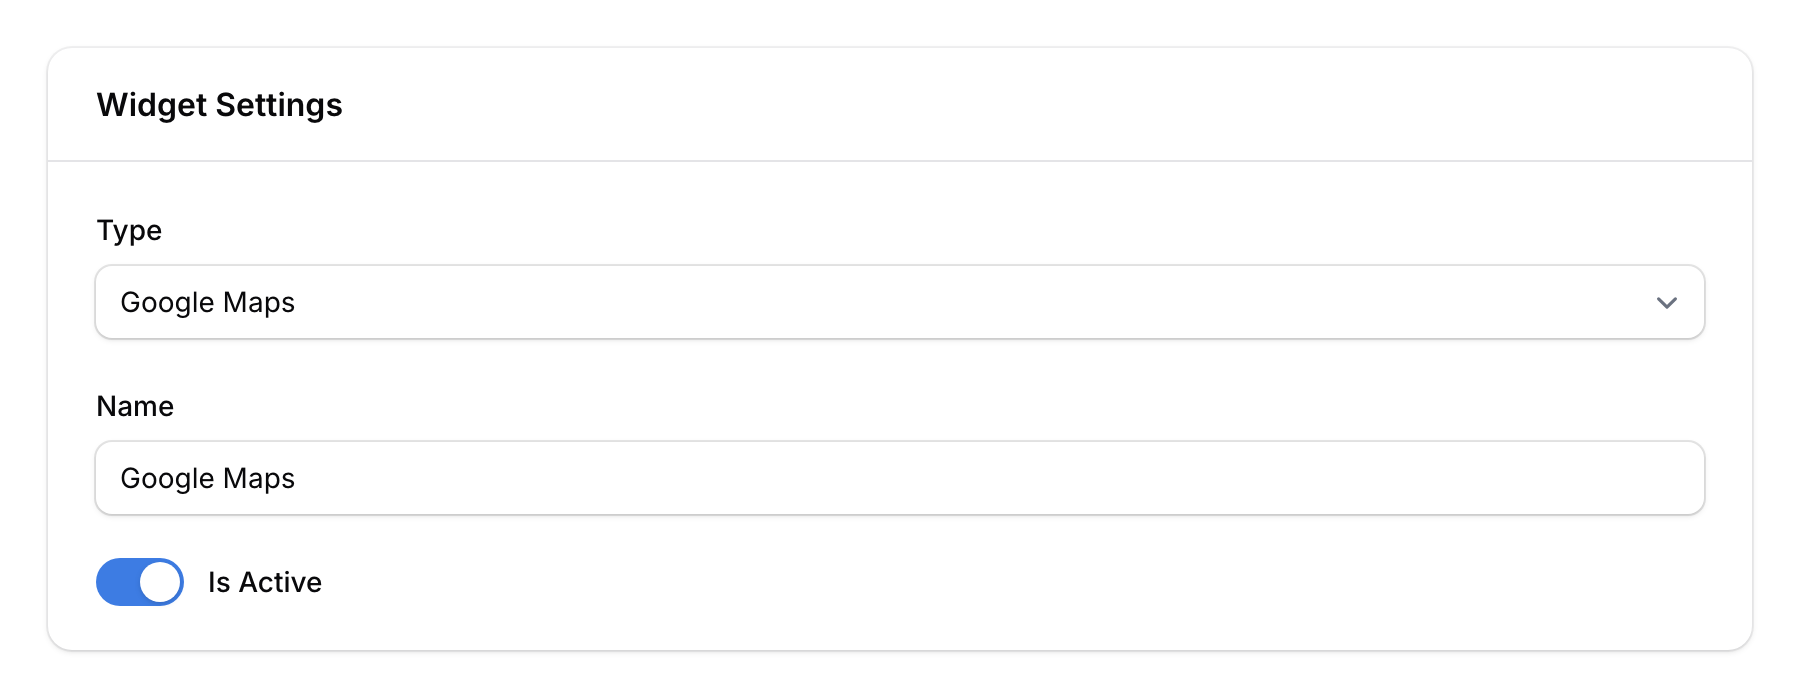
Click Create to add a new widget. Fill in the details:
- Type — Select from the available widget types (see table below)
- Name — Auto-populated based on type (you can change it)
- Is Active — Toggle on to display the widget
Available Widget Types
| Widget Type | What It Shows | Required Field |
|---|---|---|
| Google Maps | Embedded map of your location | Embed src (paste Google Maps embed code) |
| YouTube | Embedded YouTube video | Embed src (paste YouTube embed code) |
| Matterport | 3D virtual tour | Matterport ID |
| 3D Vista | Another 3D tour platform | Embed src |
| Facebook Page Feed | Your Facebook page posts (only available when editing, not on create) | Facebook page name |
| Calendly (Inline) | Calendly scheduling widget | Calendly URL |
| Reservation Widget | Your Pixalink reservation calendar | Select a calendar |
| Gallery | Image gallery | Upload up to 10 images (separate from space gallery) |
| Default Widget Without Matterport | Custom card with title, CTA, and background | Title, CTA text, background image |
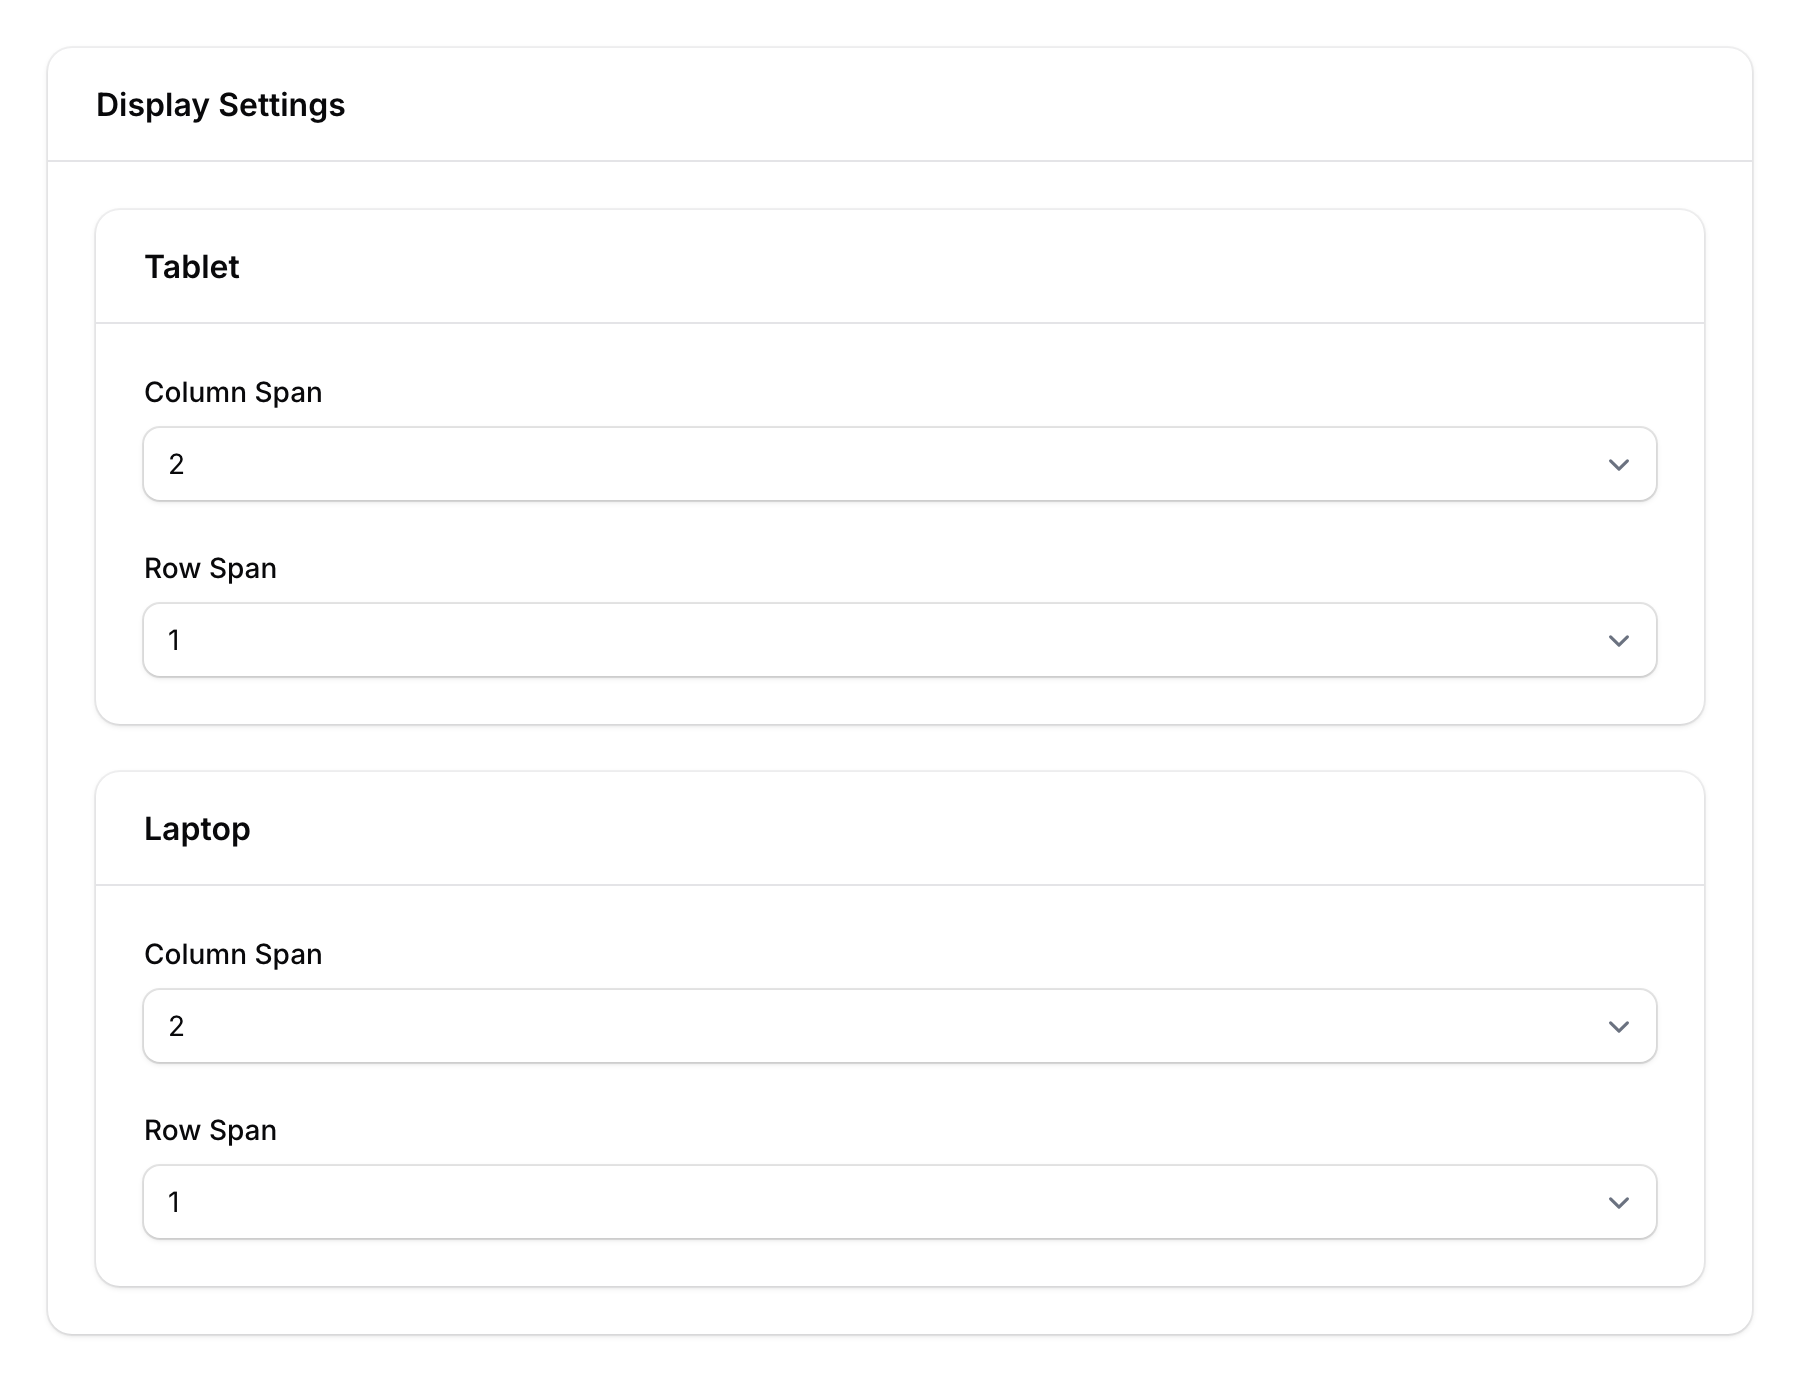
Step 4: Configure Display Settings
Set how the widget appears on different devices:
- Tablet — Column span (1–2) and row span (1–2)
- Laptop — Column span (1–3) and row span (1–3)
These settings control the widget's size in the grid layout. A larger span means the widget takes up more space.
Step 5: Save
Click Create to save the widget. It immediately appears on the customer portal page for that space.

Good to Know
- Multiple widgets — You can add as many widgets as you like to a single space.
- Active toggle — Quickly enable/disable widgets without deleting them.
- Responsive layout — Widgets automatically adjust for mobile, tablet, and laptop screens.
- Embed codes — For Google Maps and YouTube, paste the full embed code from the platform (the
<iframe>source URL). - Reservation Widget — This connects directly to your Pixalink calendar, letting customers book without leaving the portal.