How to Add Your Business Logo
What Is This?
Your business logo appears on your customer portal, loyalty cards, and notifications. Adding a logo gives your loyalty programme a professional, branded look that customers recognise and trust.
Real-Life Example
Puan Syafiqah just signed up Pixalink for her bakery, Kek Lapis Sarawak by Syafiqah. The first thing she does is upload her bakery's logo so the customer portal displays her brand instead of a generic placeholder.
How to Add Your Logo
Step 1: Open Your Space Settings
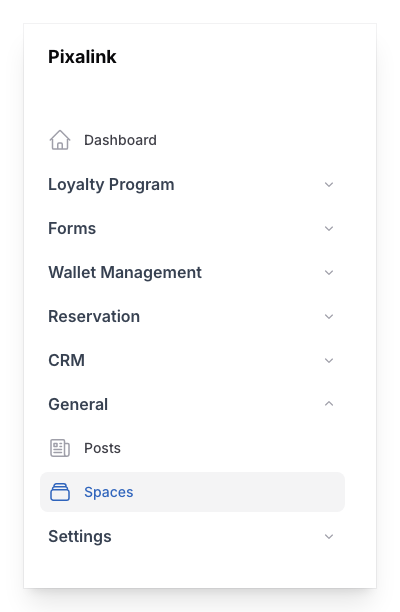
From the Admin Panel sidebar, go to General → Spaces. Click on the space you want to add a logo to, then click Edit.
Step 2: Go to the Media Tab
Switch to the Media tab in the space edit form.
Step 3: Upload Your Logo
Find the Logo field and upload your image:
- Aspect ratio — 1:1 (square). The system will auto-crop to this ratio.
- Max file size — 5 MB
- Recommended format — PNG with transparent background for best results
![]()
Step 4: Save
Click Save to apply the changes. Your logo will immediately appear on the customer portal and other branded materials.
![]()
Good to Know
- Square format required — Logos must be 1:1 (square). If your logo is rectangular, it will be cropped.
- Transparent backgrounds — Use a PNG with a transparent background so the logo blends well on any colour scheme.
- Per-space logos — Each space can have its own logo. This is useful for franchises or multi-brand businesses.
- High resolution — Upload the highest quality version you have (within the 5 MB limit). The system will resize as needed.