How to Set Up Loyalty Tiers
How to Set Up Loyalty Tiers
What Is This?
Loyalty tiers reward your best customers with extra perks as they spend more. You create tiers like Member, Silver, Gold, and Platinum — each with its own point requirement, benefits, and point multiplier. Customers move up automatically as they earn points, keeping them motivated to return.
Video Walkthrough
Real-Life Example
Siti runs a bubble tea shop in Petaling Jaya. She noticed her regulars visit 2-3 times a week but never felt special. She set up four tiers: Member (0 points), Silver (200 points), Gold (500 points), and Platinum (1,000 points). Gold members earn double points on every purchase, and Platinum members get an exclusive monthly reward. Within two months, her average customer visit frequency jumped because people wanted to reach the next tier. Her top customers now spend over RM200 a month — up from RM120 — just to maintain their Platinum status.
How to Set It Up
-
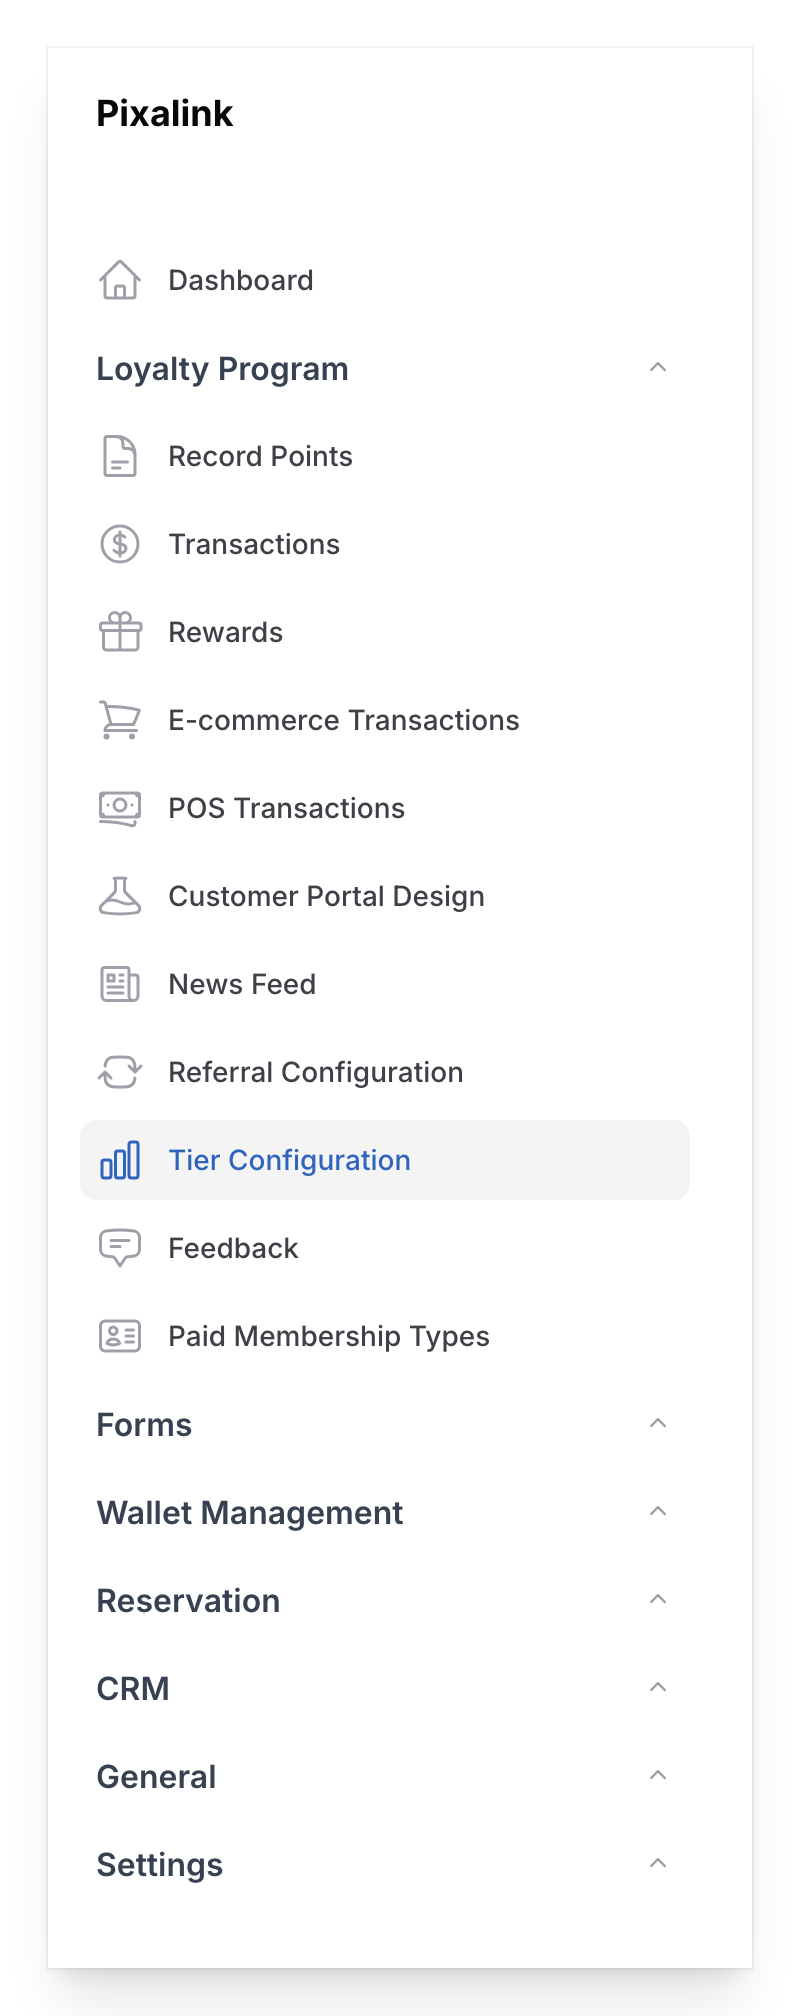
Go to Admin Panel → Loyalty Program → Tier Configuration.
-
Click New Tier Configuration to start the setup wizard.

-
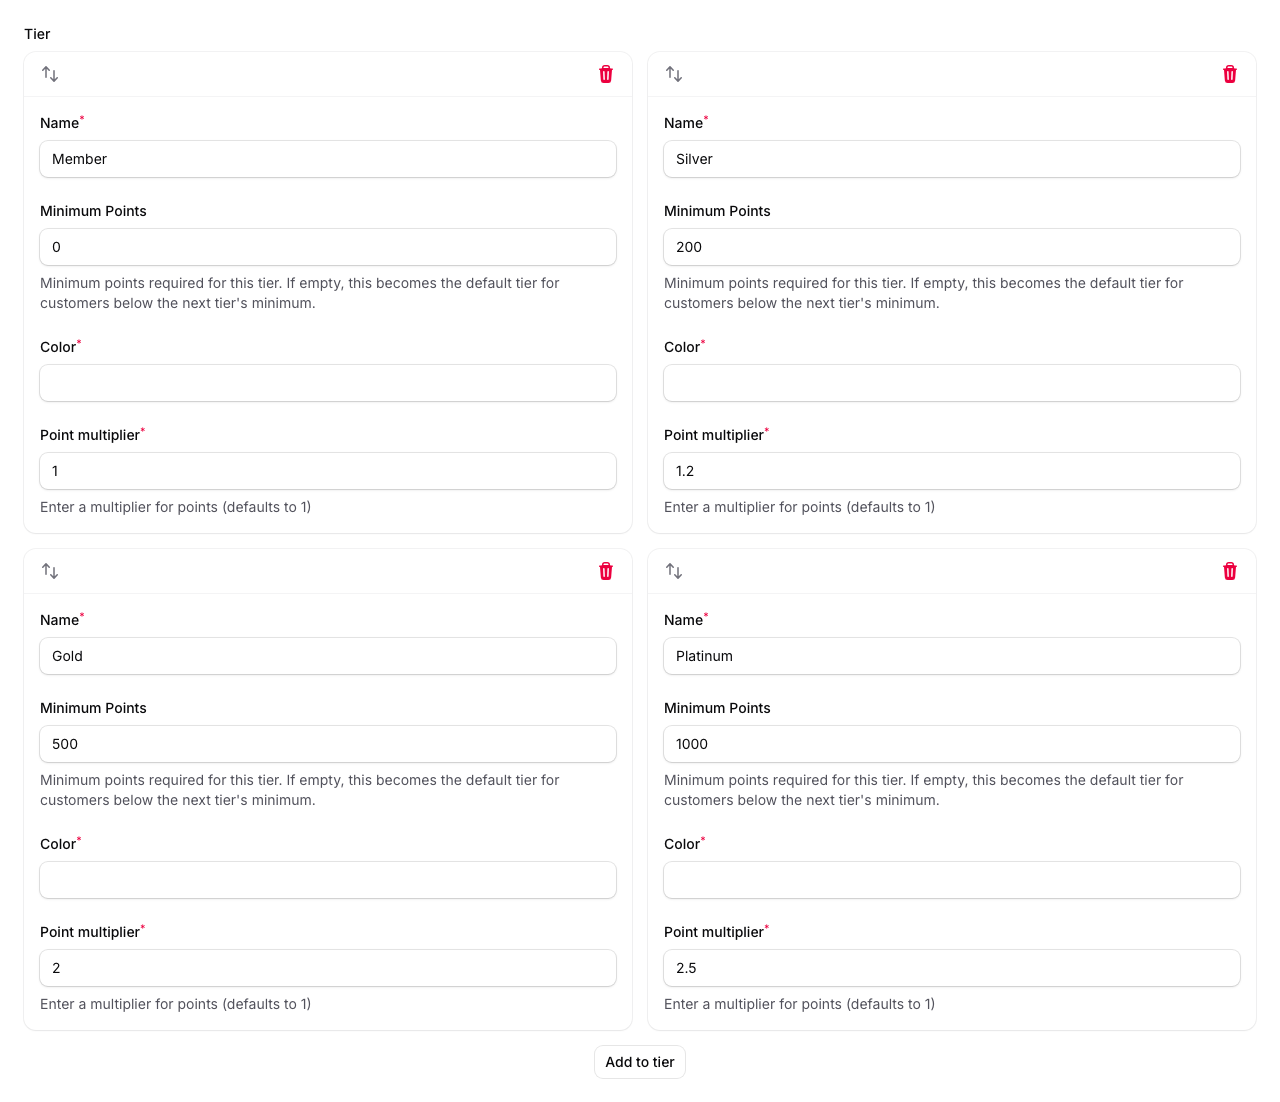
Fill in each tier card in the Tier step. The wizard comes with four sample tiers (Member, Silver, Gold, Platinum) — you can edit these or add your own.
- Name — what your customers will see (e.g., "Gold")
- Minimum Points — the points a customer needs to reach this tier. Use 0 for your base tier.
- Color — the colour shown on the customer's membership card
- Point multiplier — how fast this tier earns points. A multiplier of 2 means double points on every purchase.
- Background image — upload a custom card background for this tier
- Perks — add the benefits for this tier (icon, heading, and description for each)
- Automations — optionally set up automatic actions — such as assigning a reward or applying a discount — when customers reach this tier
-
Click Next to move to the Terms & Conditions step.
-
Add your terms and conditions text and any FAQs you'd like customers to see.
-
Click Create to save your tier setup.
Managing Your Tiers
After creating your tier setup, you can manage individual tiers from the edit page.
-
Go to Admin Panel → Loyalty Program → Tier Configuration and click on your configuration.
-
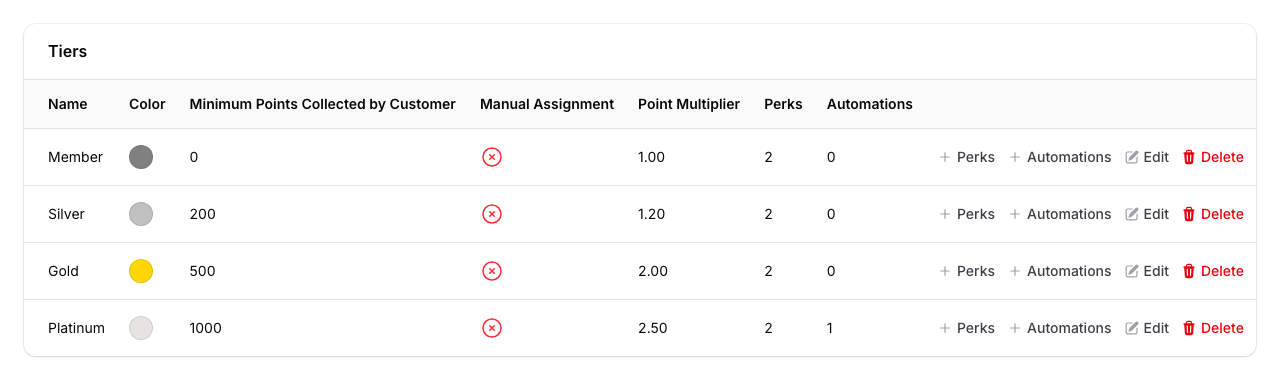
Scroll down to the Tiers table to see all your tiers listed with their colours, point requirements, and multipliers.

-
Click Perks next to any tier to add or edit its benefits.
-
Click Automations next to any tier to set up automatic actions — such as assigning a reward or applying a discount — when customers reach that tier.
-
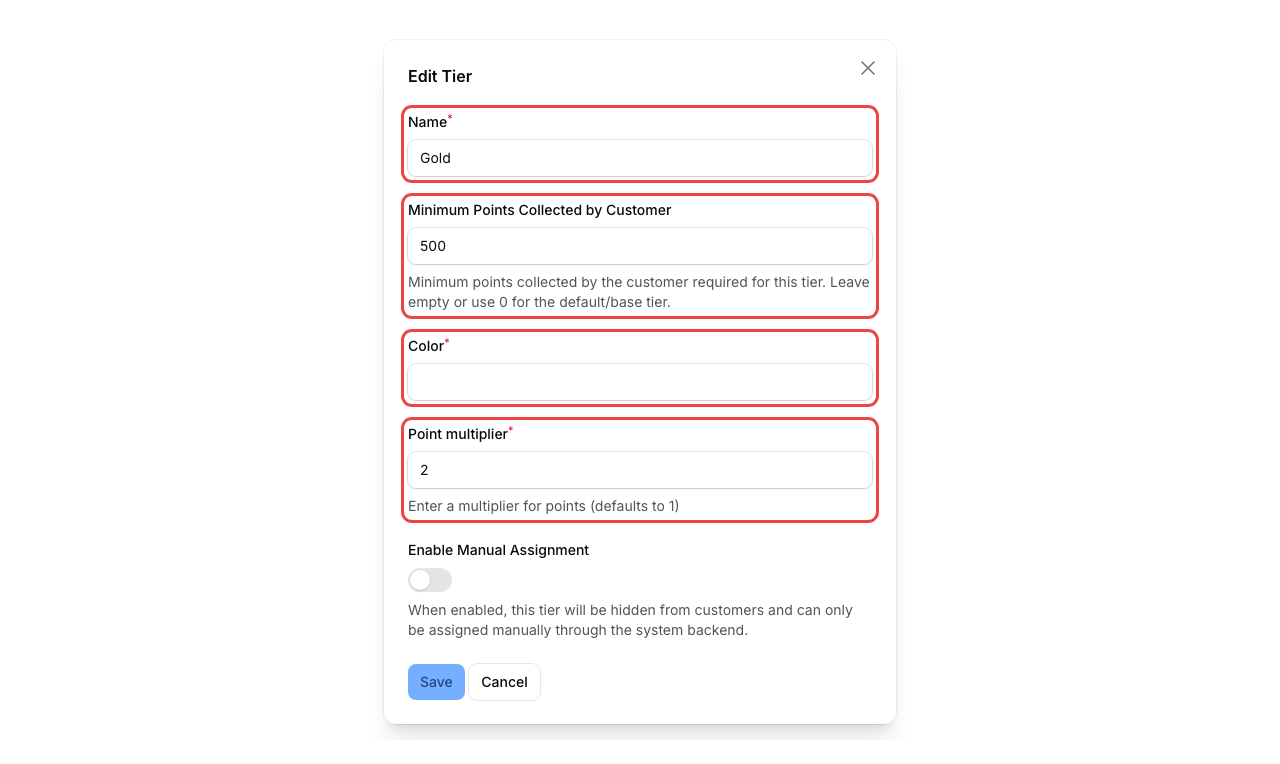
Click the Edit button next to a tier to change its name, colour, points requirement, or multiplier.
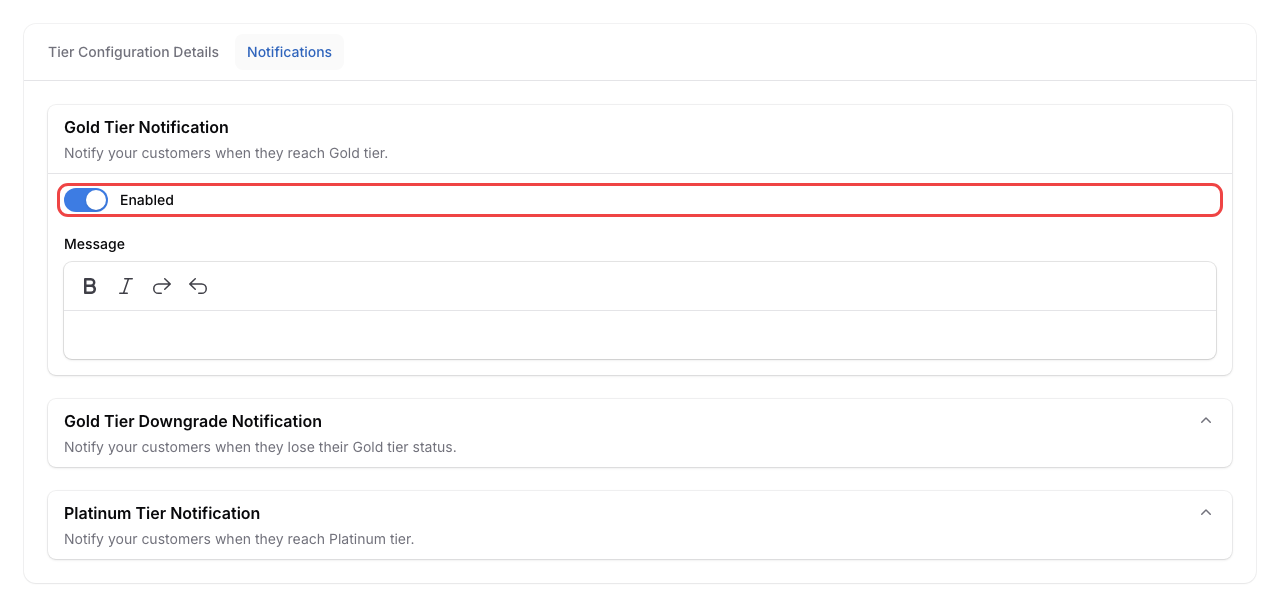
Setting Up Tier Notifications
You can send WhatsApp messages to customers when they move up (or down) a tier.
-
Go to Admin Panel → Loyalty Program → Tier Configuration and click Edit on your configuration.
-
Click the Notifications tab.
-
Expand the notification section for the tier you want (e.g., "Gold Tier Notification").
-
Turn on the Enabled toggle.
-
Edit the upgrade message template. You can use these variables to personalise the message:
{{CUSTOMER_NAME}}— the customer's name{{SPACE_NAME}}— your outlet or brand name{{NEW_TIER}}— the tier the customer just reached{{CURRENT_POINT}}— the customer's current point balance{{BENEFITS}}— the perks listed for the new tier
For downgrade notifications, these variables are available:
{{CUSTOMER_NAME}}— the customer's name{{SPACE_NAME}}— your outlet or brand name{{PREVIOUS_TIER}}— the tier the customer dropped from{{NEW_TIER}}— the tier the customer moved down to{{CURRENT_POINT}}— the customer's current point balance{{POINTS_NEEDED}}— how many points the customer needs to return to the previous tier
-
Click Save when you're done.
What Your Customers Will See
On the customer portal, each customer sees a tier card showing their current tier name, colour, and a list of perks. As they earn more points, the card updates to reflect their new tier. This gives your customers a clear sense of progress and motivates them to keep coming back.
Good to Know
- Customers move up tiers automatically based on their total purchase points — they don't need to do anything
- Redeeming points for rewards does not lower a customer's tier. Only point expiry can reduce a customer's tier.
- The Point multiplier stacks with your base earning rate. If a customer normally earns 1 point per RM1 spent, a 2x multiplier means they earn 2 points per RM1.
- Enable Manual Assignment hides a tier from automatic progression. Use this for VIP tiers you assign personally.
- You can set up both upgrade and downgrade notifications for each tier under the Notifications tab