
How to Let Customers Redeem Voucher Codes Themselves (Redeem Code Page)
The Redeem Code page lets your customers claim a reward on their own by typing in a voucher code you gave them. Instead of a staff member entering the code at your counter, the customer enters it inside your customer portal and the reward drops straight into their account.
This is useful when you hand out printed codes, share codes in an email or WhatsApp broadcast, or run a promotion where each customer gets a unique code. Once they redeem it, the reward sits in their Rewards list, ready to use.
When to use the Redeem Code page
Turn this on when you want customers to claim rewards from a code by themselves, for example:
- Unique voucher codes printed on receipts, flyers, or packaging
- Codes sent in a campaign so customers can claim a welcome gift
- Event or partner codes that only certain people receive
The customer must be logged in to your customer portal to redeem a code. When they enter a valid code and confirm, the reward is added to their account.
Before you start
Two things need to be in place before the Redeem Code page will work.
1. Third-party reward vouchers must be switched on for your account. This is what makes the Redeem Code section appear in Step 2. If you do not see it, contact Pixalink support and ask them to enable third-party reward vouchers for your account first.
2. You must upload your voucher codes first. The codes customers type in are the unique third-party voucher codes you load onto a reward ahead of time. Create the reward, then import or generate its codes and mark them as claimable. For the full steps, see How to Generate Unique 3rd-Party Voucher Codes and Upload Them to Pixalink or How to Import Third-Party Reward Vouchers.
Which code do customers enter here?
Customers enter the voucher code you uploaded, the unique third-party code tied to the reward. This is not the same as the temporary 6-digit redemption code, and mixing the two up is the most common point of confusion.
- Uploaded voucher code (used on this page): a unique code you gave the customer, for example printed on a receipt or sent in a campaign. Entering it here claims the reward into the customer's account.
- 6-digit redemption code (used later, at your counter): a short code shown in the customer's portal when they are ready to use a reward they already own. Your staff use it to verify and complete the redemption in person.
In short, the Redeem Code page is for claiming a reward from a code you handed out. It is not for cashing a reward in at the counter, which is a separate step.
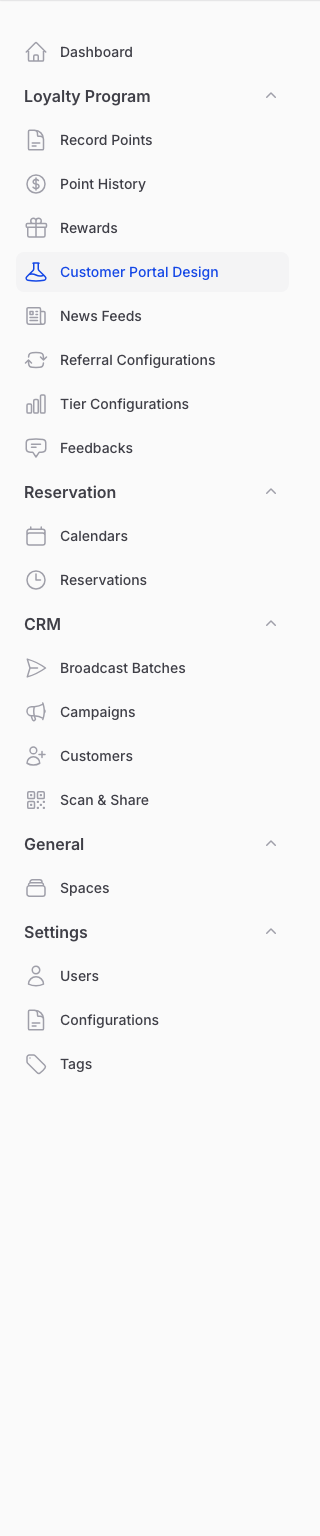
Step 1: Open Customer Portal Design
In the Admin Panel, open the Loyalty Program group in the left menu and click Customer Portal Design.
Step 2: Turn on Enable Redeem Code Page
Open your customer portal theme, then click the Feature tab. Find the Redeem Code section and switch on Enable Redeem Code Page. Click Save changes at the bottom of the page.
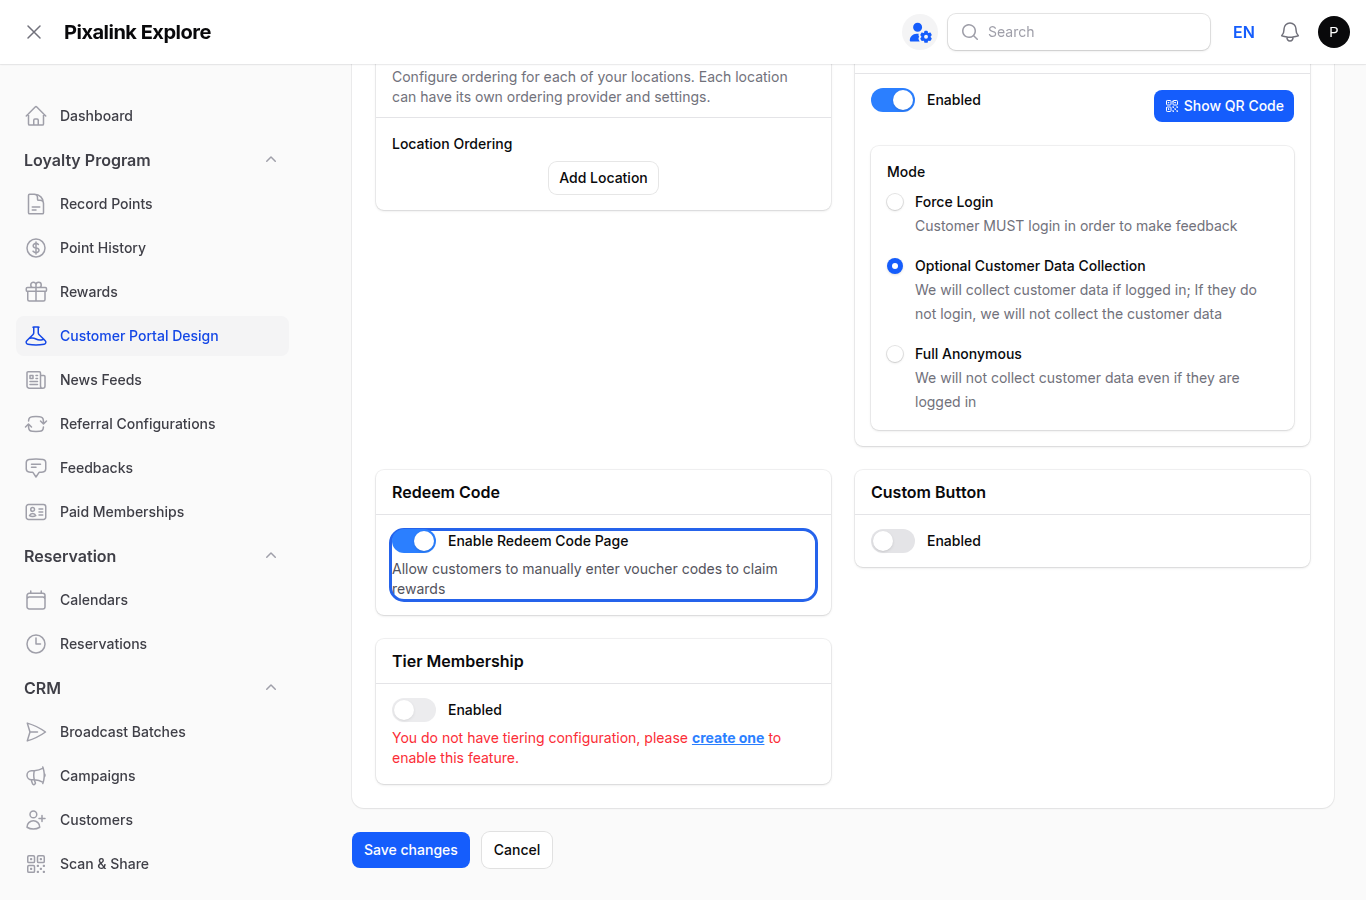
That is all you need to do. A Redeem Code shortcut now appears for your customers inside the portal.
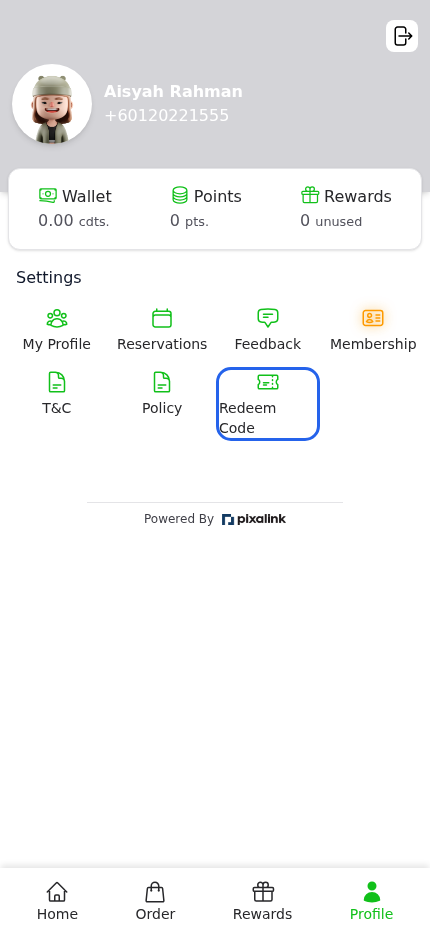
Step 3: Customers open the Redeem Code shortcut
When a customer logs in to your portal, they tap Profile at the bottom, then tap the Redeem Code shortcut under Settings.
Step 4: Customers enter their voucher code
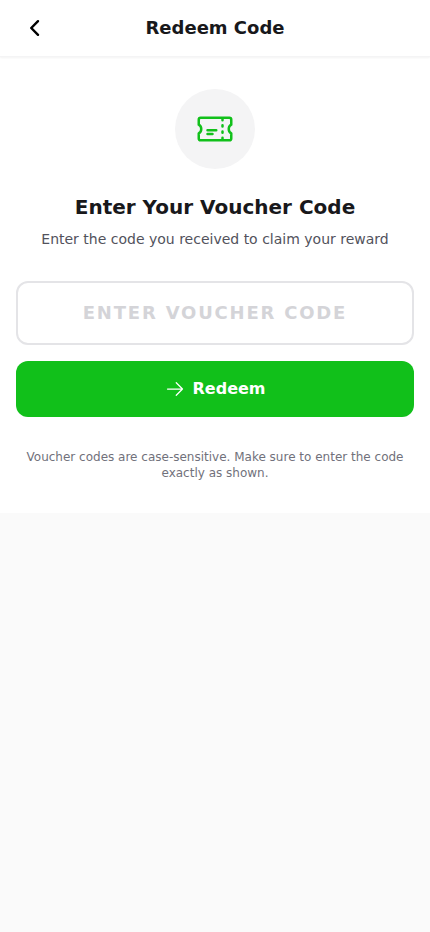
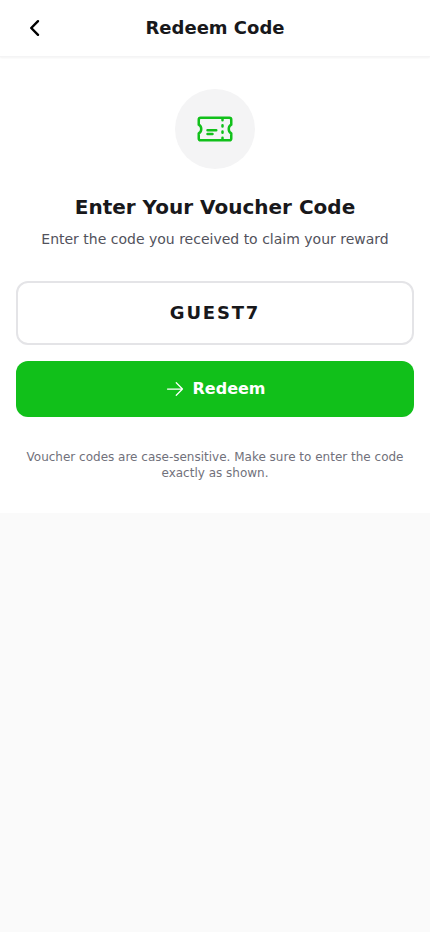
The Redeem Code page opens with a single box titled Enter Your Voucher Code. The customer types in the code you gave them.
Step 5: Customers tap Redeem
Once the code is typed in, the customer taps Redeem. Voucher codes are case-sensitive, so remind customers to enter the code exactly as you gave it to them.
Step 6: Customers confirm and claim the reward
If the code is valid, a confirmation page opens showing the reward, its voucher code, and the expiry date. The customer taps Claim Reward to save it to their account.
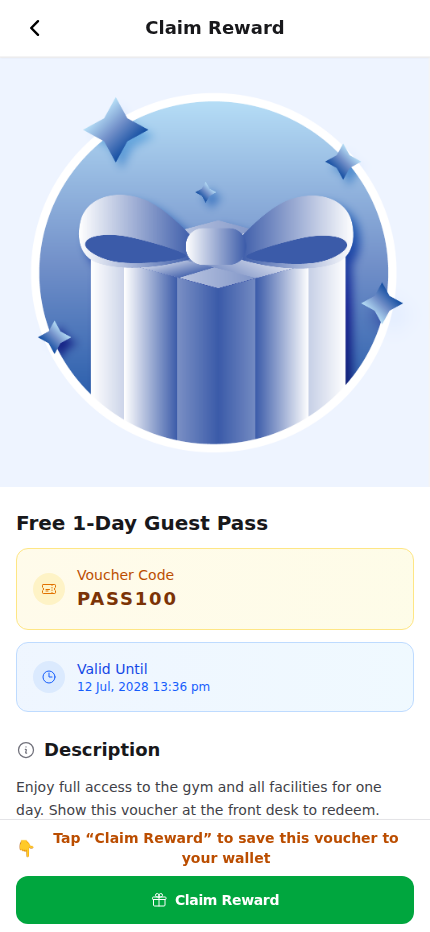
The reward now sits in the customer's Rewards list in the portal, ready for them to use.
If a code does not work
Each code can only be claimed once. If a customer sees an error, here is what it means:
- "This voucher code is not valid." The code was typed wrong or does not exist. Ask the customer to check for typos and try again.
- "This voucher has already been claimed." Someone has already used that code. Each code works only one time.
- "This voucher code has expired." The code is past its expiry date and can no longer be claimed.
- "This code is not valid for your account." The code belongs to a different business.
- "You have already claimed this reward." The customer has already claimed a one-time reward and cannot claim it again.
Frequently asked questions
Do customers need an account to redeem a code? Yes. They must be logged in to your customer portal before they can redeem a code.
Where does the reward go after they redeem? Straight into the customer's Rewards list in the portal, ready for them to use.
Can the same code be used by many customers? No. Each code can be claimed only once. If you want to reward many customers, give each of them their own unique code.