
Eats365 Tier-Based Discount Configuration
What Is This?
The Eats365 tier-based discount feature lets you configure a storewide discount percentage for each loyalty tier, which is synced to the Eats365 POS. You can also exclude specific products from the discount (e.g., premium items that should never be discounted).
Each tier can have its own discount percentage and its own list of excluded products, giving you full control over how discounts scale with loyalty.
Real-Life Example
Imagine an F&B restaurant using Pixalink loyalty tiers with Eats365 POS:
| Tier | Discount | Excluded Products |
|---|---|---|
| Bronze | 5% off | Wagyu Steak, Lobster Thermidor |
| Silver | 10% off | Wagyu Steak |
| Gold | 15% off | (none — discount applies to everything) |
When a Gold-tier customer scans their membership at the Eats365 terminal, the POS automatically applies a 15% storewide discount to their entire order. Bronze and Silver members get their respective discounts, but with certain premium items excluded.
Prerequisites
Before configuring tier-based discounts, ensure:
- Eats365 integration is set up — Your organisation's Eats365 connection must be active. If you don't see any Eats365 sections in your admin panel, contact Pixalink support to complete the connection
- Spaces have a restaurant code — Each outlet that uses Eats365 must have its restaurant code selected in the space's Eats365 integration settings (Admin Panel → General → Spaces → Edit)
- Tier configuration exists — You need an existing tier configuration with tiers created
How to Set It Up
Step 1: Navigate to the Tier
- Go to Admin Panel → Loyalty Program → Tier Configurations
- Select the tier configuration you want to edit
- In the Tiers relation manager, you'll see all your tiers listed with their settings
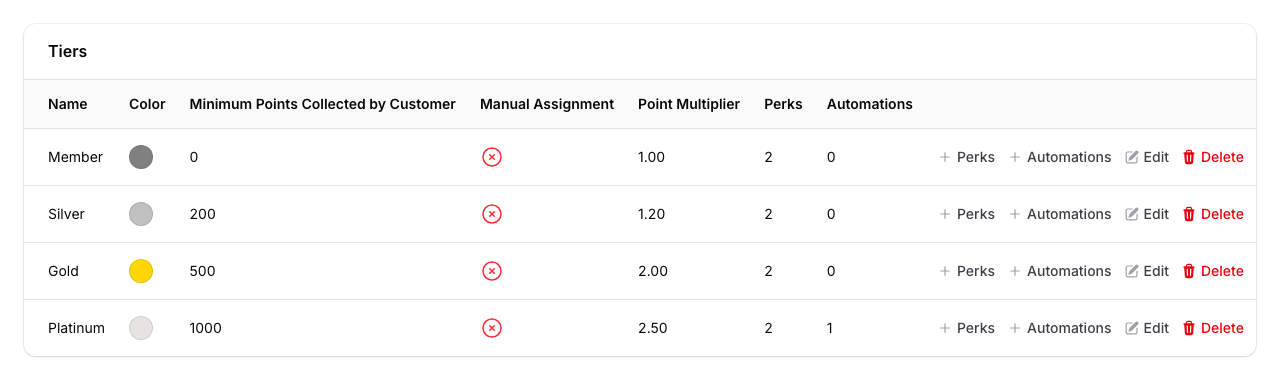
- Click the + Automations button on the tier row you want to configure (e.g., Gold)
Note: Each row has four action buttons: + Perks, + Automations, Edit (pencil icon), and Delete (trash icon). For discount configuration, click + Automations.
Step 2: Add the Eats365 Member Plan Block
- A modal will open showing the Automations section
- Click the Add to automations button
- Select Eats365 Member Plan from the dropdown
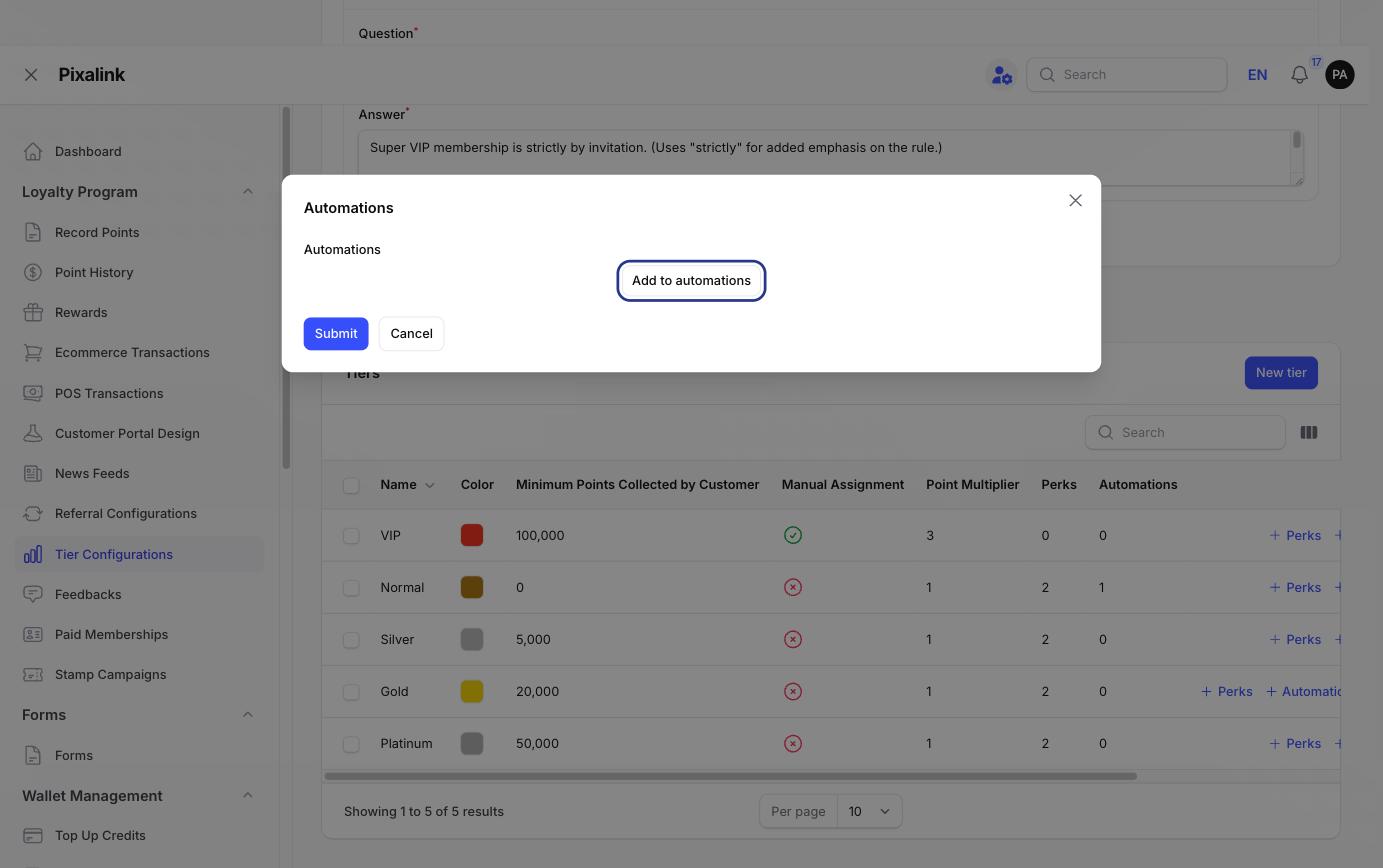
Note: You can only add one Eats365 Member Plan block per tier.
Step 3: Configure the Discount
Fill in the following fields:
- Discount Off (%) — Enter the storewide discount percentage for this tier. Accepts values from 0 to 100 (supports up to 2 decimal places, e.g.,
7.50). This is required. - Non-Discountable Product Codes — Select products that should be excluded from the discount. This is a searchable multi-select dropdown that pulls live product data from Eats365.
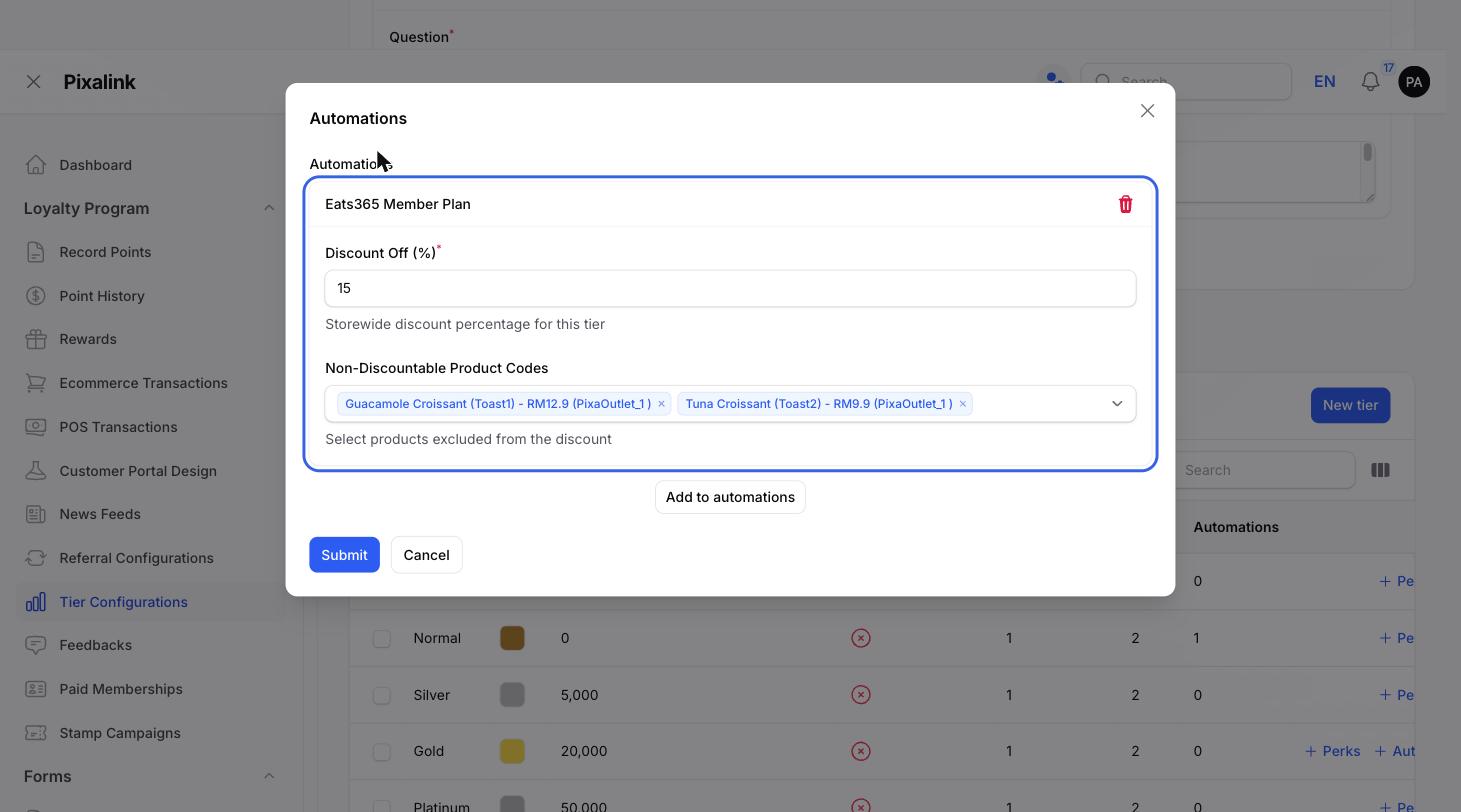
Step 4: Save
Click Save at the bottom of the modal to apply the configuration. The discount settings will be synced to Eats365 for this tier.
How the Product Dropdown Works
The Non-Discountable Product Codes field is a searchable dropdown that fetches products directly from your Eats365 menu. Here's how it works:
- Live data — Products are fetched from the Eats365 API, not stored locally. You always see the current menu.
- All spaces included — Products are aggregated from every space in your organisation that has an Eats365 restaurant code configured.
- Display format — Each product appears as:
Product Name (SKU Code) - RM{price} (Space Name), making it easy to identify the exact item and which outlet it belongs to. - Search — Type to filter products by name, SKU code, or any part of the display text.
- Multi-select — You can exclude multiple products from the discount.
Good to Know
- Per-tier configuration — Each tier has its own independent discount percentage and exclusion list. Changing one tier does not affect others.
- Maximum one block per tier — You can only have one Eats365 Member Plan automation per tier. If you need to change settings, edit the existing block rather than adding a new one.
- Products across spaces — The product dropdown shows items from all Eats365-connected spaces. This means if you have multiple outlets, you can exclude products from any of them.
- Zero discount — Setting the discount to
0effectively means no discount for that tier, but the member plan is still synced to Eats365. - Decimal precision — You can use decimals like
7.50for precise discount percentages. The step is 0.01.