
How to Create a Meta App for WhatsApp Cloud API
Before connecting WhatsApp Cloud API to Pixalink, the vendor needs a Meta App registered under their Meta Business portfolio. This guide walks through creating one on the Meta for Developers platform.
This app lives under the vendor's own Meta Business account — there is no need to share it with Pixalink's business portfolio.
Step 1: Start the App Creation Wizard
- Go to Meta for Developers and log in with the vendor's Facebook account.
- Click My Apps in the top navigation bar, then click Create App.
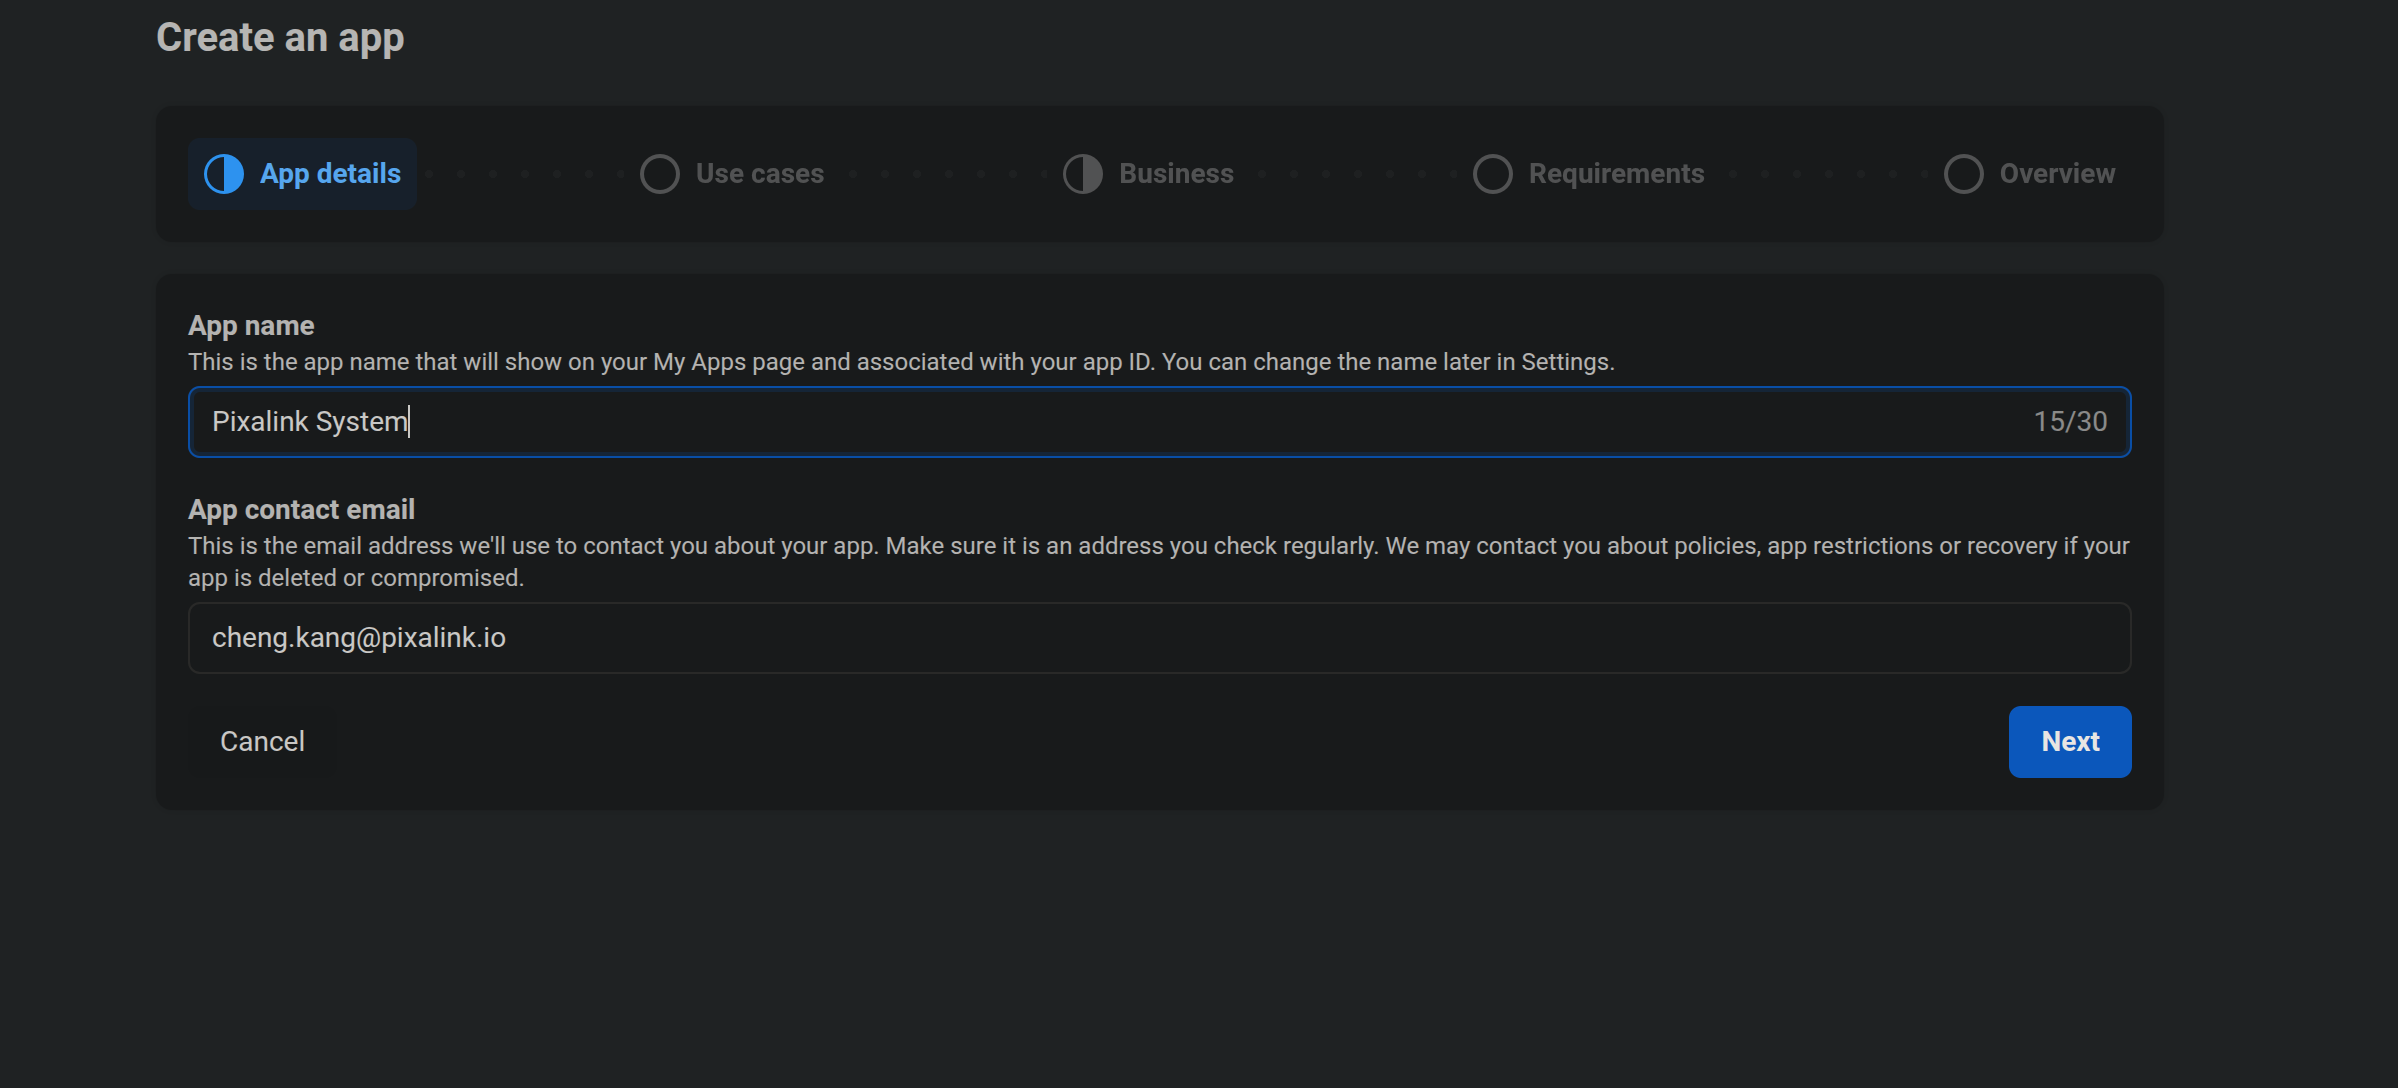
Step 2: Fill in the App Details
- Enter an App name — use something recognisable like the business name followed by "System" (e.g. "Pixalink System").
- Enter the App contact email — this is the email Meta will use to contact the vendor about app policies, restrictions, or recovery. Use an email the vendor checks regularly.
- Click Next.
Step 3: Select the Use Case
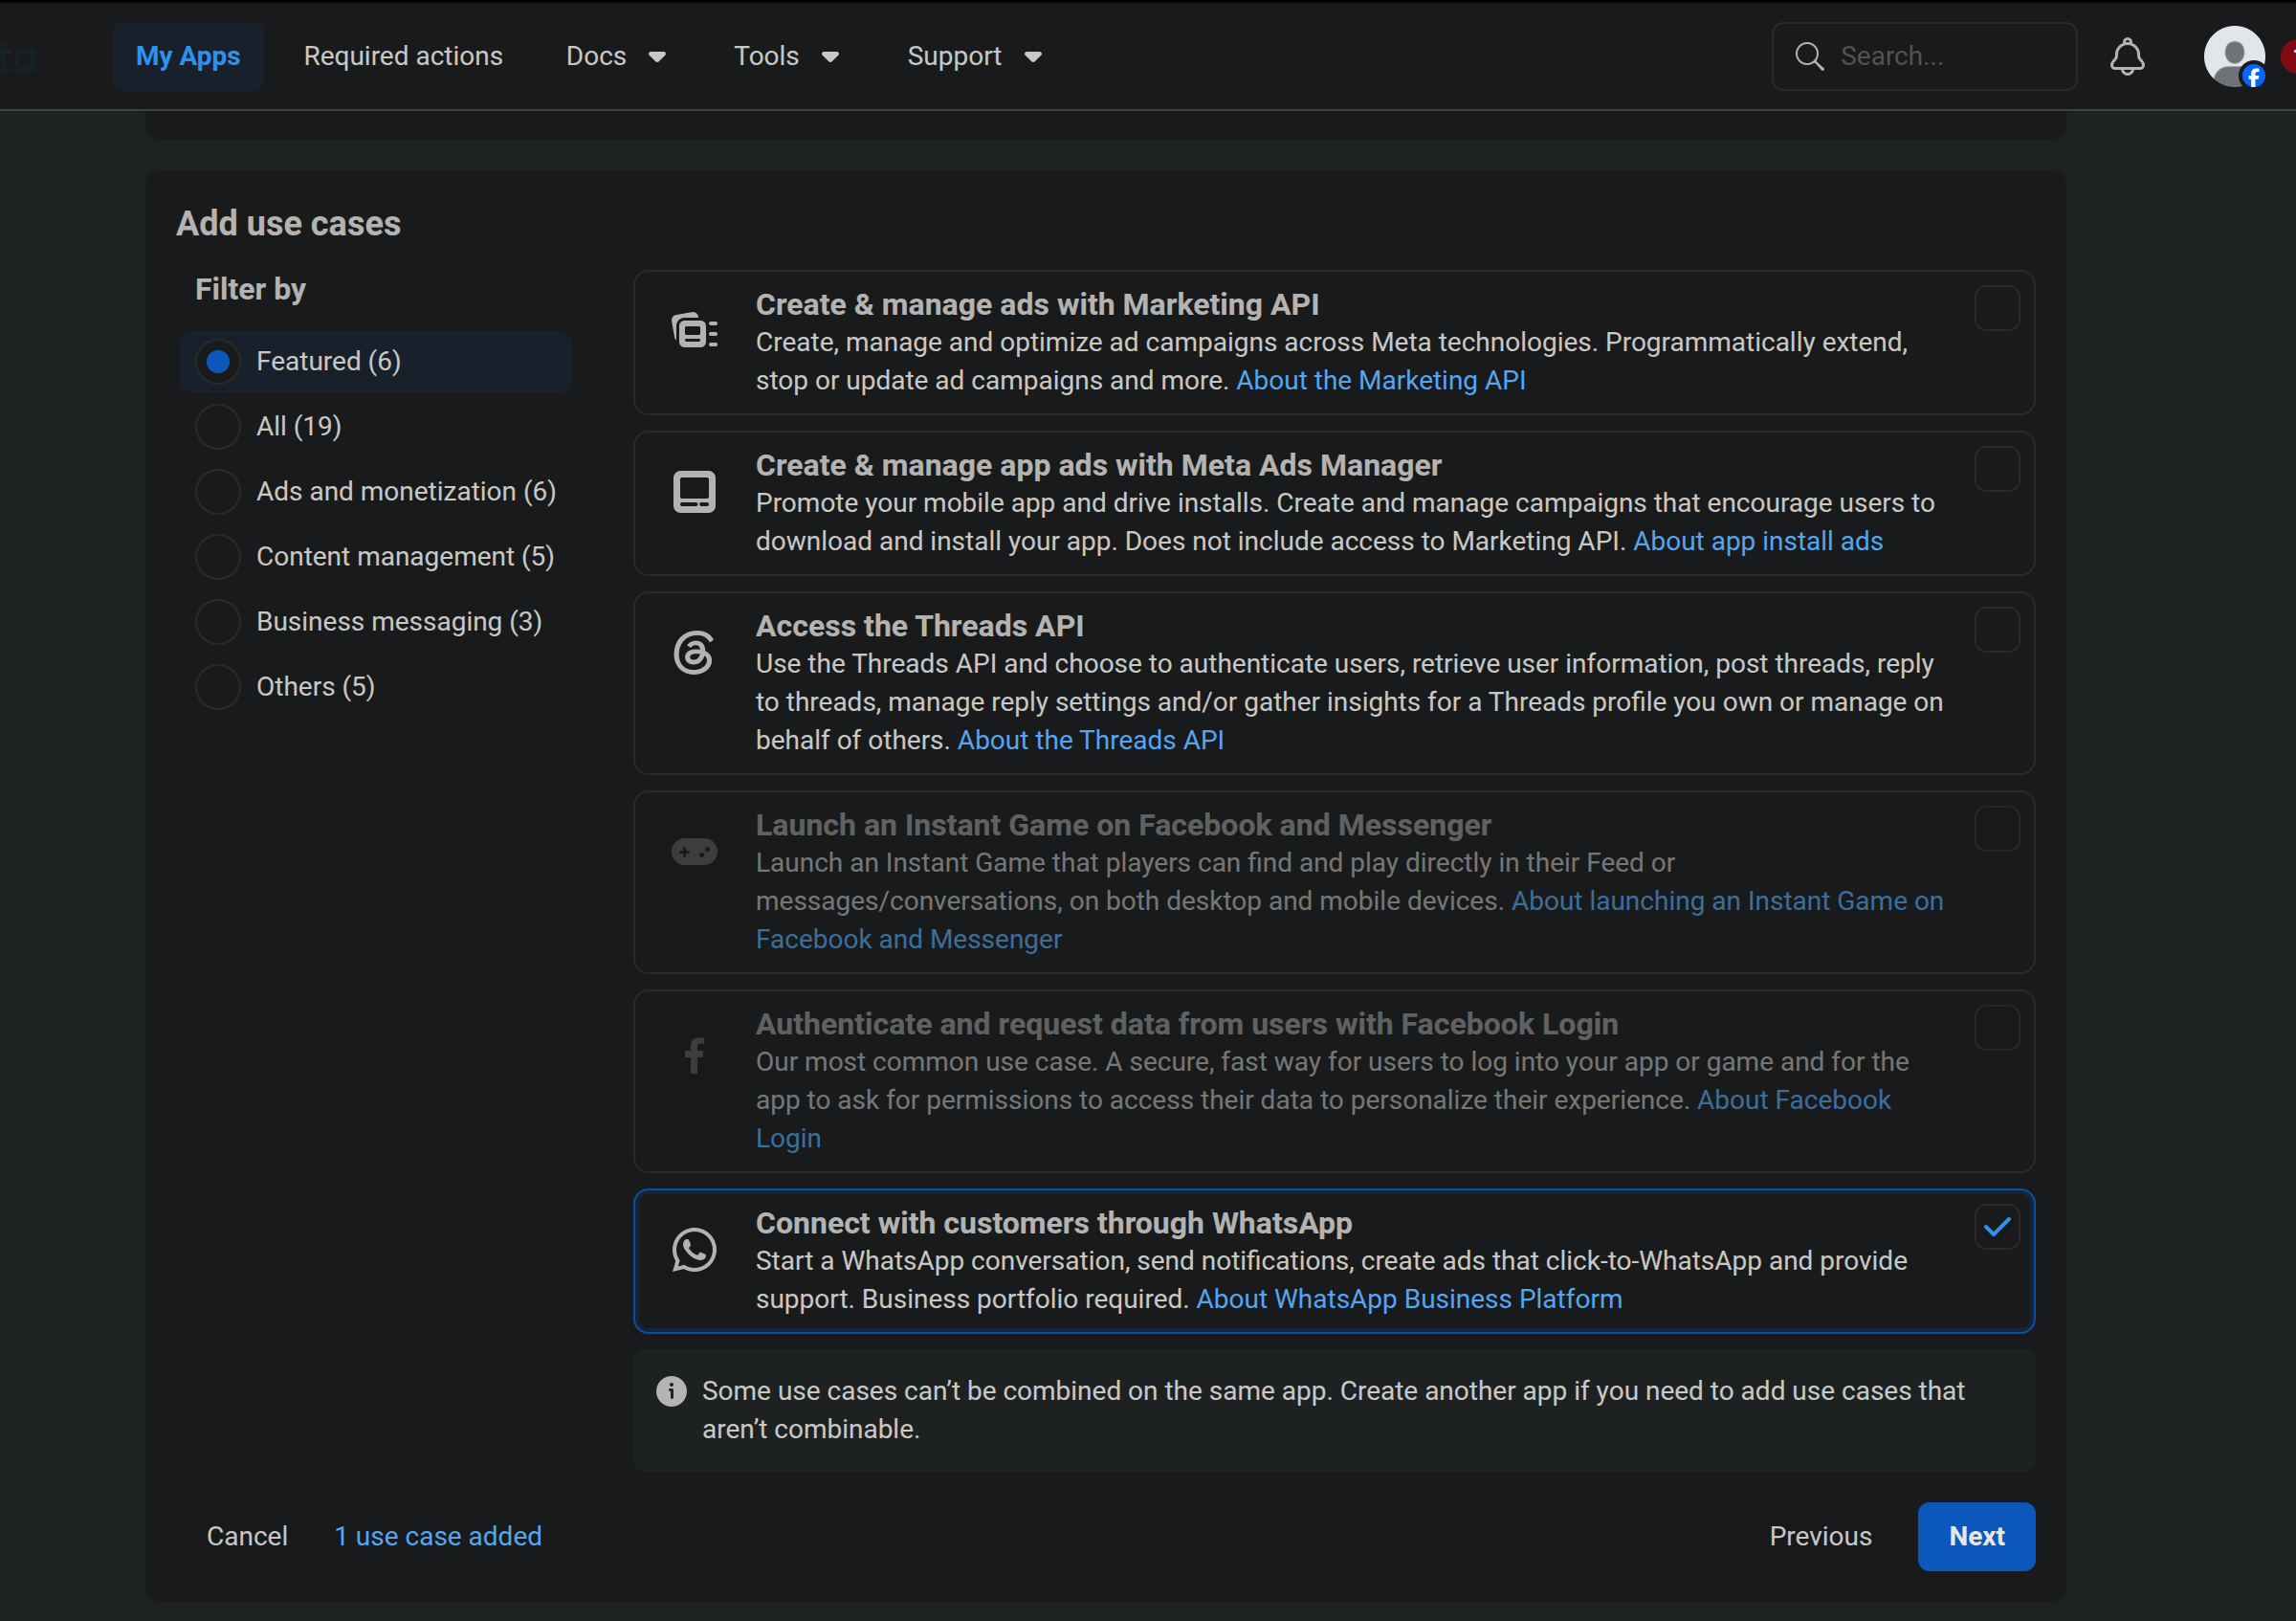
- On the Add use cases screen, scroll down the list of available use cases.
- Select Connect with customers through WhatsApp — this enables the WhatsApp Business Platform for the app.
- Click Next.
If this use case does not appear, make sure the vendor's account has a verified Business portfolio linked. A business portfolio is required for WhatsApp access.
Step 4: Connect the Business Portfolio
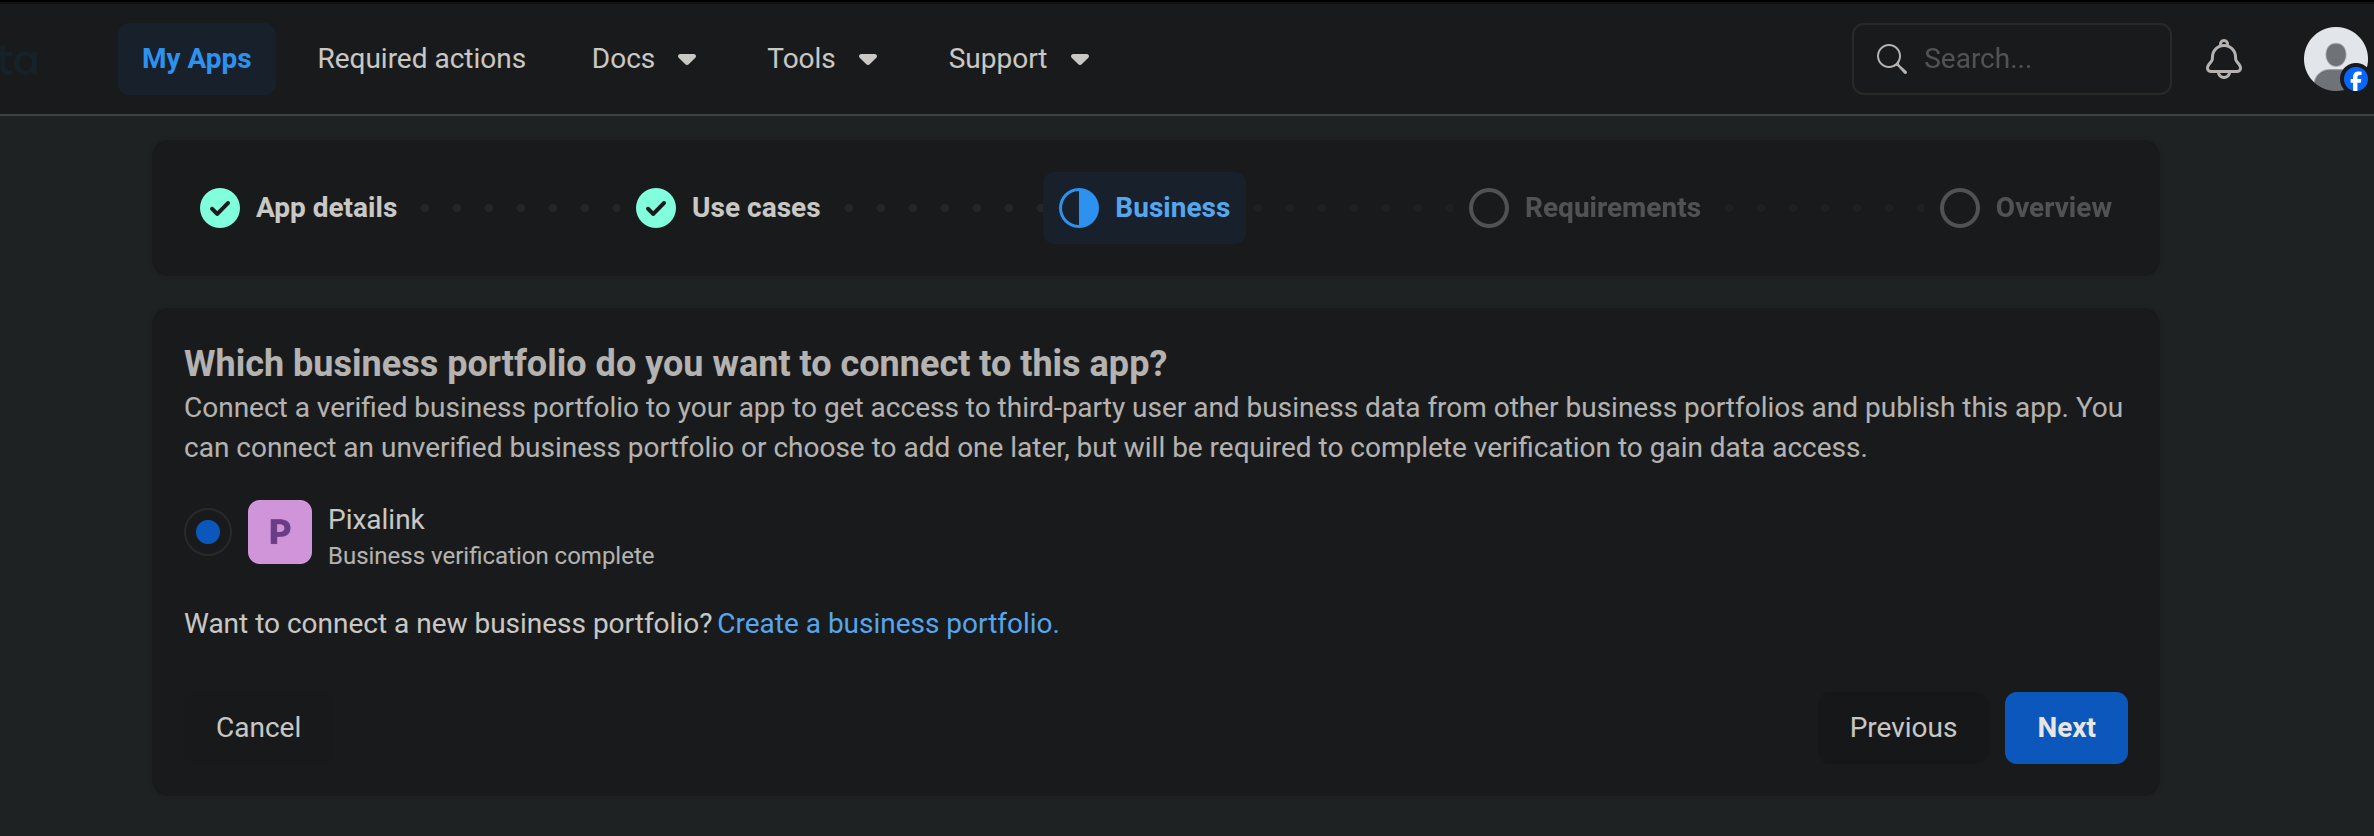
- Select the vendor's Business portfolio from the list. It should show the business name and verification status (e.g. "Business verification complete").
- If the vendor does not have a business portfolio yet, click Create a business portfolio to set one up first.
- Click Next.
Step 5: Review Publishing Requirements
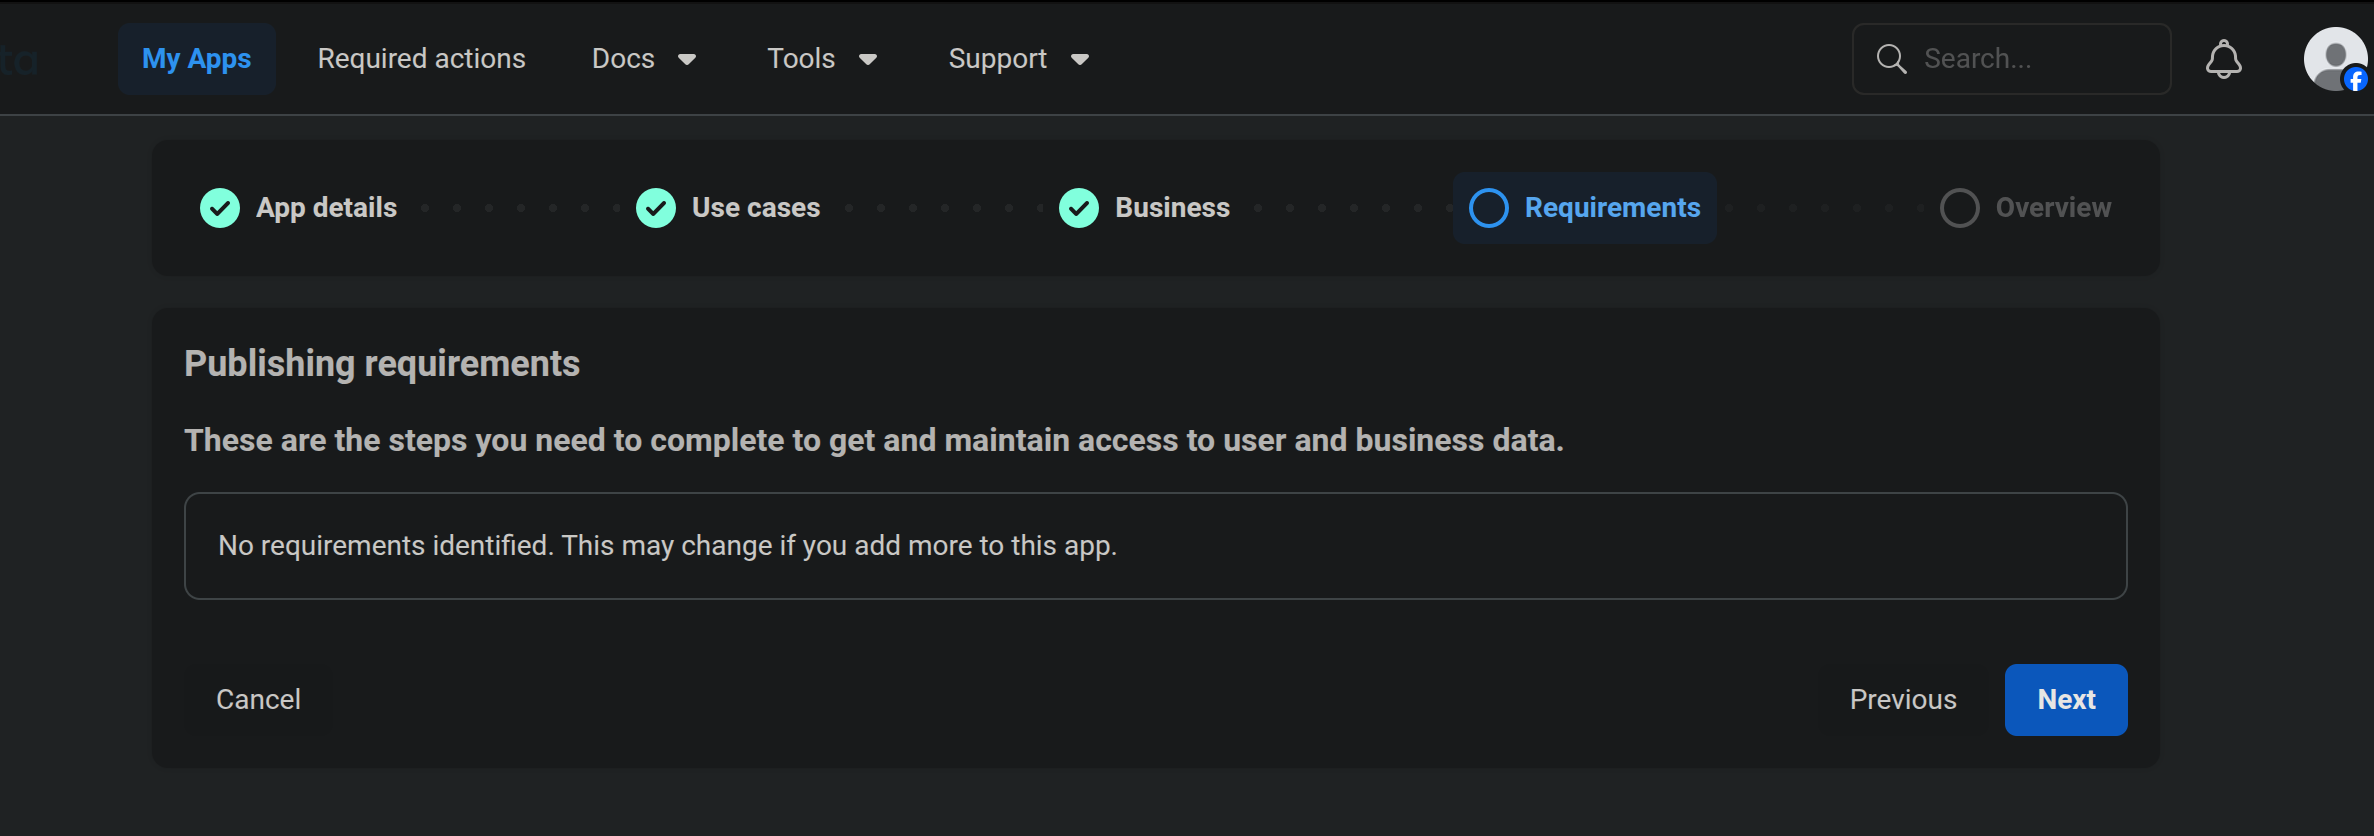
- The Requirements step shows any publishing requirements for the selected use cases. For WhatsApp-only apps, this typically shows "No requirements identified."
- Click Next to continue.
Step 6: Review and Create the App
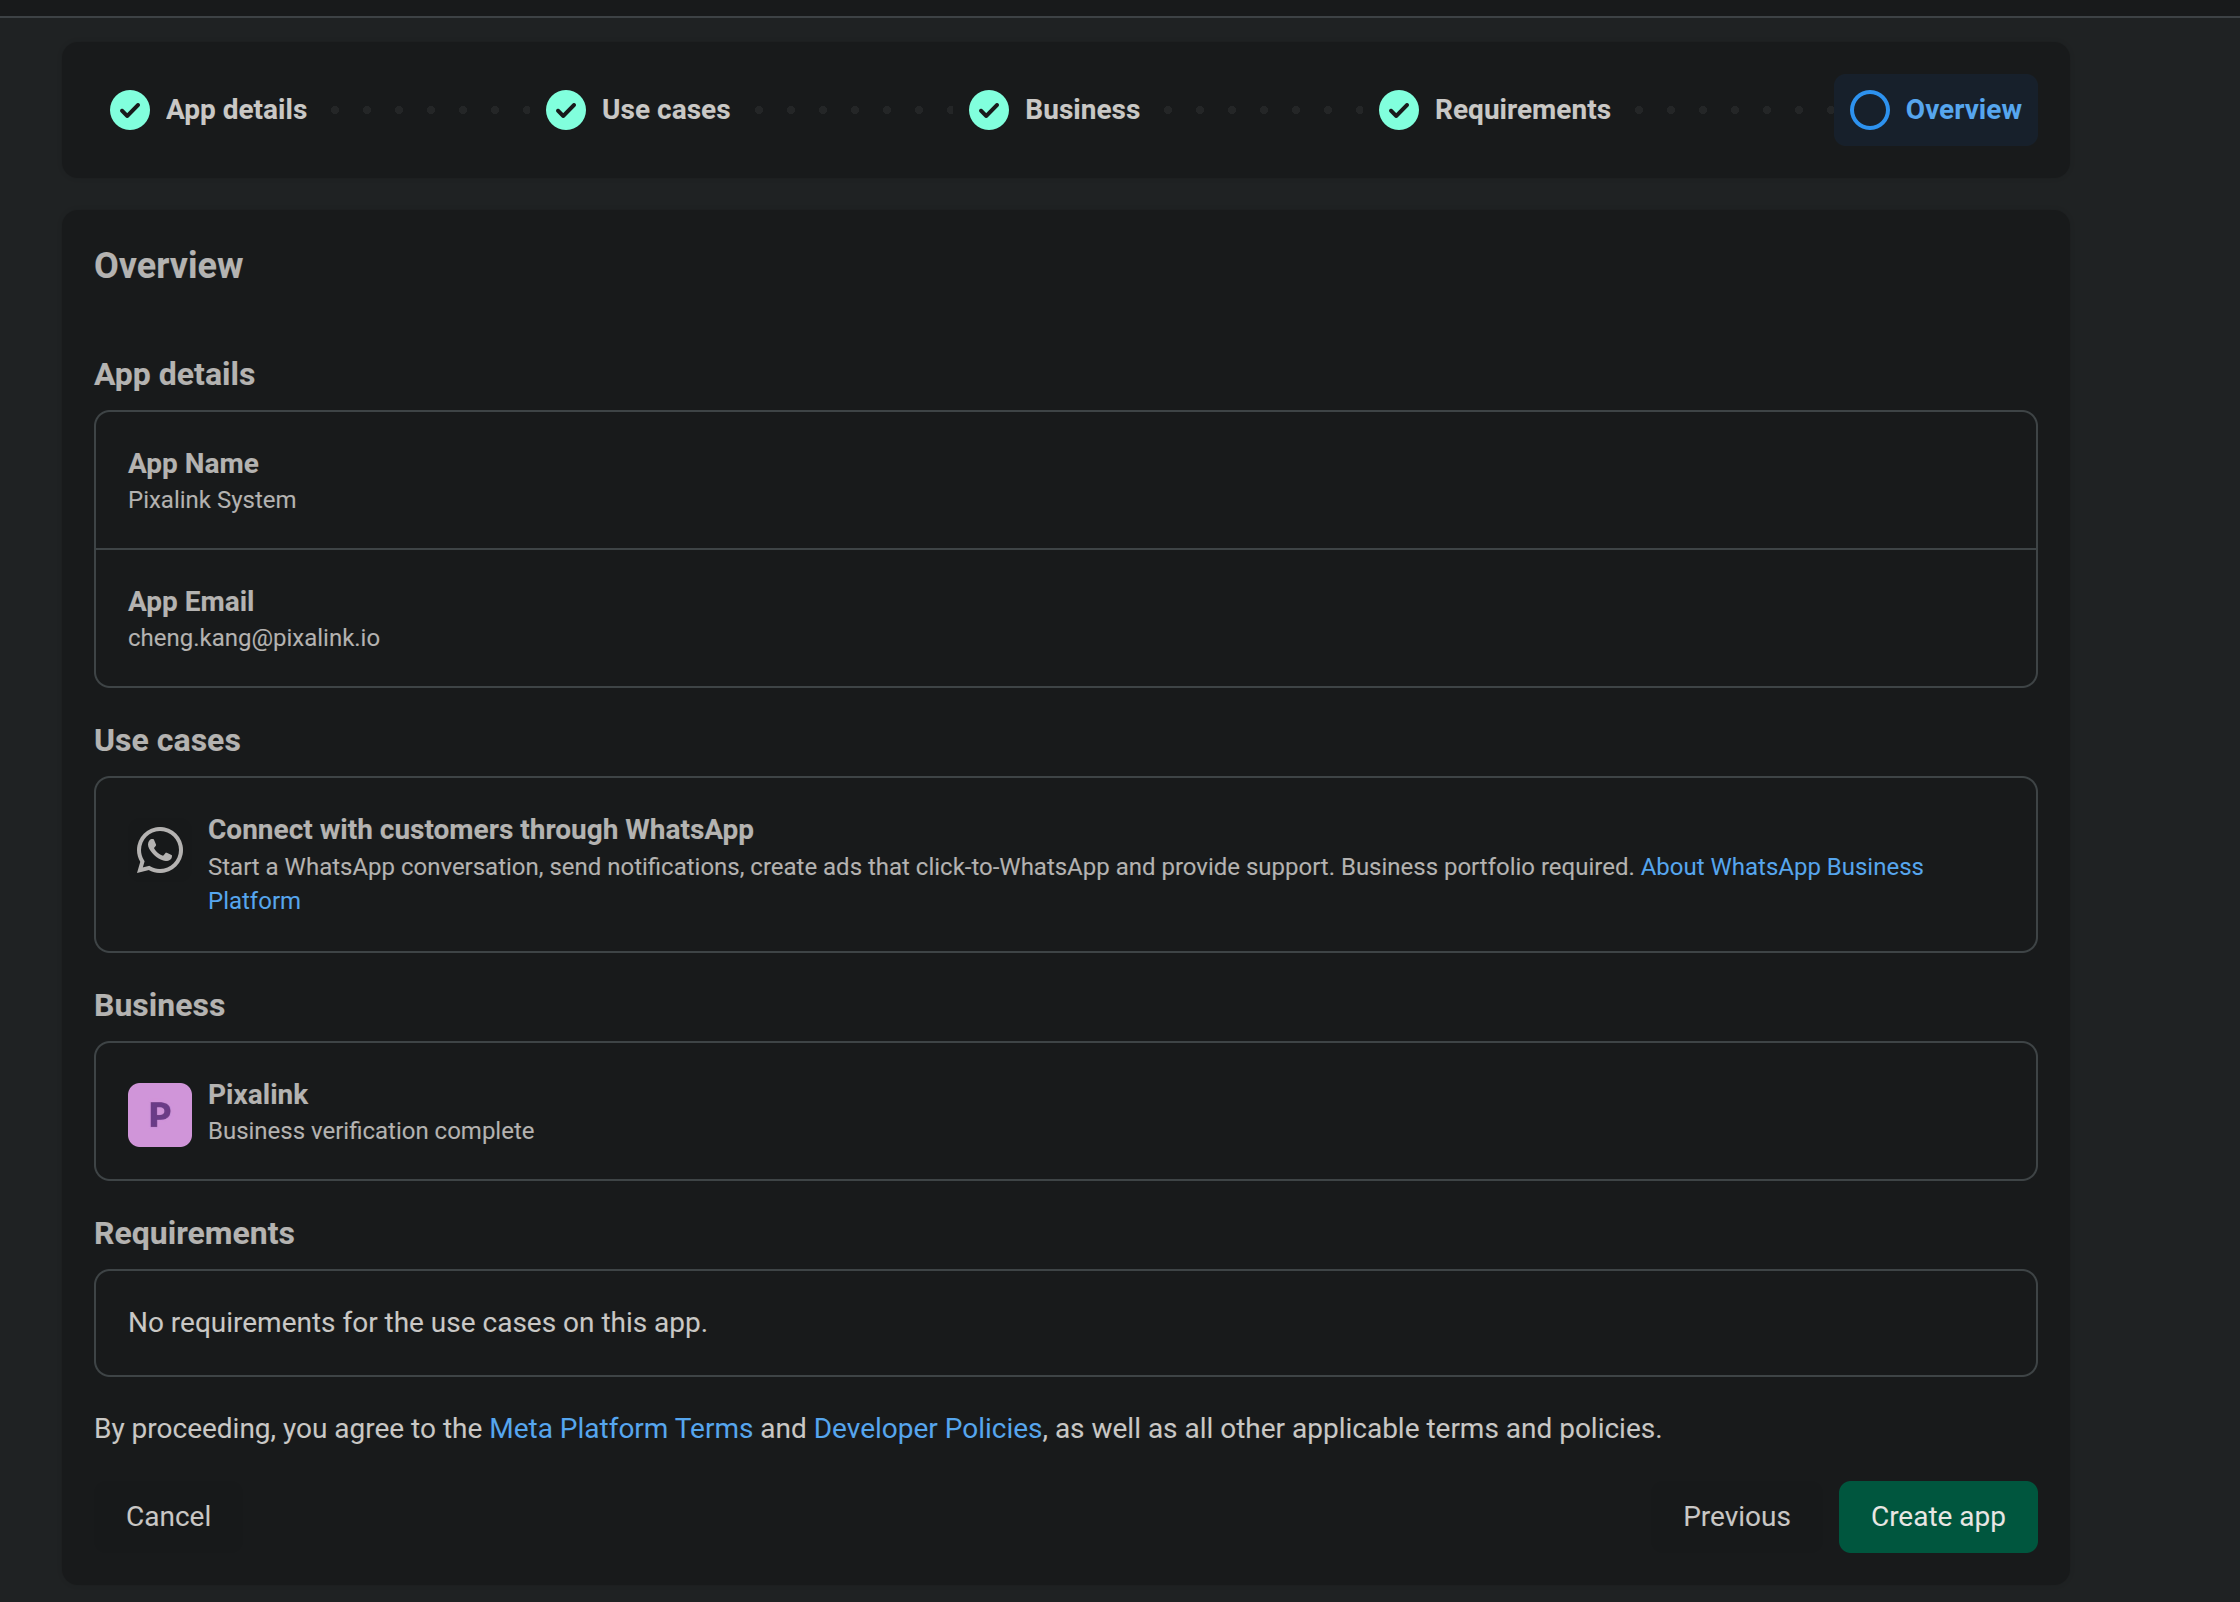
- Review the Overview summary — confirm the app name, email, use case ("Connect with customers through WhatsApp"), and business portfolio are correct.
- Click Create app to finish.
What Happens Next
The app is now created and ready. The next step is to set up WhatsApp Cloud API credentials (System User Access Token, Phone Number ID, and WABA ID) and connect them in Pixalink. Follow the main setup guide: How to Connect WhatsApp Cloud API (Meta) for Your Business.