How to Create an Announcement
What Is This?
Announcements are pop-up messages that appear on your customer portal. They're great for promoting limited-time deals, sharing important updates, or highlighting new products. In Pixalink, announcements are created as News Feed items with the "Pop-up" type — when customers visit your portal, the announcement appears as an eye-catching overlay.
Real-Life Example
Encik Faisal runs Nasi Kandar Aroma in Georgetown, Penang. He wants to announce a Ramadan buffet promotion to all portal visitors. He creates a News Feed item with the Pop-up type, writes a short description with pricing details, and sets it to display for the month of Ramadan. Every customer who opens the portal sees the promotion immediately.
How to Create an Announcement
Step 1: Open the News Feeds Page
From the Admin Panel sidebar, go to Loyalty Program → News Feeds. Click Create to start a new news feed item.
Step 2: Set Basic Information
Fill in the basic details:
- Space — Select which outlet this announcement applies to
- Name — Give it a clear internal name (e.g., "Ramadan Buffet Promo")
- Type — Select Pop Up from the dropdown
- Active — Toggle on to make it visible immediately

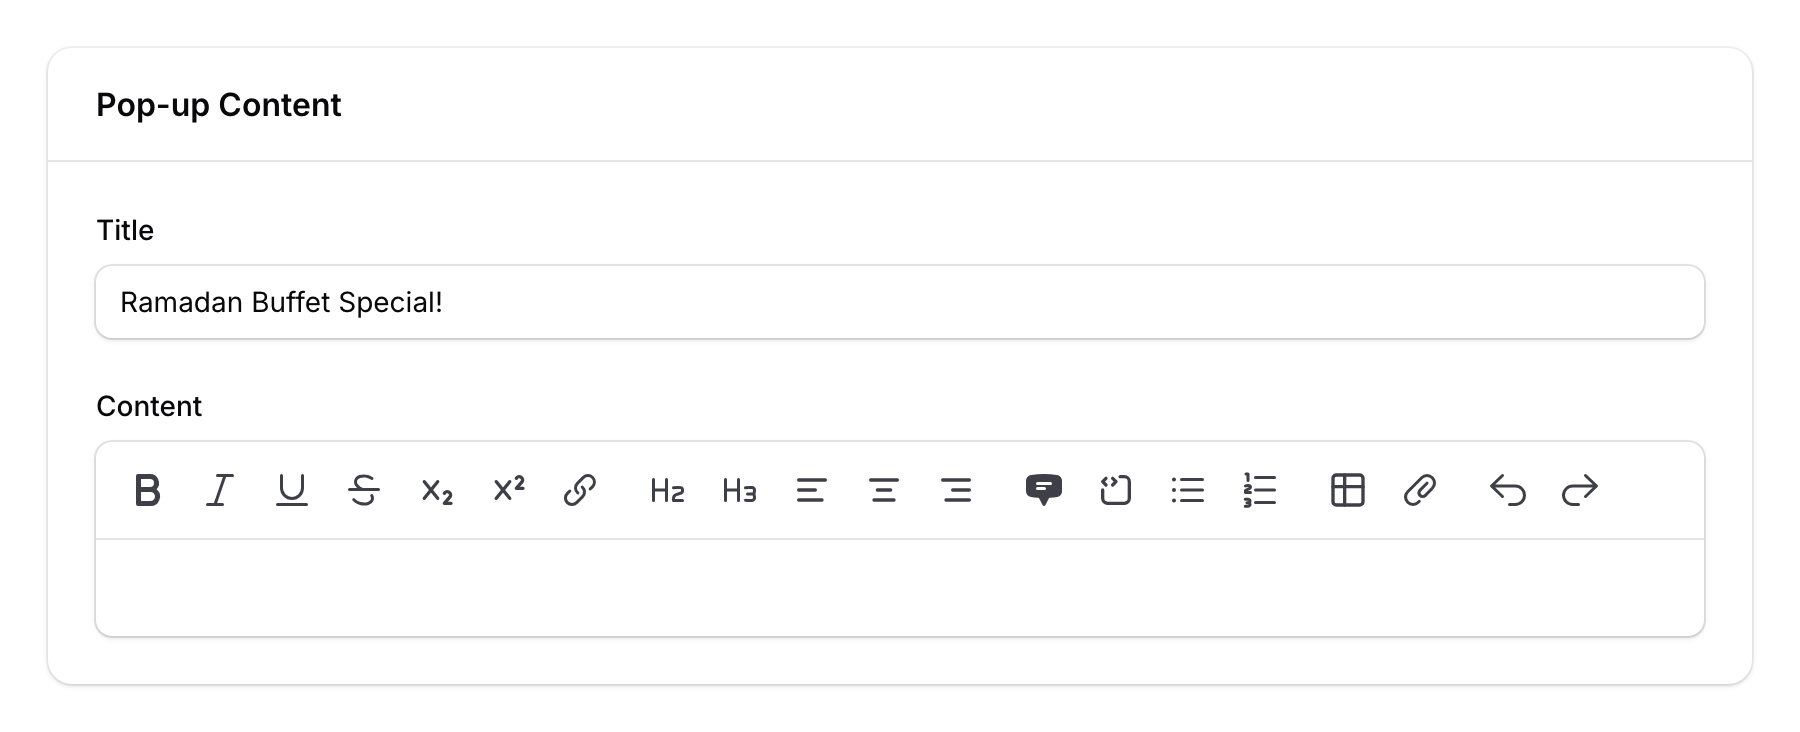
Step 3: Add the Pop-up Content
Once you select the Pop-up type, two additional fields appear:
- Title — The headline customers see (e.g., "Ramadan Buffet Special!")
- Content — A rich text editor where you can write your announcement with formatting, links, and images
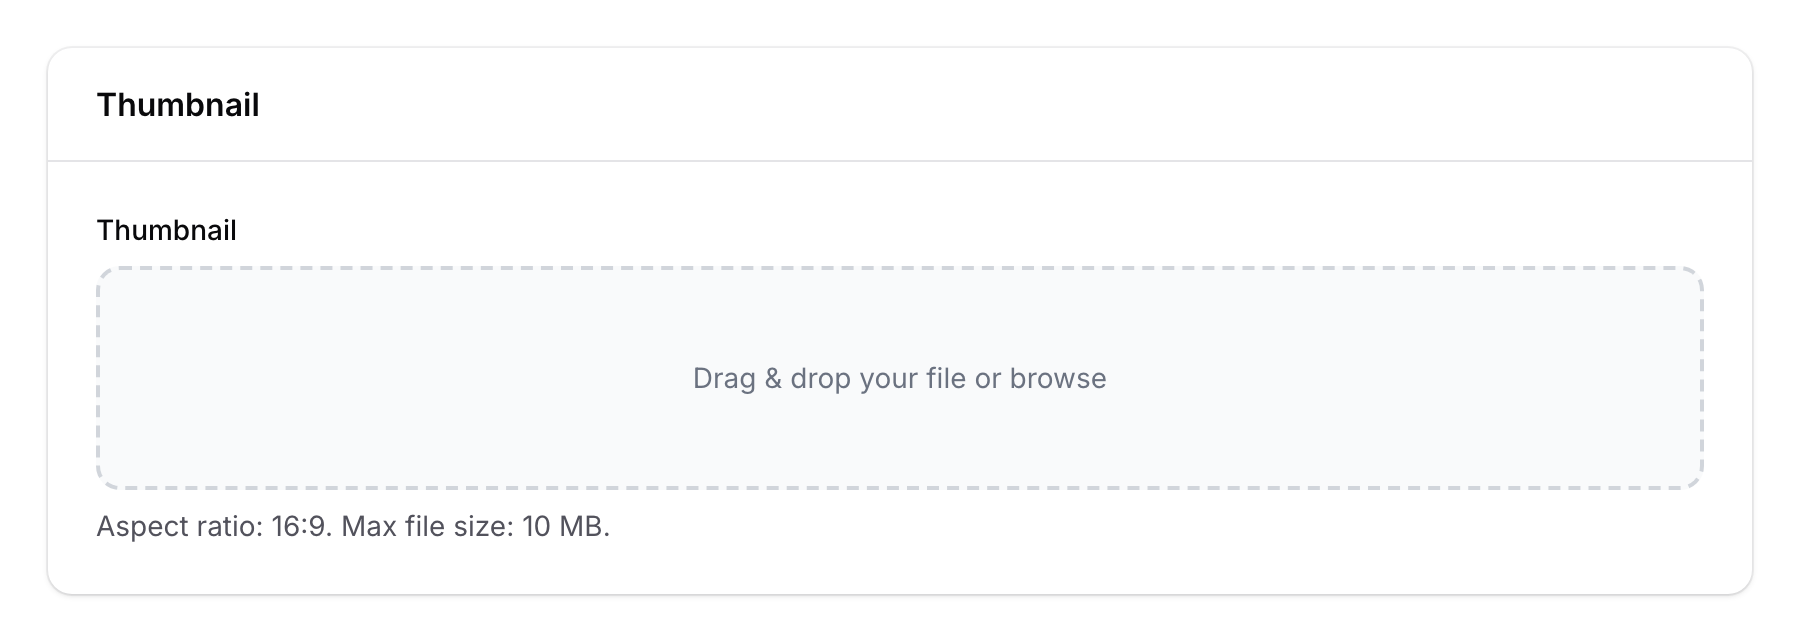
Step 4: Upload a Thumbnail
Upload an eye-catching thumbnail image (required). The aspect ratio must be 16:9 for proper display on the portal.
Step 5: Set a Schedule (Optional)
If your announcement is time-limited:
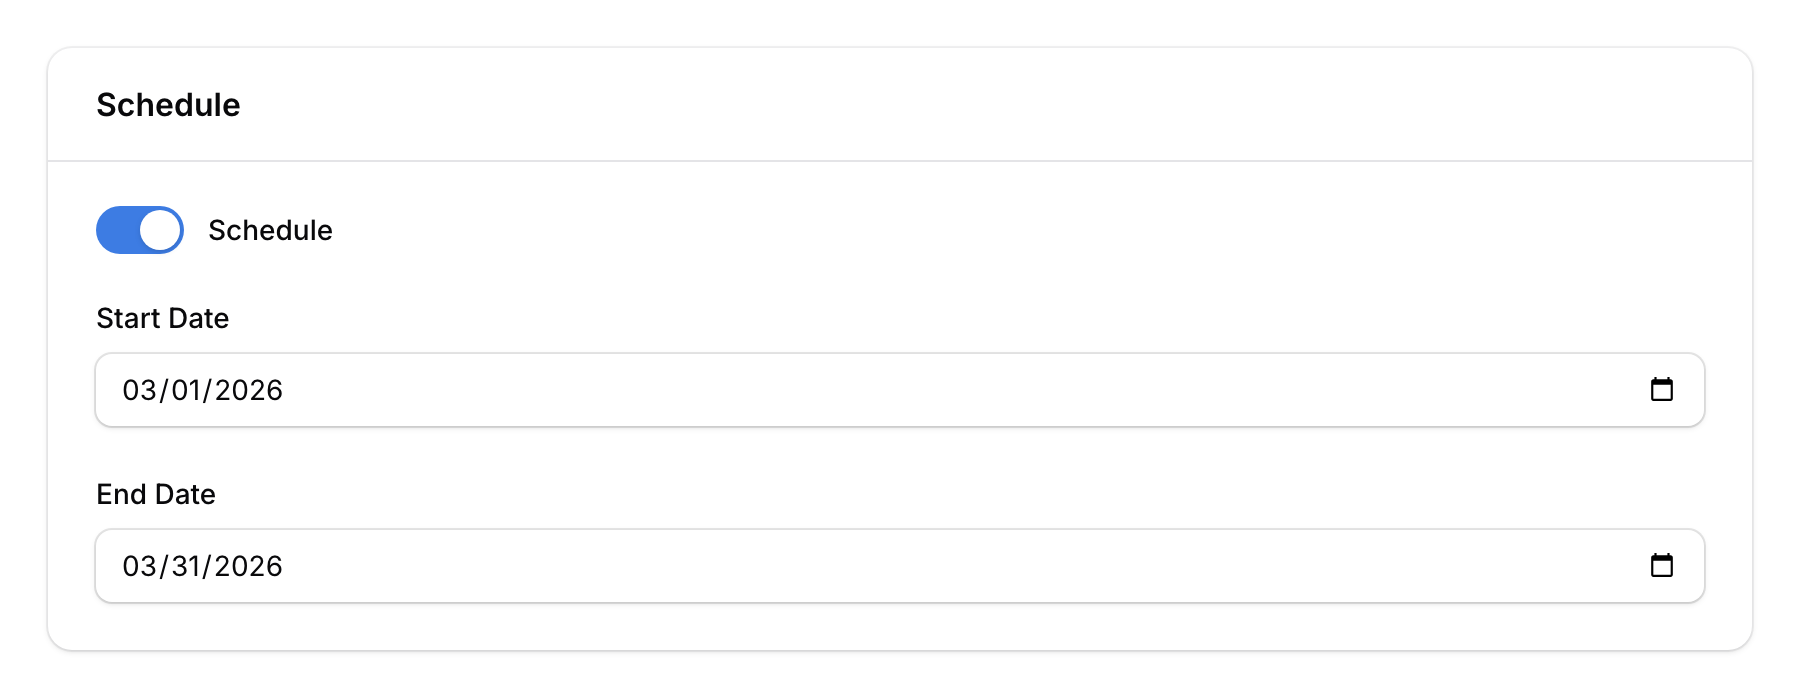
- Toggle Schedule on
- Set the Start Date — When the announcement becomes visible
- Set the End Date — When it automatically disappears
This is perfect for seasonal promotions, holiday specials, or limited-time offers.
Step 6: Save
Click Create to publish your announcement. It will immediately appear as a pop-up on your customer portal (or at the scheduled time if you set one).

Good to Know
- Three News Feed types — Besides Pop-up (for announcements), you can also create news items that link to internal pages (like rewards or orders) or external links (like your website or social media).
- Scheduling — Use start and end dates to plan announcements in advance. No need to manually activate/deactivate them.
- Reordering — You can reorder news feed items to control which ones appear first on the portal.
- One announcement per space — Each announcement is tied to a specific space. Create separate ones for different outlets if needed.