How to Create a Calendar
How to Create a Calendar
What Is This?
A calendar is the foundation of your reservation system. It's where your customers go to pick a date, choose a timeslot, and book with your business. Creating one takes just a few minutes using a guided setup wizard.
Video Walkthrough
Real-Life Example
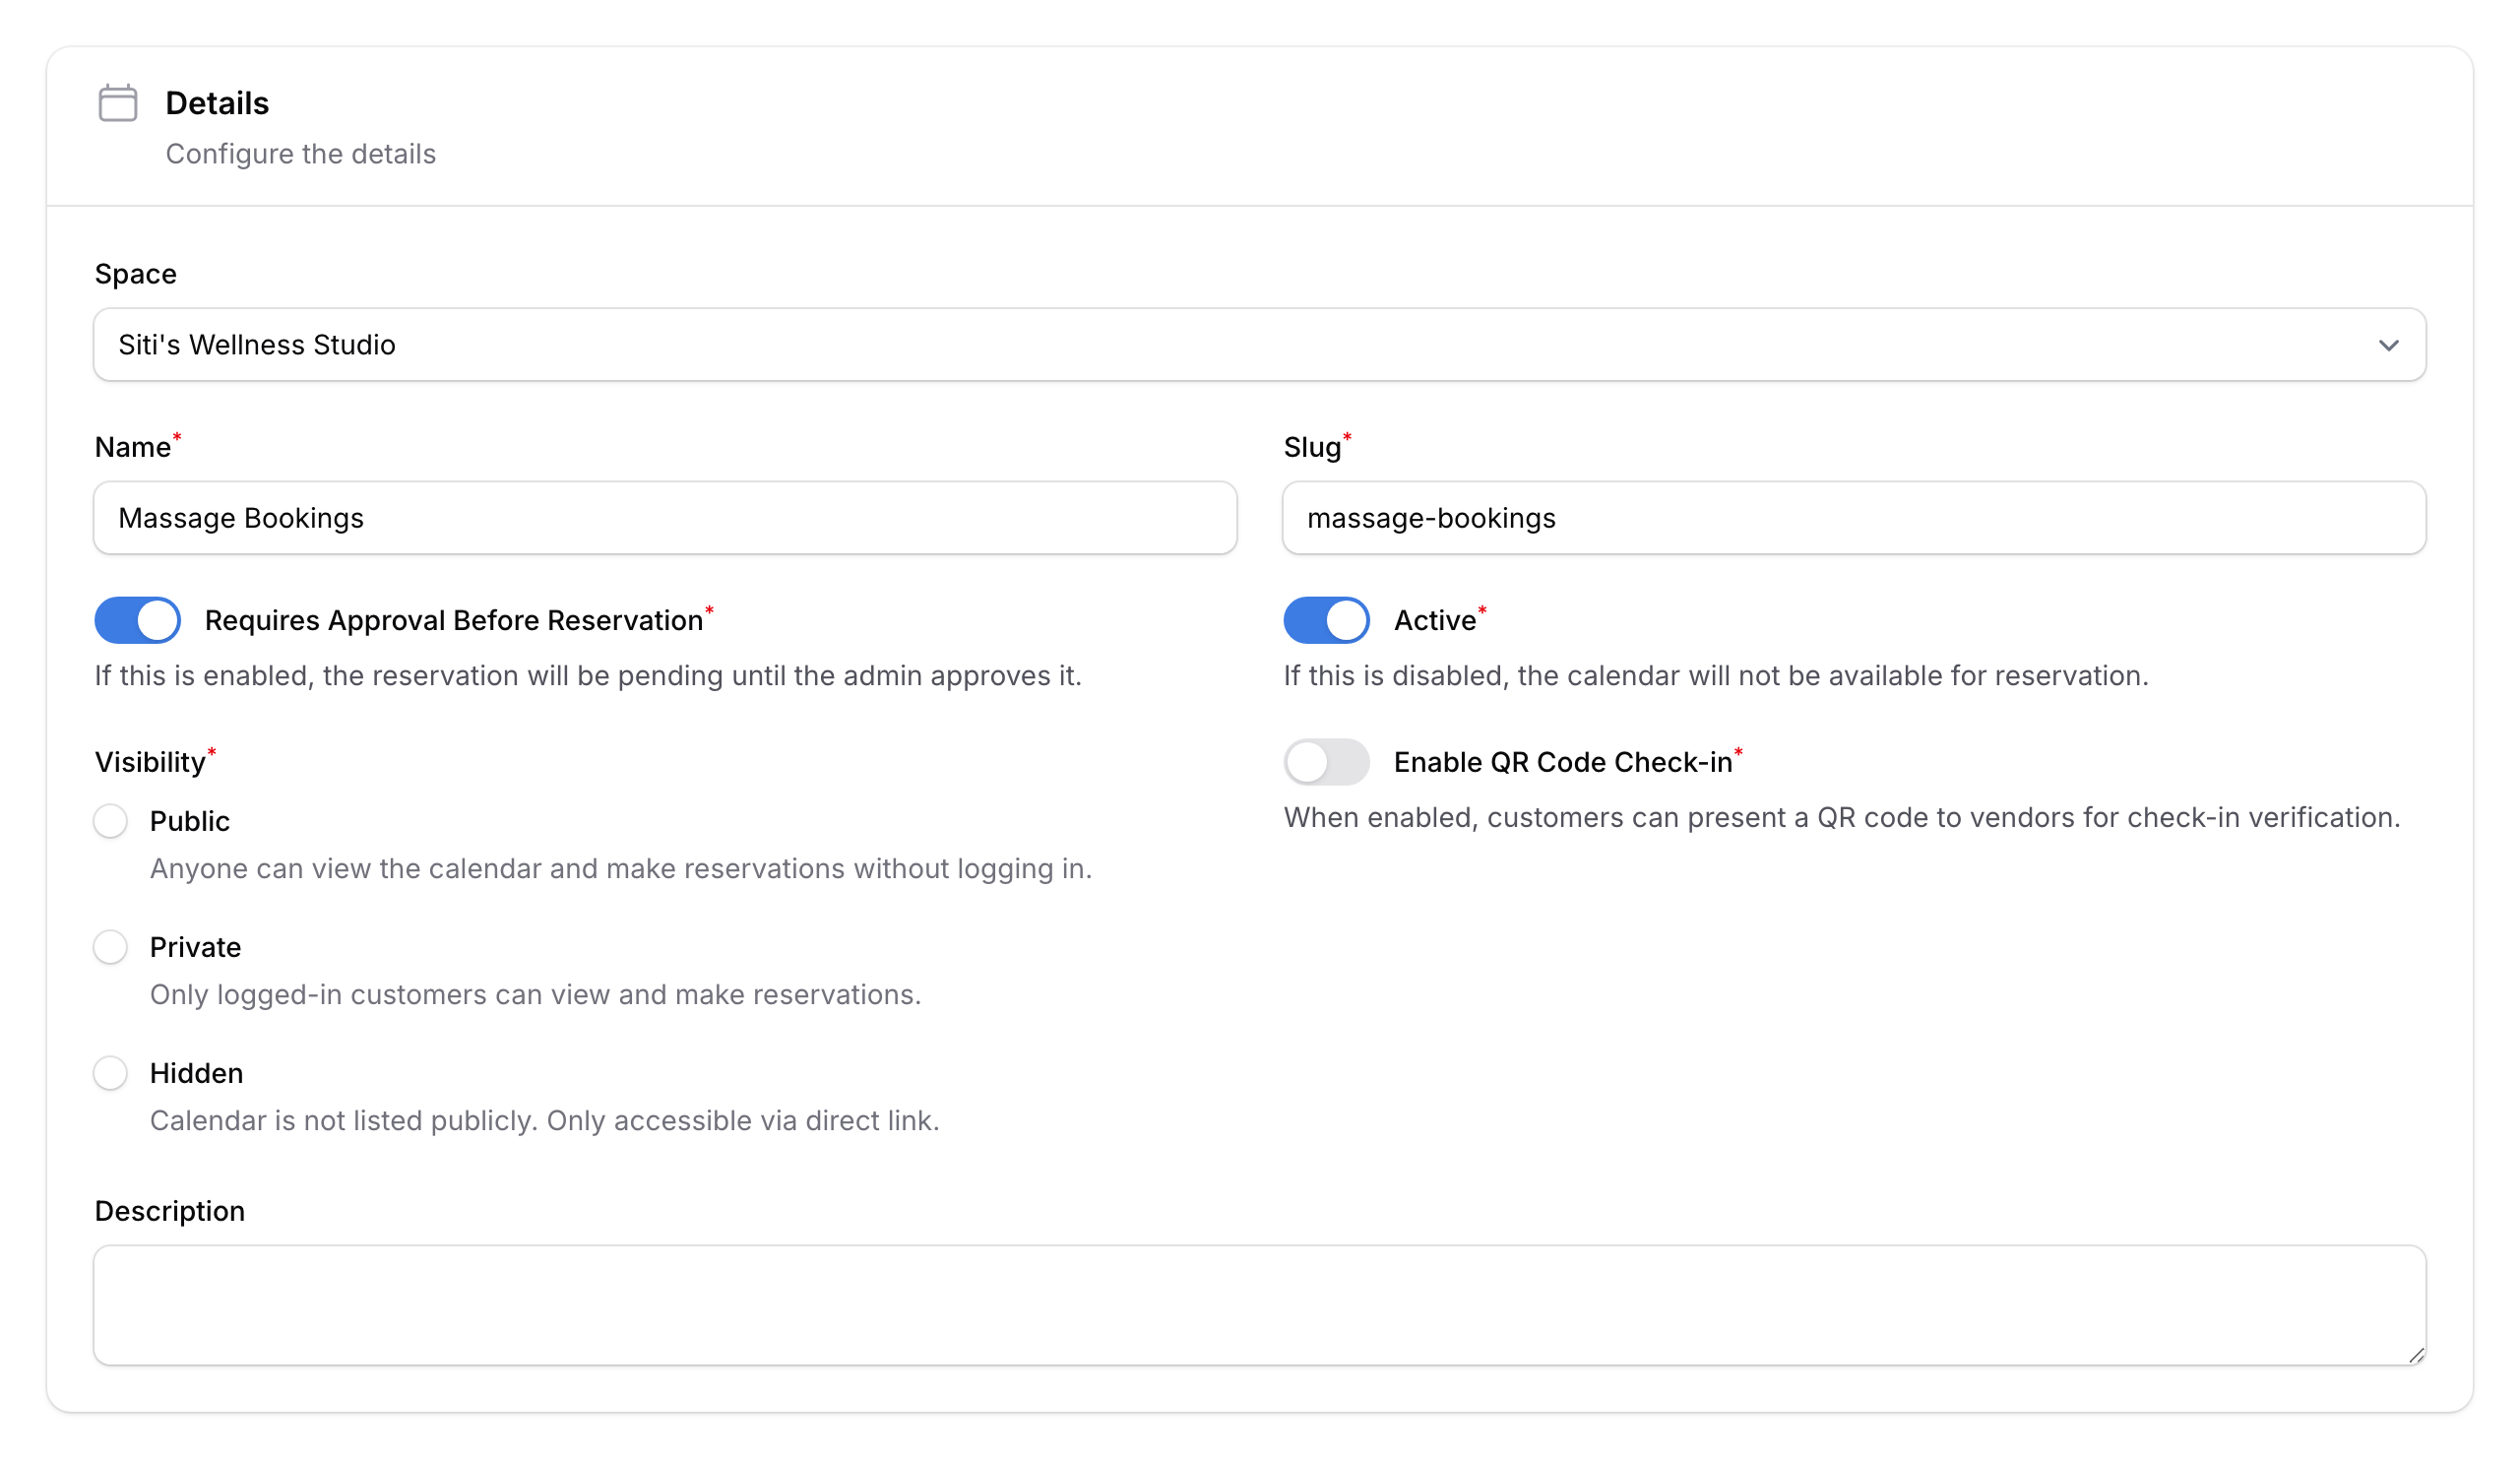
Siti runs a wellness studio in Petaling Jaya and wants her clients to book massage sessions online. Before Pixalink, she relied on WhatsApp messages and sometimes double-booked her therapists. She created a calendar called "Massage Bookings", set the session capacity to 1 guest, and added her weekly timeslots — all in one go through the setup wizard. Within a week, her no-shows dropped and her schedule stayed organised.
How to Set It Up
The setup wizard guides you through 3 steps: Calendar details, Configuration, and Timeslots.
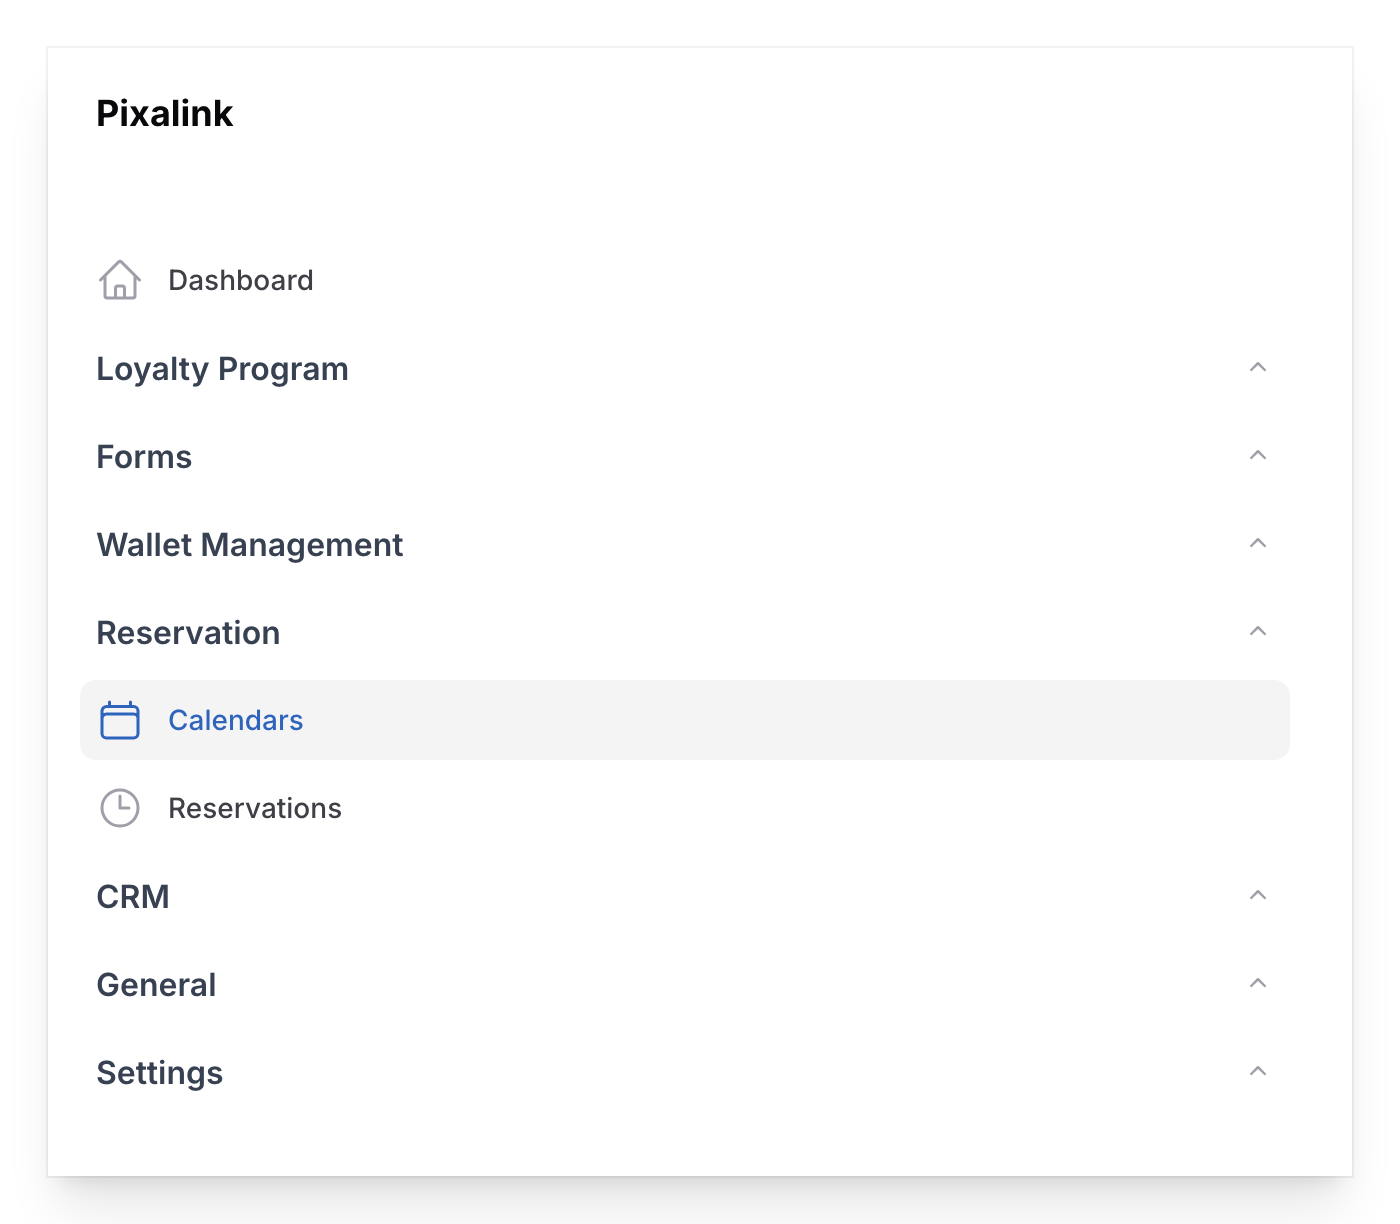
- Go to Admin Panel → Reservation → Calendars and tap Create.
- Step 1 — Calendar Details. Fill in:
- Space — which outlet this calendar belongs to
- Name — e.g., "Massage Bookings" or "Group Classes"
- Slug — auto-filled from the name (used in booking links)
- Requires Approval Before Reservation — turn on to review each booking manually
- Active — turn on to make the calendar live
- Visibility — Public (anyone), Private (logged-in only), or Hidden (direct link only)
- Enable QR Code Check-in — turn on for check-in QR codes
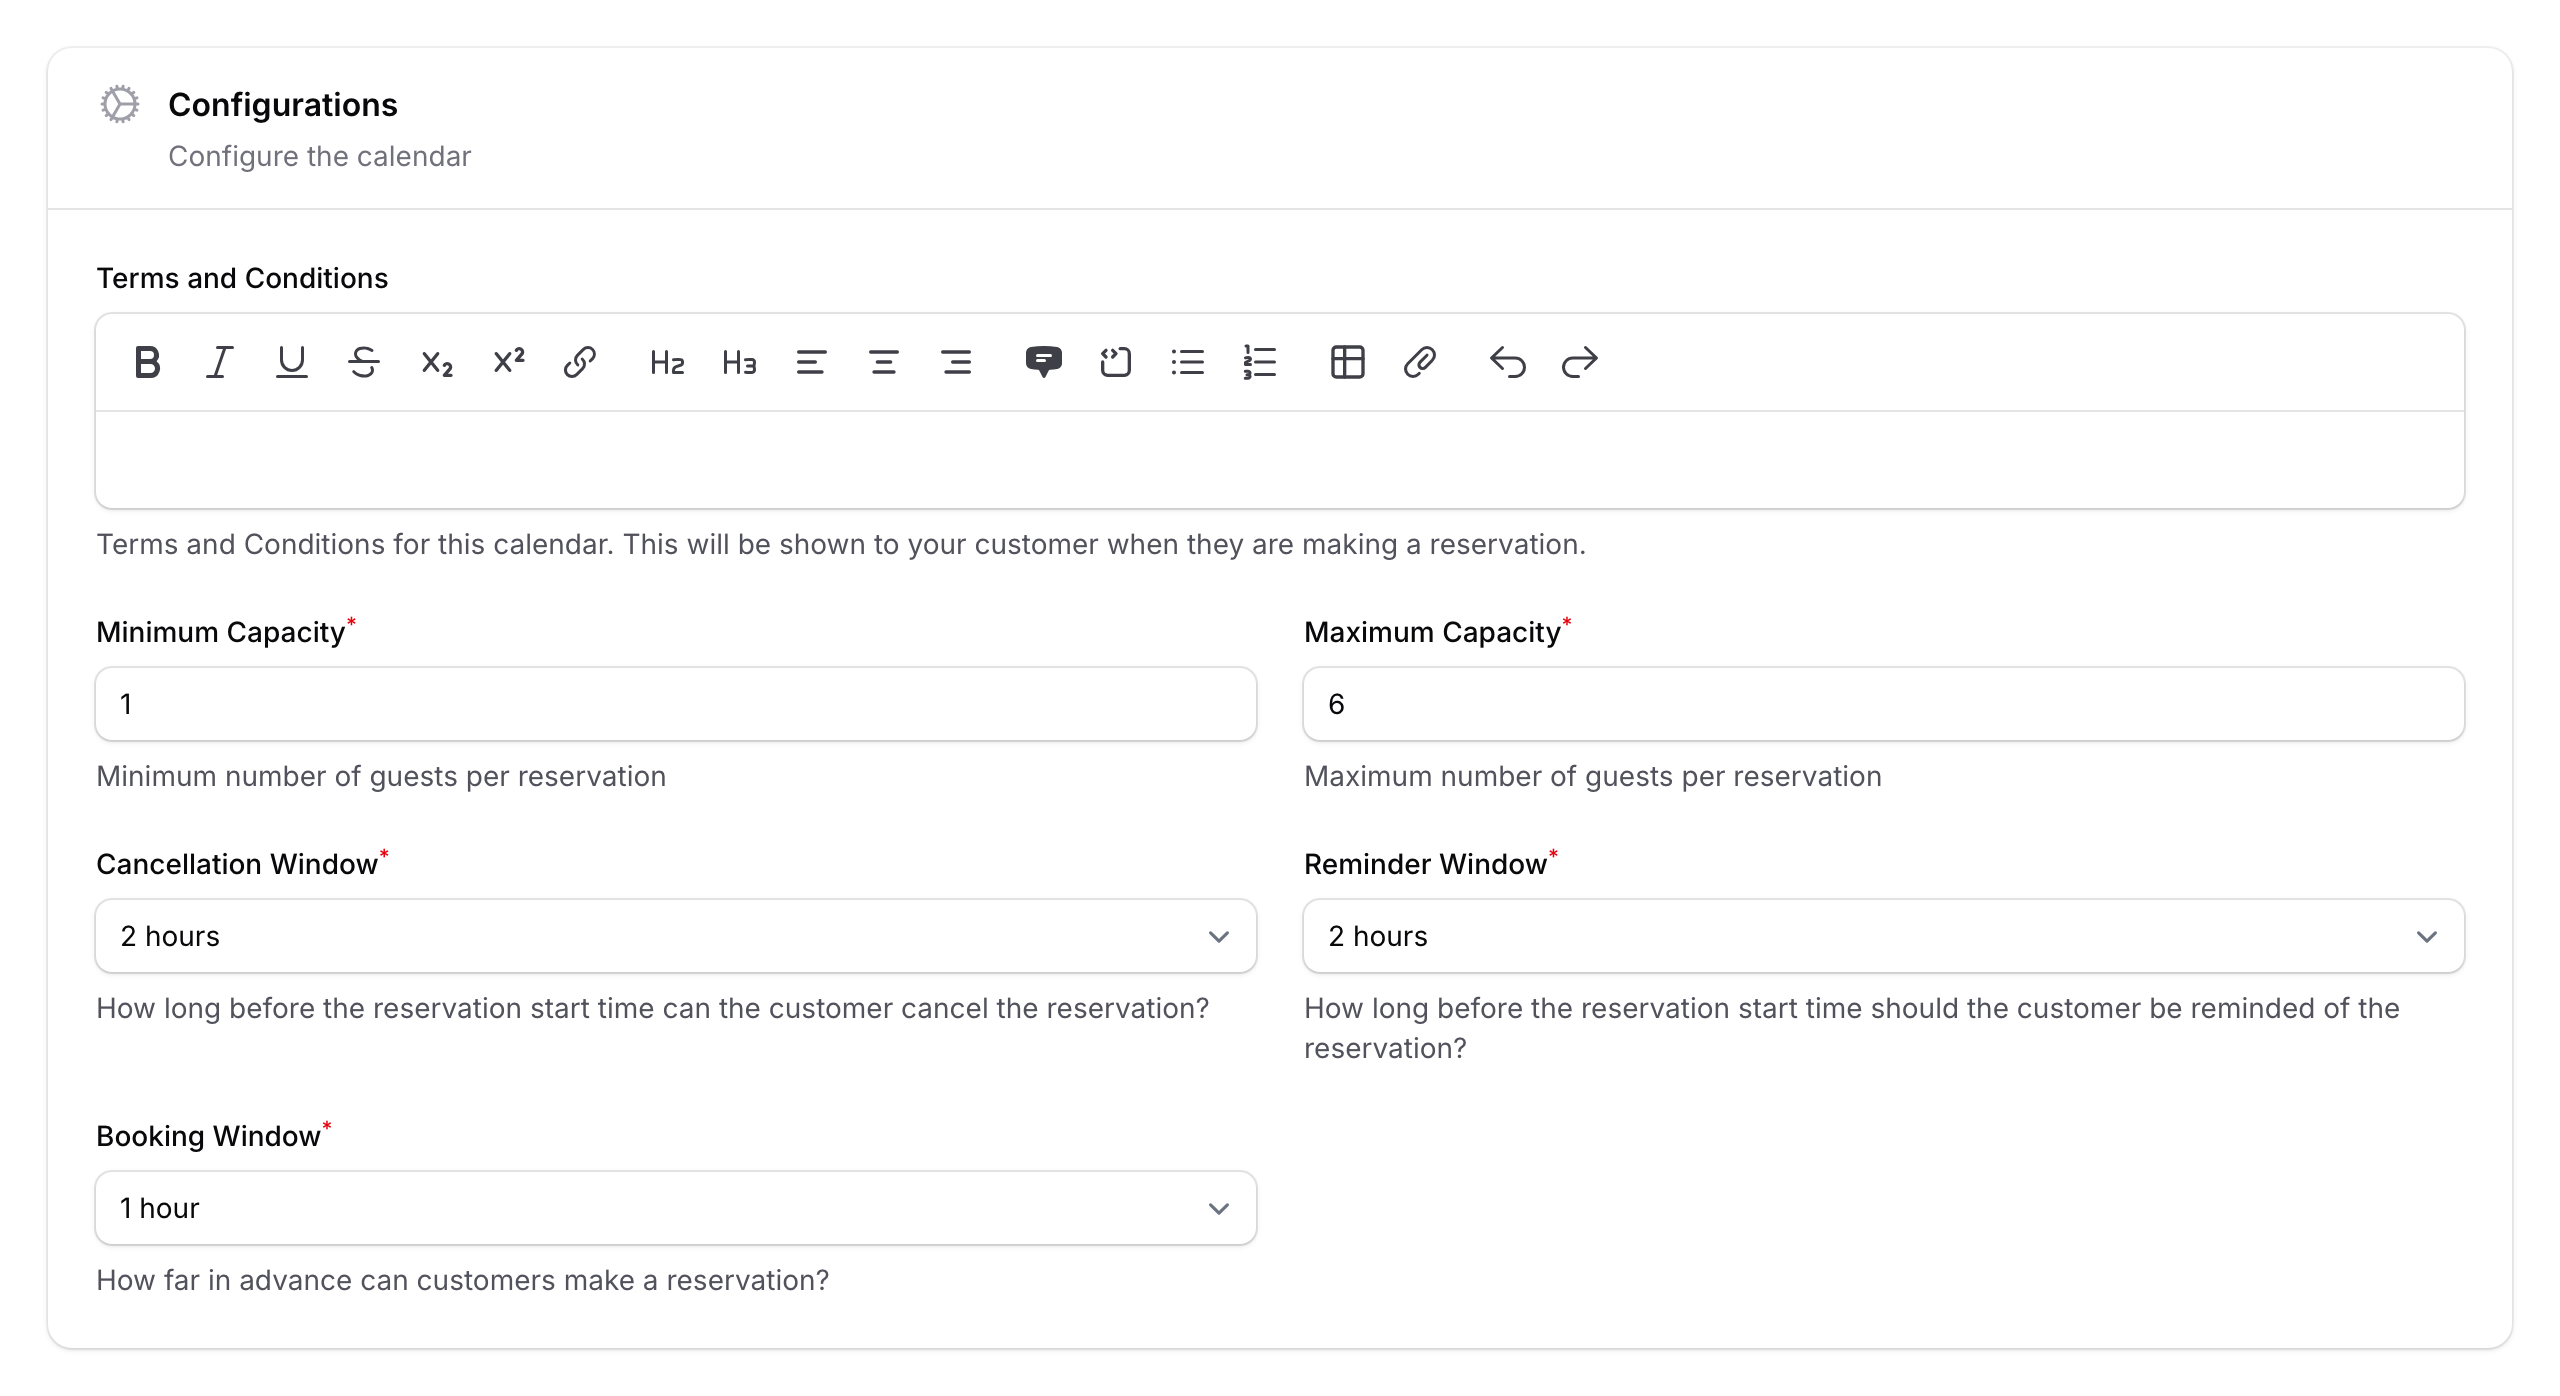
- Step 2 — Configuration. Set your booking rules:
- Min / Max Capacity — guest limits per reservation (e.g., 1–6 guests)
- Cancellation Window — how early customers can cancel (30 min to 1 day, or no cancellation)
- Reminder Window — when to send a reminder before the booking
- Terms & Conditions — optional text shown to customers during booking
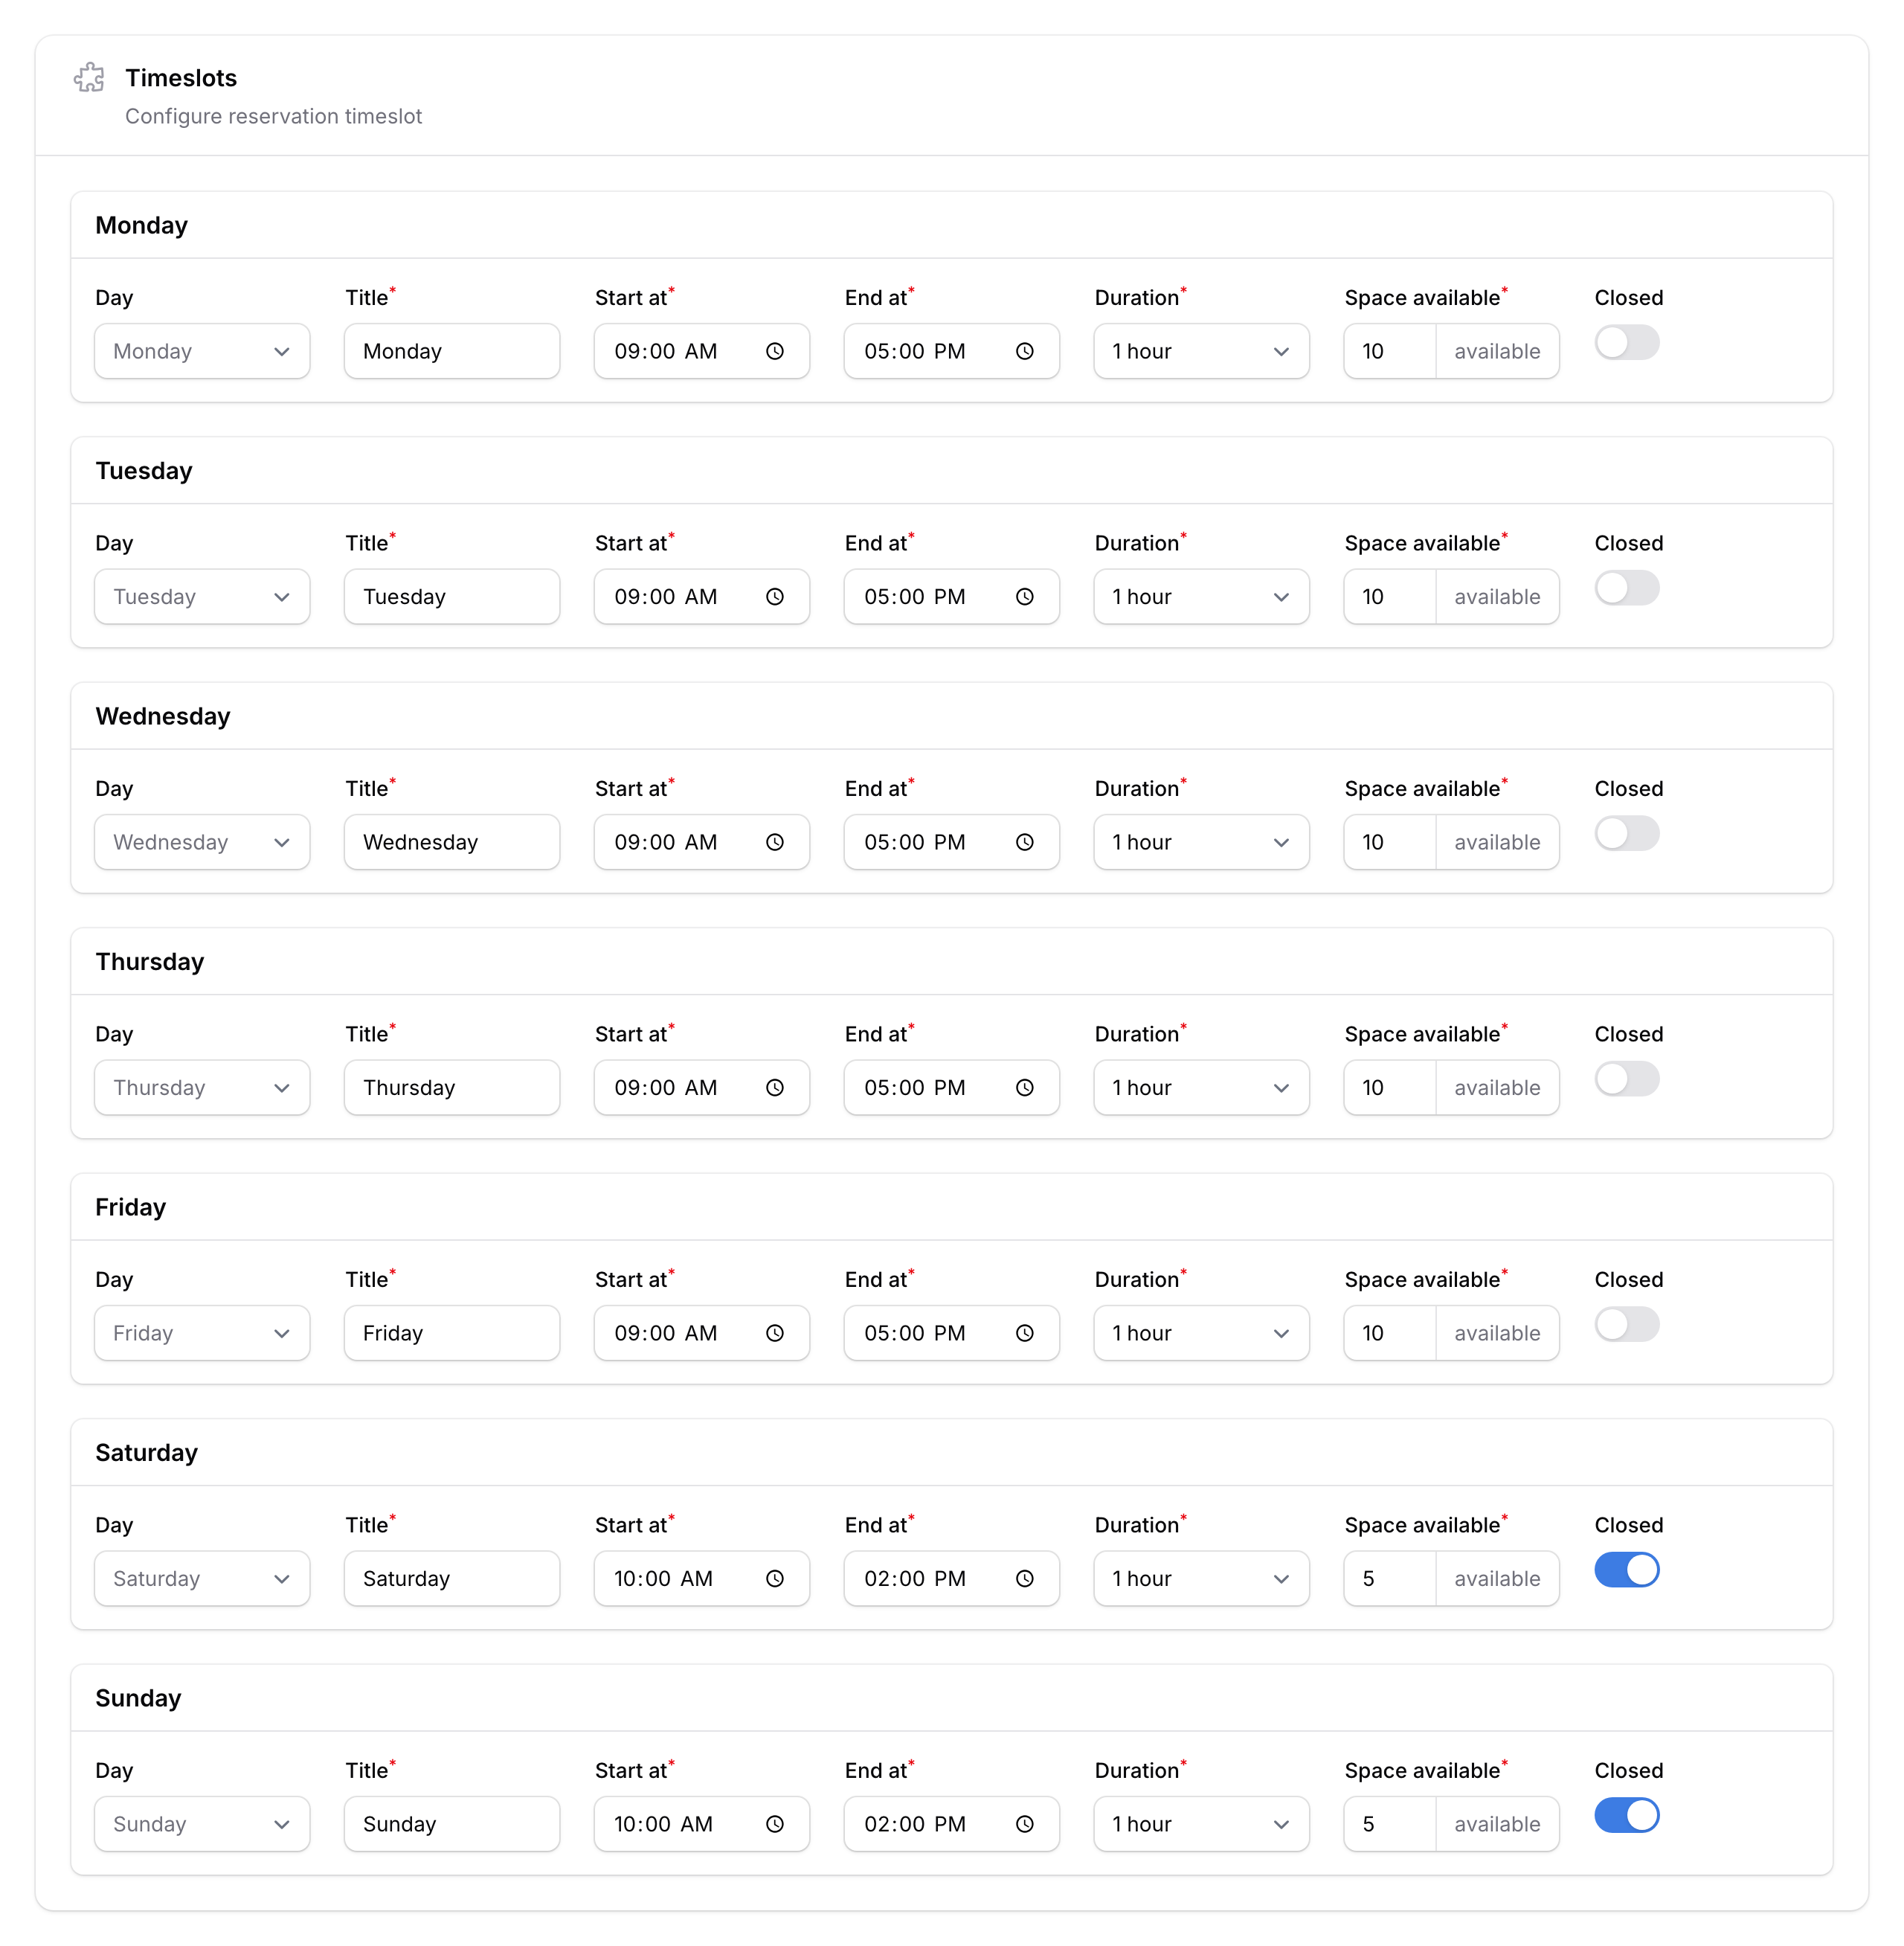
- Step 3 — Timeslots. Set your weekly schedule for each day — start time, end time, slot duration, and how many bookings per slot. Days marked as closed won't show up for customers.
- Tap Create to save your calendar.
What Your Customers Will See
Customers visiting your booking page will see the calendar name, available dates, and open timeslots. They pick a date, choose a slot, fill in their details, and submit — all in a few taps.
Good to Know
- You can create multiple calendars under one space — handy for different services (e.g., "Haircuts" and "Colouring").
- Turning a calendar inactive doesn't delete existing bookings — it just stops new ones.
- Need to pause bookings temporarily? Use Block Dates instead of deactivating the calendar.
- After creating, you can fine-tune timeslots from the Default Timeslots tab on the calendar edit page.
What's Next?
- Edit timeslots — fine-tune your weekly schedule after creation.
- Block dates — close off specific days for holidays or maintenance.
- Add custom fields — collect extra details from customers when they book.